
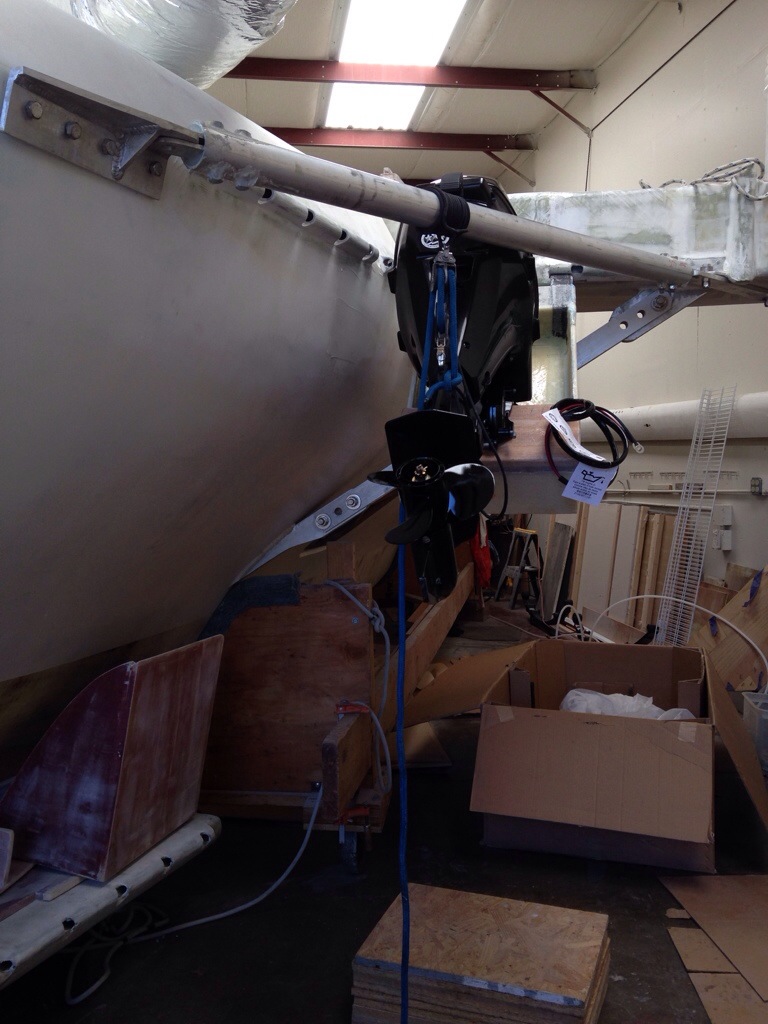
We advanced this project through the structural laminations and it came out nice and strong. The engine mounted up just fine, and titled up to the sailing position very well.
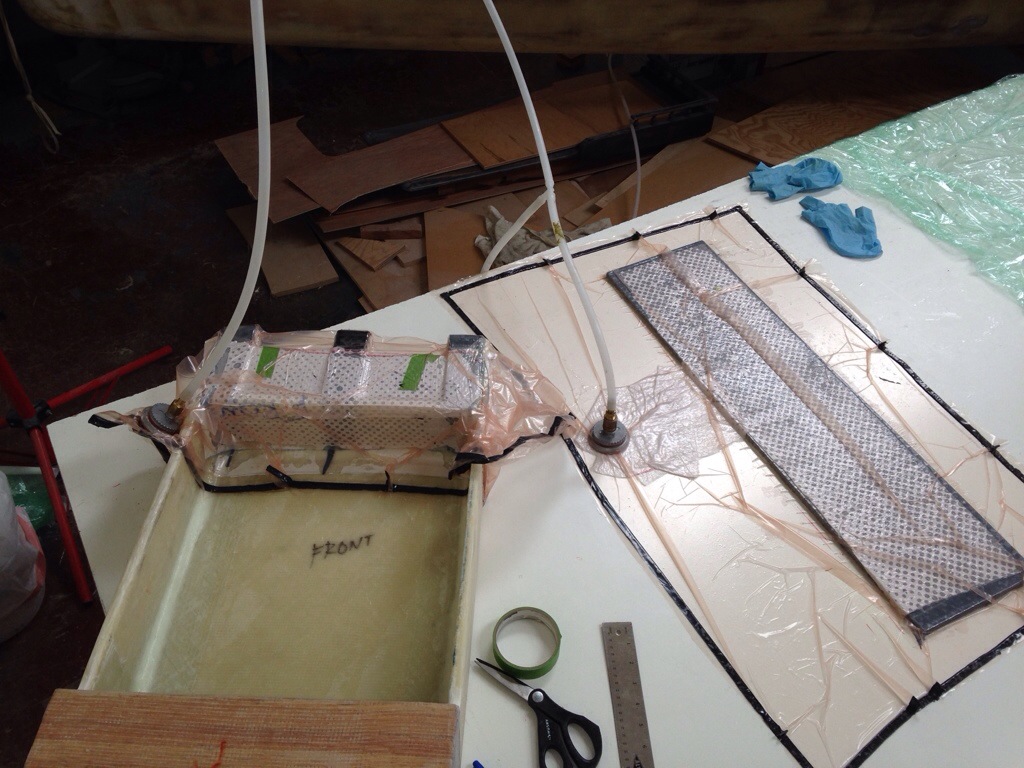


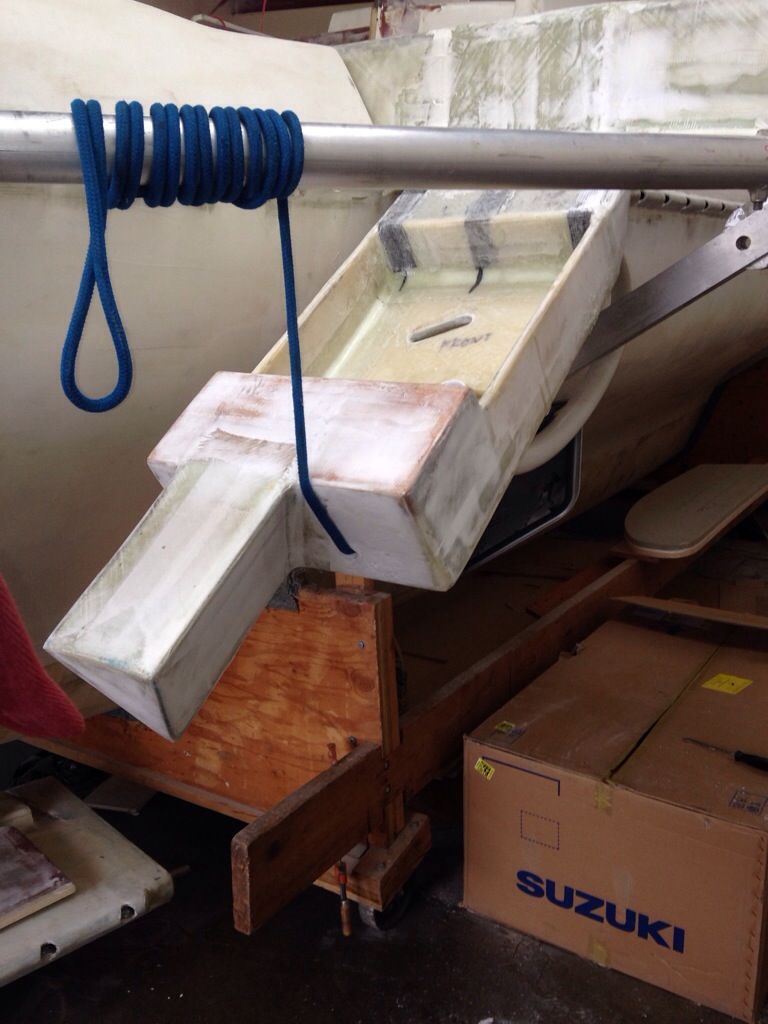
Once the motor was in place, Dad and I built a triangular wave-piercing shield for the motor leg, with the idea of protecting the vulnerable looking exposed transmission linkage (that you see 2/3 down the leg of almost all Japanese small & mid size outboards).

The diagonally cut slot lines up with the pull starter cord of the engine. I suppose it could actually be done from a launched dinghy but not very realistic to pull start this thing from on deck. We’ll stick a rubber plug in there until it ever/never is needed.
The final step was rigging the engine controls and a conduit tube from the cockpit through a corner of the aft cabin, the ceiling of the engine(less) room, through the emergency gear locker and out through the hull, forward of the beam far enough to make a gradual right hand turn to meet the motor. I like the controls here, in between the feet of the driver and not asking passengers to move their legs…
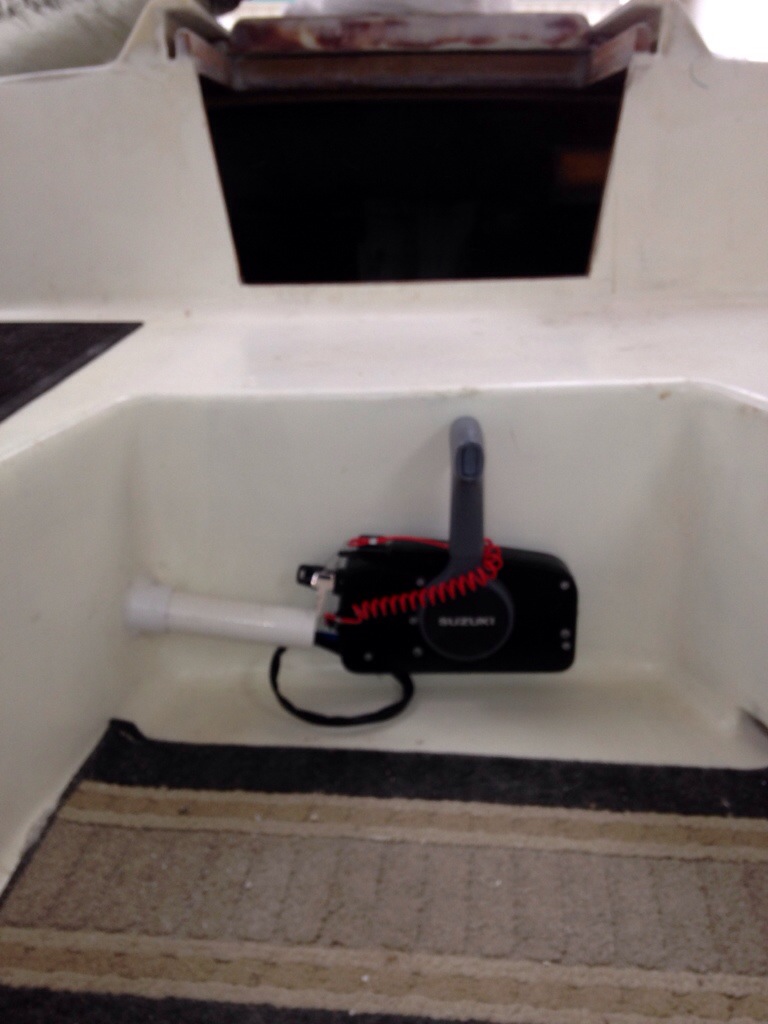
Now follow the conduit tube, made of Semi-flexible 1.5″ PVC “spa pipe”, from that corner by the Suzuki control box:
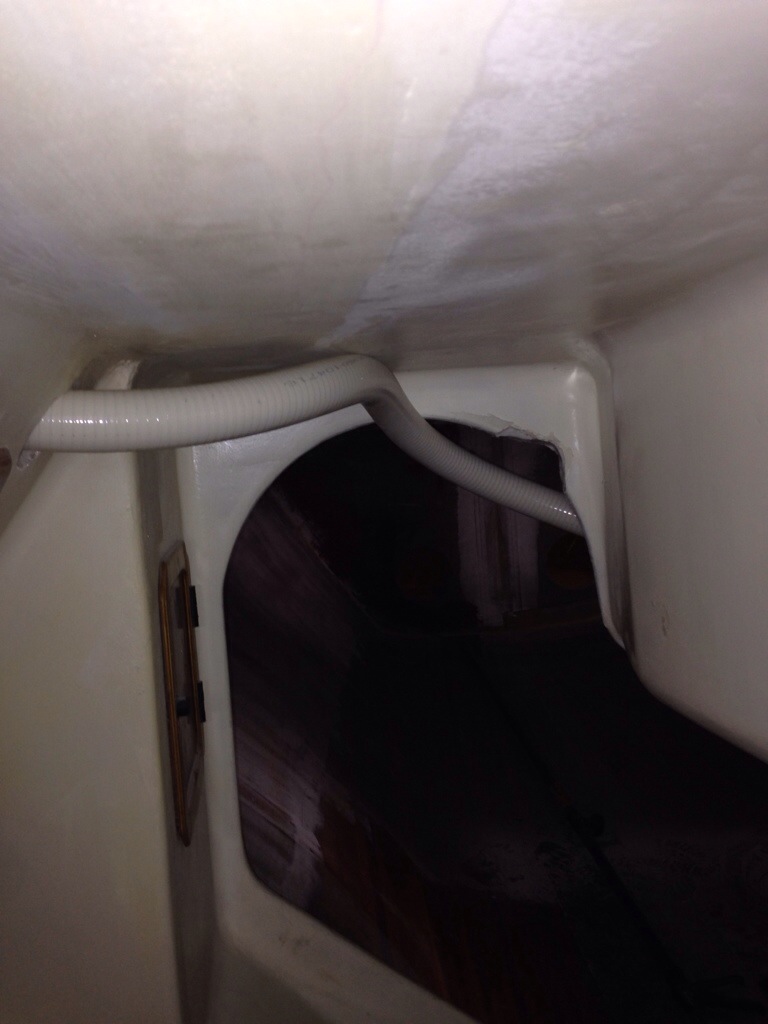

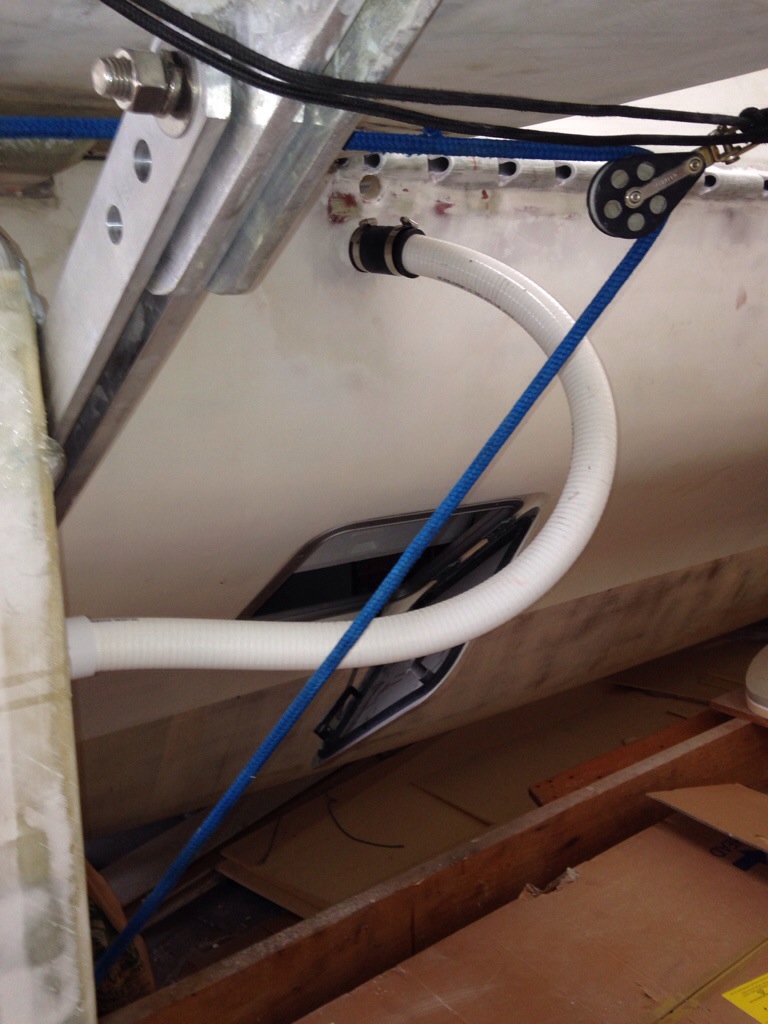

The black ‘Y’ inside the emergency gear locker will allow for a split in the rigging tunnel, with the gas line and battery wires heading forward in to the engine/equipment room and the shifter/throttle cables plus key start/electronics wires passing through to the cockpit. Outside the hull, there’s just enough flex in the white pipe to allow for the swinging of the whole engine bracket.
While that big white pipe is kind of ugly, it’ll be somewhat out of sight under the net and beam. Plus it will be a useful grab bar when approaching the grocery-loading chores thru the escape hatch from the dinghy.
Overall we’re very satisfied with how this all came out, especially since it’s a custom job taking inputs from various minds and boats. Thanks again Keith!
And today we got our heads around how to build the 8′ long bow sprit in carbon, instead of the sticker shock of “a grand” just to buy the carbon tube premade. Turns out it all starts with the concept of forming the new tube inside a mold pipe that has been split lengthwise, and blowing up a balloon bag from the inside once the materials are laid up in there and the pipe halves strapped together with clamps. This should be another interesting caper! Stay tuned for that one and meanwhile we’ll get back to the windshield tomorrow, making patterns for the acrylic window panels.
The shop closed at 3 today, just in time to get to the docks at Vallejo to crew for Charlie aboard F27 Tri Chi. It was like homecoming, as the boat was built just 2 months before Origami. We pounded thru BIG chop in San Pablo Bay, sailing fast to a nice 2nd place finish. Next time the chute goes up and the boat can win Vallejo beer cans! Nice driving Charlie :)

Beautiful work !
LikeLike
Wow, that’s a heck if a boat! It was good to meet you last night, thanks for the expert sailing advice!
Can’t wait to come see the bait in person.
LikeLike
Hi, I found your website today. I built a F32 a couple of years back and Love to see you build your boat. very good looking.
From my experience I am a bit worried that the 20 HP outbourd will not suffice! Forward will be no problem but stopping this big light but huge area boat is going to be a hard job.in stronger winds from aft.
We use a 10 hp high thrust and the big propellor works way better than a normal propellor but still we have problems stopping in higher winds. If I don’t trust the reverse I will always reverse into a marina and use the forward to stop the boat
With regards,
Tom
http://www.f32.nl
LikeLike
Tom, you make an excellent point! I’m not too concerned about 20hp being enough, but the outboard is limited to a ten inch propeller instead of the sixteen inch of an inboard diesel. We will use a flatter (7 pitch) four blade prop. I used to back the F27 in and out of harbors for better control, so your suggestion makes perfect sense. We may also create a spot to temporarily mount the dinghy motor on the float to help with tricky harbors.
LikeLike
You must have seen this already, but I have read of technique of making tube that sounds simpler than blowing up a balloon inside a mold. A thin fiberglass tube is made outside a pipe. The thin fiberglass tube is then opened with a single longitudinal cut and popped off the pipe. The carbon fiber tube is then formed outside the thin fiberglass mold, which is left inside the finished tube.
LikeLike
Todd, Yes, I was thinking first about doing what you describe. Then it seemed like unnecessary weight to have that glass inside the carbon. Now I think I should just do the math to figure out how much that inner glass would really add ;). But also the bag technique sounds so clever I’m going to try it on a smaller, less important piece! I called Associated Bag Co and they are sending some free samples of long tube plastic bags that should do the trick. We’ll see…
LikeLike
Been thinking about that, what if you were to put the bag over a tube, lay up the carbon over the bag and tube, put the tube, bag, and layup into the split tube, clamp it all together, then cap the end of the bag and inflate, might give you better control of the layup.
Also, you could use Todd Olson’s method, but do the first layup in carbon.
Doing it inside a tube would give you a better outside finish.
LikeLike
Yes, your description is what I’ve read about. A mandrel just smaller than the inside of the mold tube goes inside the inflation bag; the mandrel provides the shape to hold the wet carbon in place before the bag inflation. The only trouble I foresee is the plastic bag getting stuck inside the pole, out of reach. But that’s really not any weight or rot issue. I’ll keep you posted on when this work will get attempted.
LikeLike
Also, I have some 30′ long aluminum irrigation pipe, 2″, 3″, 4″ and 6″. I think it is actual dimension, but will check to see if it fits into a PVC pipe
if you want.
LikeLike
It’d be great to check if it’s convenient for you. The finished pole can’t exceed 4 1/4″ outside diameter, so I’d guess you could just look at the 3″. Thanks!
LikeLike
email me, it will be easier than communicating this way. Give me your phone number and I will send you pictures.
I did check and they are in fact dimensional, within .020″. The trick might be finding one without a dent, but I have a pretty good pile of them, and if you only need 10-15′ it shouldn’t be too hard to find. What size are you interested in?
LikeLike
This is the link: http://www.westsystem.com/ss/building-composite-tubes-with-west-system-epoxy-and-braided-fibers/
MOLDS FOR STRAIGHT TUBES
Fiberglass over a metal pipe or tube
“My simplest and most successful approach to creating molds for composite tubes is to laminate a thin layer of fiberglass over a smooth metal pipe or tube (could be aluminum, chrome, steel, etc.) that serves as a mandrel. Wax the tube. It must be very smooth to facilitate removal. Apply a thin layer of fiberglass with epoxy. After this thin layer has cured, cut the laminate along the tube’s length with a utility knife and pop it loose but still on the mandrel. Rotate it a little to make sure it is free.
Then, continue with the desired laminate schedule. The fiberglass has already been released, so the composite tube will slide easily off the mandrel.”
LikeLike
Do you think this could work with PVC as the mandrel pipe? A four inch x eight foot smooth metal pipe will be expensive and maybe hard to find?
Thanks for that link!
LikeLike
I do think it will work. However, I have never done it. I have made a swimstep for an F27 and done some vacuum bagging. As you mentioned, it will be good to do a small one first.
This person seems to have the technique of rolling on and wetting out the cloth sorted out.
LikeLike