Working with the new vacuum bagging equipment

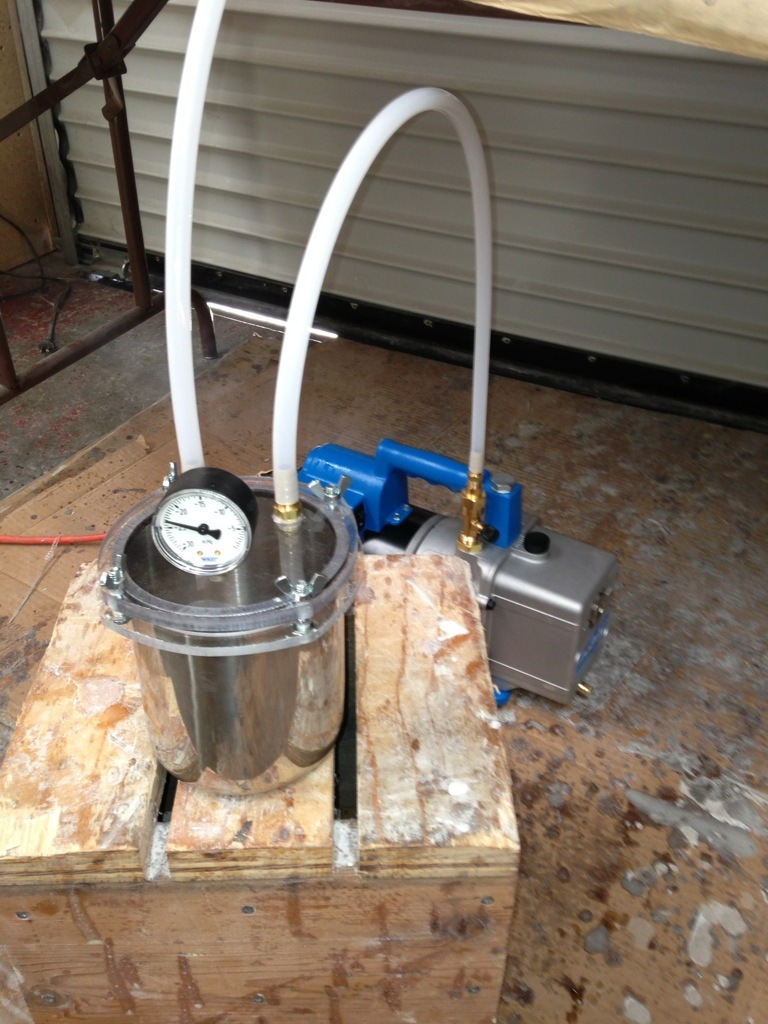
Dad came to the shop today and we unpacked and set up the new vacuum pump and related gear. Thought at first we should try something non-critical like the new box for the back of the errands bicycle, but then we spied the various flat panels for the stern swim steps area. Seemed a low-risk place to start as we taught ourselves the first-timer basics of ‘bagging’…

20130224-222516.jpg

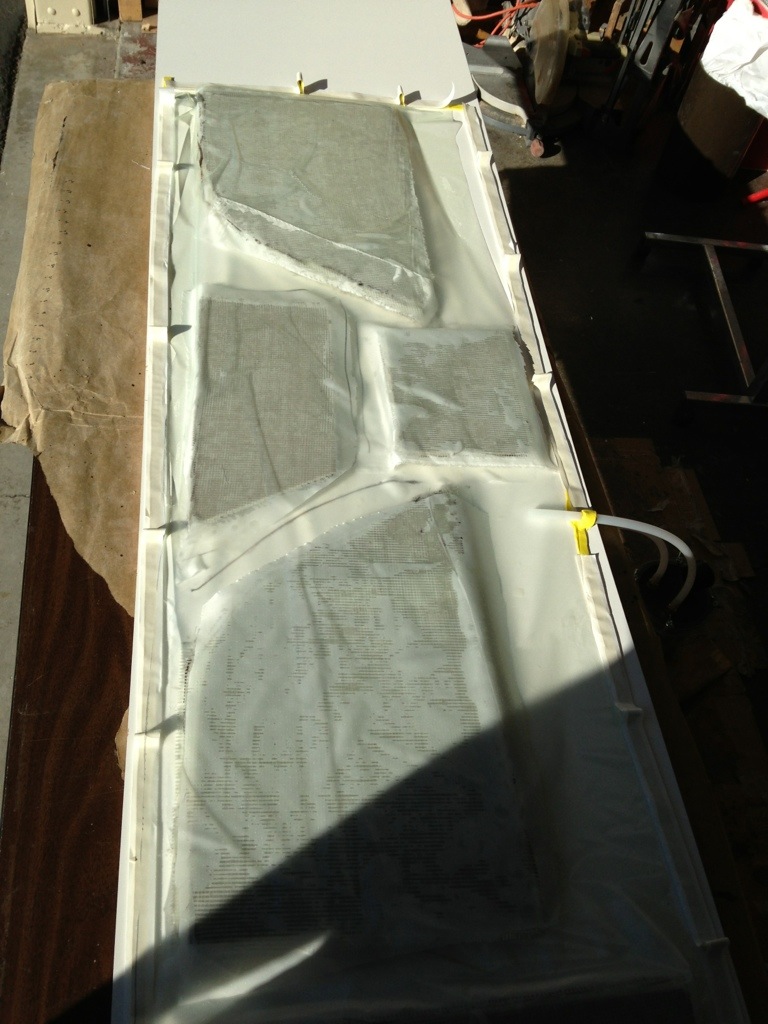
The table is a 2×8 melamine coated shelf from Home Depot. These five panels were glassed on both sides, peel-plied, then the release film, breather fabric and the bag film on top. The bright yellow mastic tape worked great, including the expansion loops AndyM told me to do (Thanks). Those allow the film to be baggy over the work, so under vacuum it snugs up the sides of panels too.

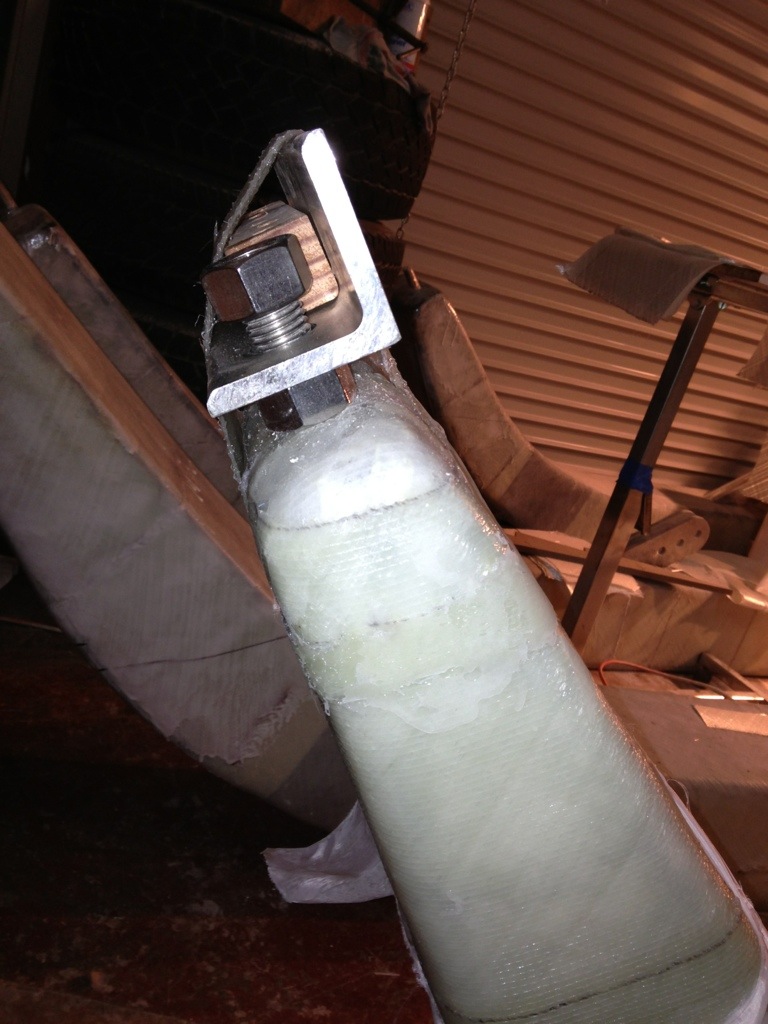
The middle photo is after just 30 seconds of vacuum pressure. I was so excited to see it working live – and to think F27 Origami was built this was 22 years ago.

The pump worked very well. Glad we stepped up to a small industrial model, instead of the $200 hobbyist version. It drew 25 inches/mercury within moments, and could have pulled more but I backed it off to a steady 24 for two hours – seemed like plenty of pressure and the epoxy flowed through the layers nicely. I look forward to making the interior panels, dagger, chain plates and much more with this technique.

20130224-223215.jpg

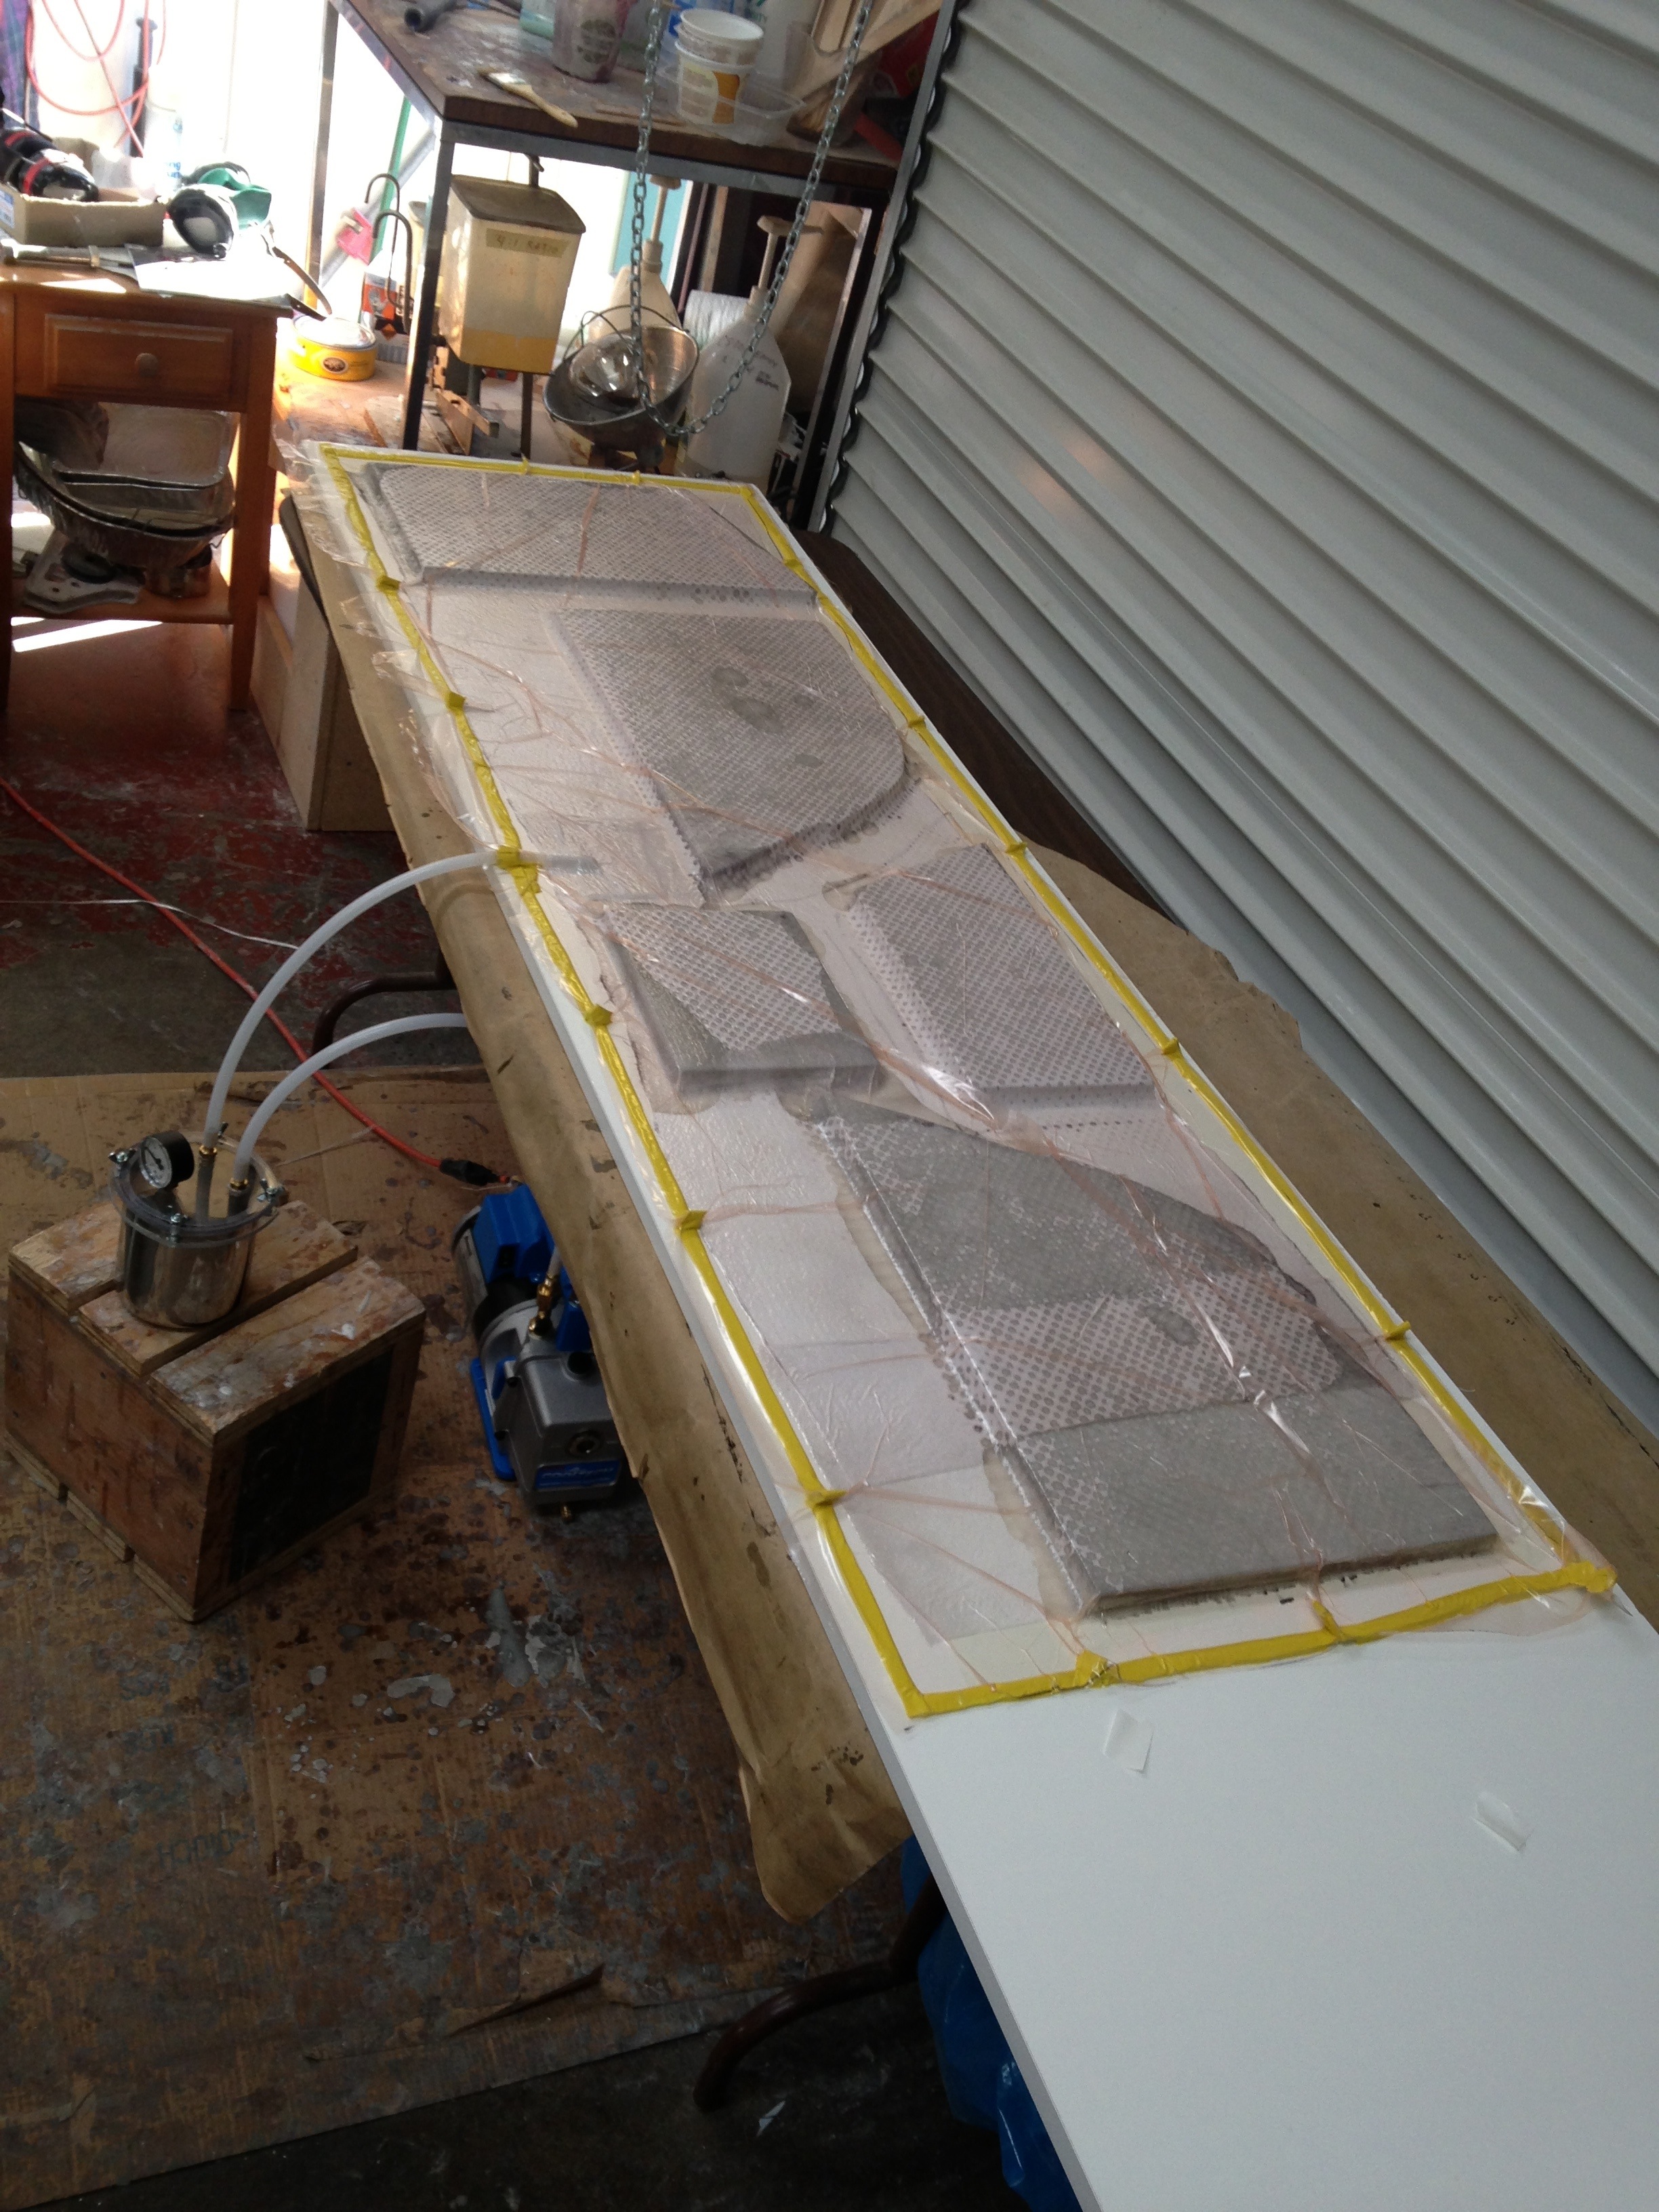
(Resin trap in line between pump and bag – in case the suction hose got too close to resin and pulled it in, we don’t want that getting to the pump!)

20130224-224133.jpg

Beam-to-float sleeves underway

Now that the big beams are structurally complete, the outer ends serve as the molds for making receptacle ‘sleeves’ that will be mounted inside the floats. Since these sleeves are built exactly to the shapes of the individual beams, I now see how the beams get a perfect fit into the outer ends of the boat. Sounds easy, but the first sleeve-making was a nasty failure. Didn’t do enough mold-release prep, and the whole new 26″ long sleeve seized up around its beam and would not slide off. Ended up sawing it all away and damaging the beam finish. VERY frustrating and a loss of a couple days work.
So tonight was a happy moment when the second attempt version slid off as planned!

20130205-221733.jpg
After the sawzall job, advice came in to test the slippery tape I had used – the cheap HarborFreight stuff turned out to ‘catch’ the epoxy, while some 3M tape had a better release. Lesson learned. Next up was adding a lot of mold release wax over the slippery tape. Helped a lot, but I’ll do another layer for the other sleeves. Third note was to glass on some blocks to the slides for hammer blows. Emotionally satisfying to smash away, but ineffective in causing the sleeve to actually budge. What worked was the brilliantly simple idea from IanF to lever off of the beam bolt. In the photo you see a nut and washer between the beam and a metal lever bar. The bar was temporarily glassed to the sleeve, but not the beam. It took about five full revs of the nut, and the whole sleeve finally released. I might be the last person on the planet to make F36 beams, but if any other builders read this, I’d warn that this lever idea is the only way to actually get these things to budge unless your beams are PERFECTLY shaped and faired. The compound curve and length of the forward sleeves is too much for simply sliding off the beam.
Anyway – it finally worked and what a huge relief!
The four fairings are built now, and after finishing up these sleeves, it’s time to put the whole thing together, starboard side first.

20130205-222651.jpg

20130205-222729.jpg
(These photos show sleeve 1 with only the initial two glass layers. Will move to the workbench to add two more glass layers, beef up the end and bed the heavy duty beam bolt washer, and grind away the temporary lever strap and pounding blocks)