The mad rush

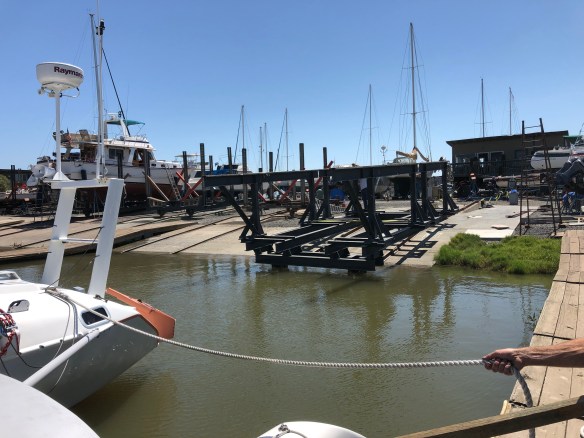
The Ravenswing build has been way more than the Carters bargained for. Years have long passed since our initial voyaging target dates. But the past few weeks have turned the corner, and we’re hitting the punch list hard in preparation of a September 8 departure from San Francisco towards the Channel Islands in southern Cal. Jim spent a week aboard earlier this month, including a successful overnight trip to Half Moon Bay. Exiting SF Bay in steep chop and upper 20’s apparent wind was a good shakedown. Finally got a first good anchorage photo shoot :)From the dinghy we asked locals for a dinner spot. Turns out she’s the membership director of HMB yacht club. 
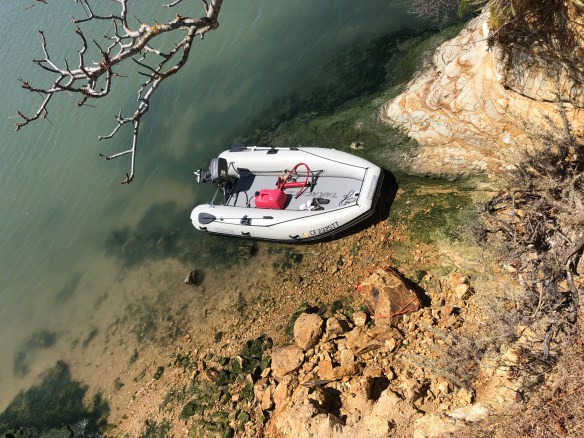
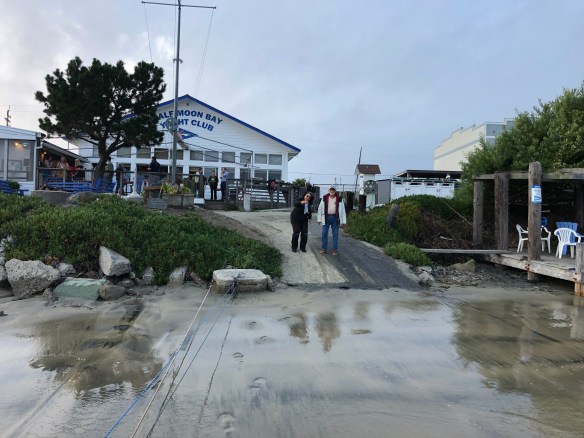
I’m riding in from the dinghy dock on a cable barge. Great getting drinks with these folks. After returning to Richmond, we then set off to China Camp (inside SF Bay) to find Drew’s family, the F27 Papillon crew. Weather was amazing and much fun was had with the dinghys (we have matching Takacats).
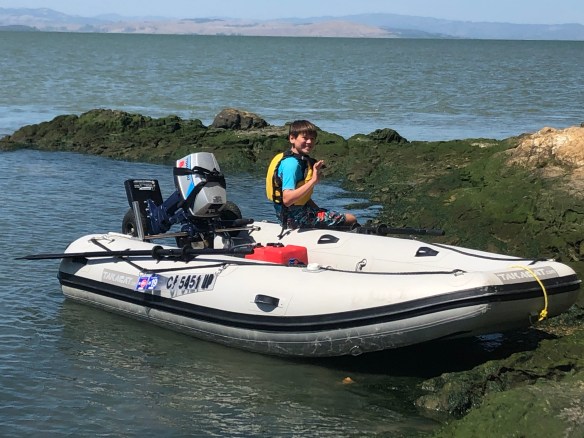
Anton drove over to join Ravenswing and Charlie sailed F24 Stingray over. Ravenswing’s first dinner party was a hit. 
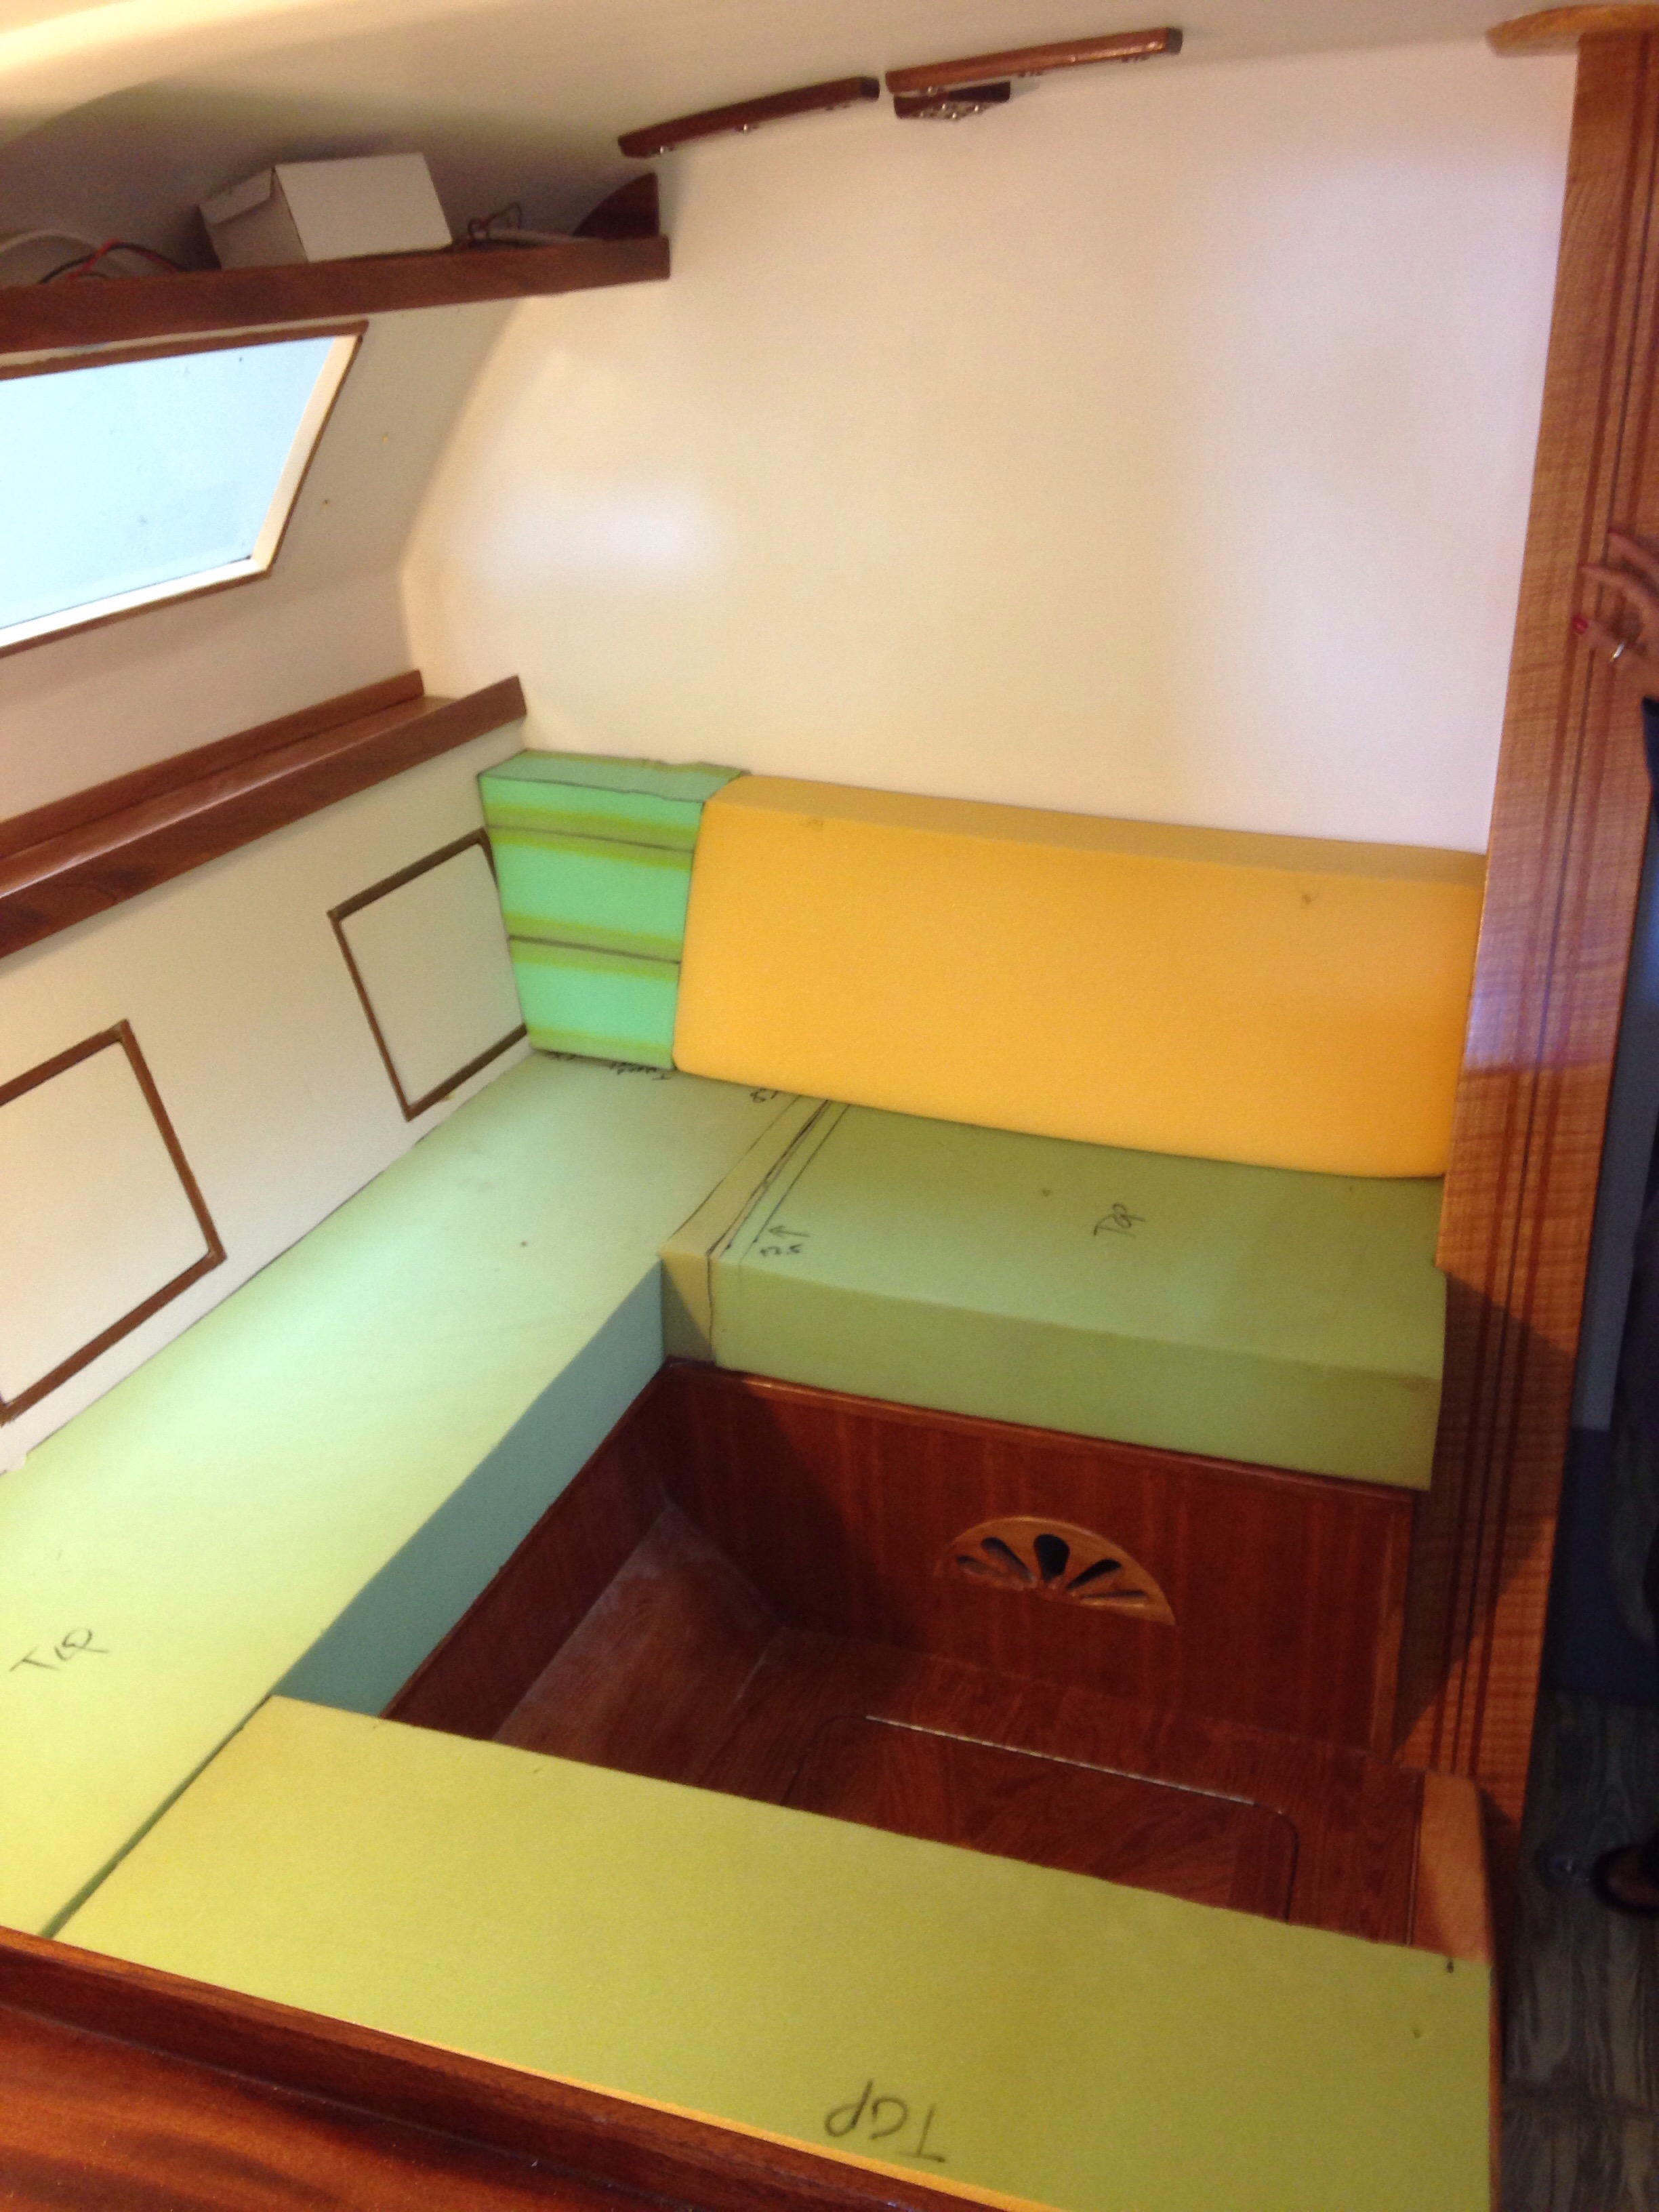
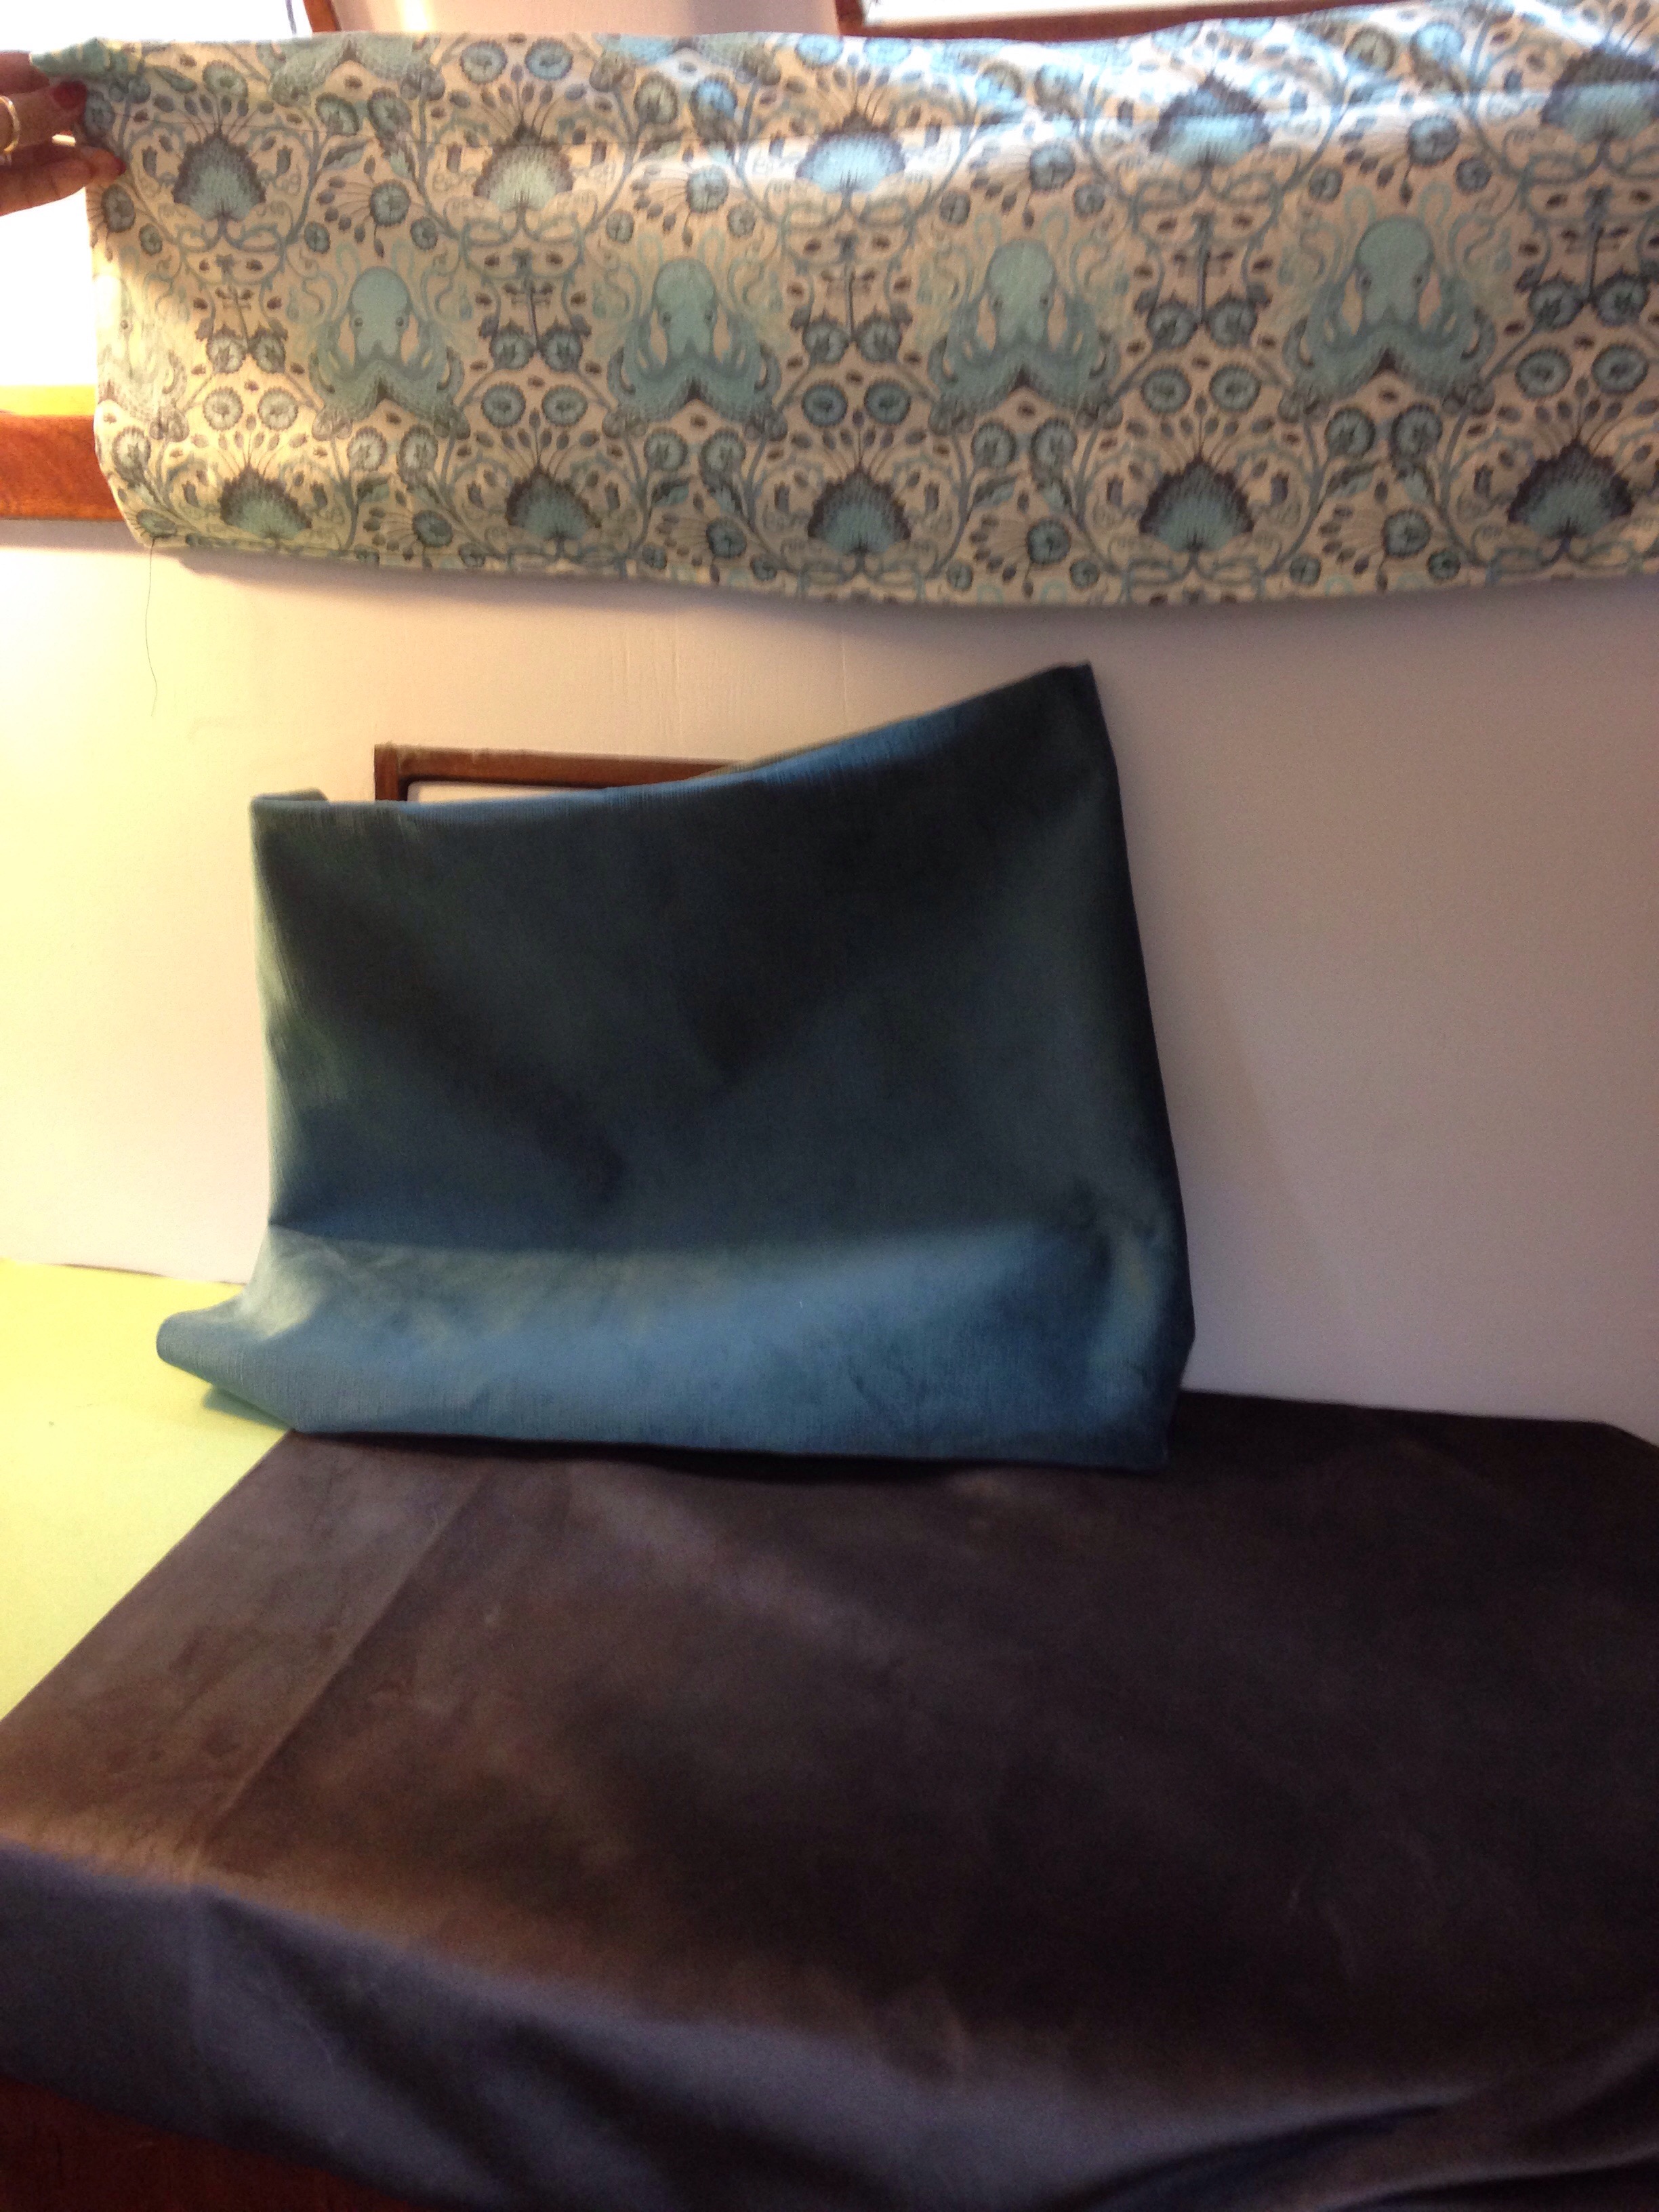
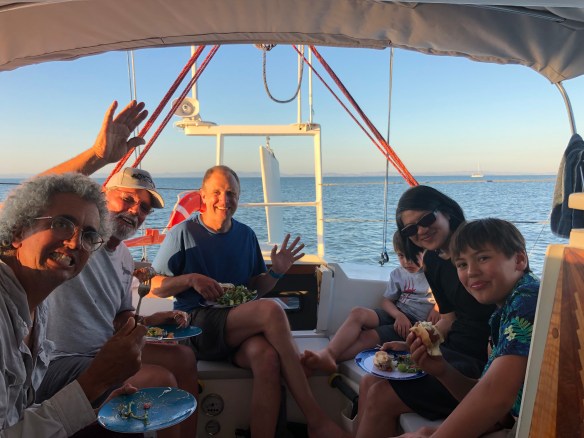
Yes, the Bimini top was great to have at anchor. So of course there was a sewing flurry before Jim came to visit. 
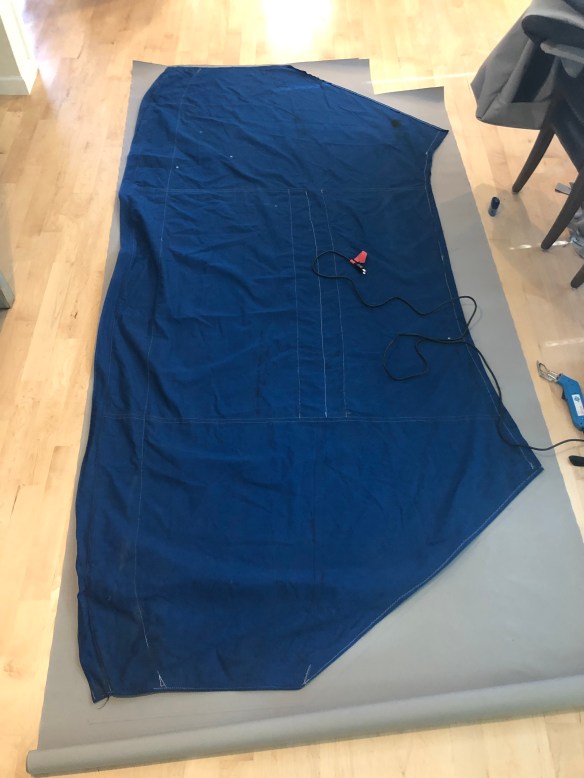
the blue one was part of the used unit we picked up for $120. Just kept cutting and reseweing it until it was a usable pattern for our shape. Next we built a new jib bag, as the crew will tell you the first one sucked (too tight). 
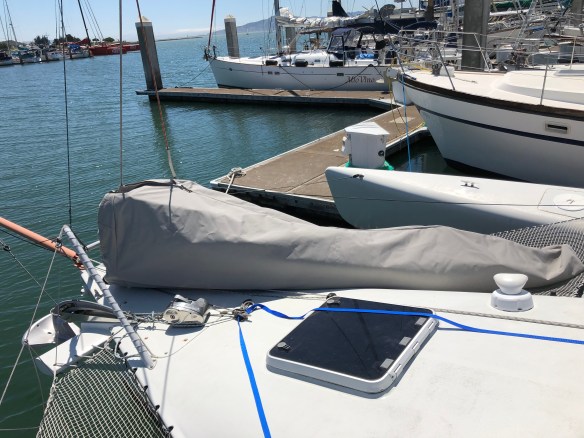
But not to waste anything, the first jib bag was easily modified to become the new stay-on-deck roller Reacher bag. Thx to Round Midnight for that idea!We’ve also been quite focused on safety gear. The 
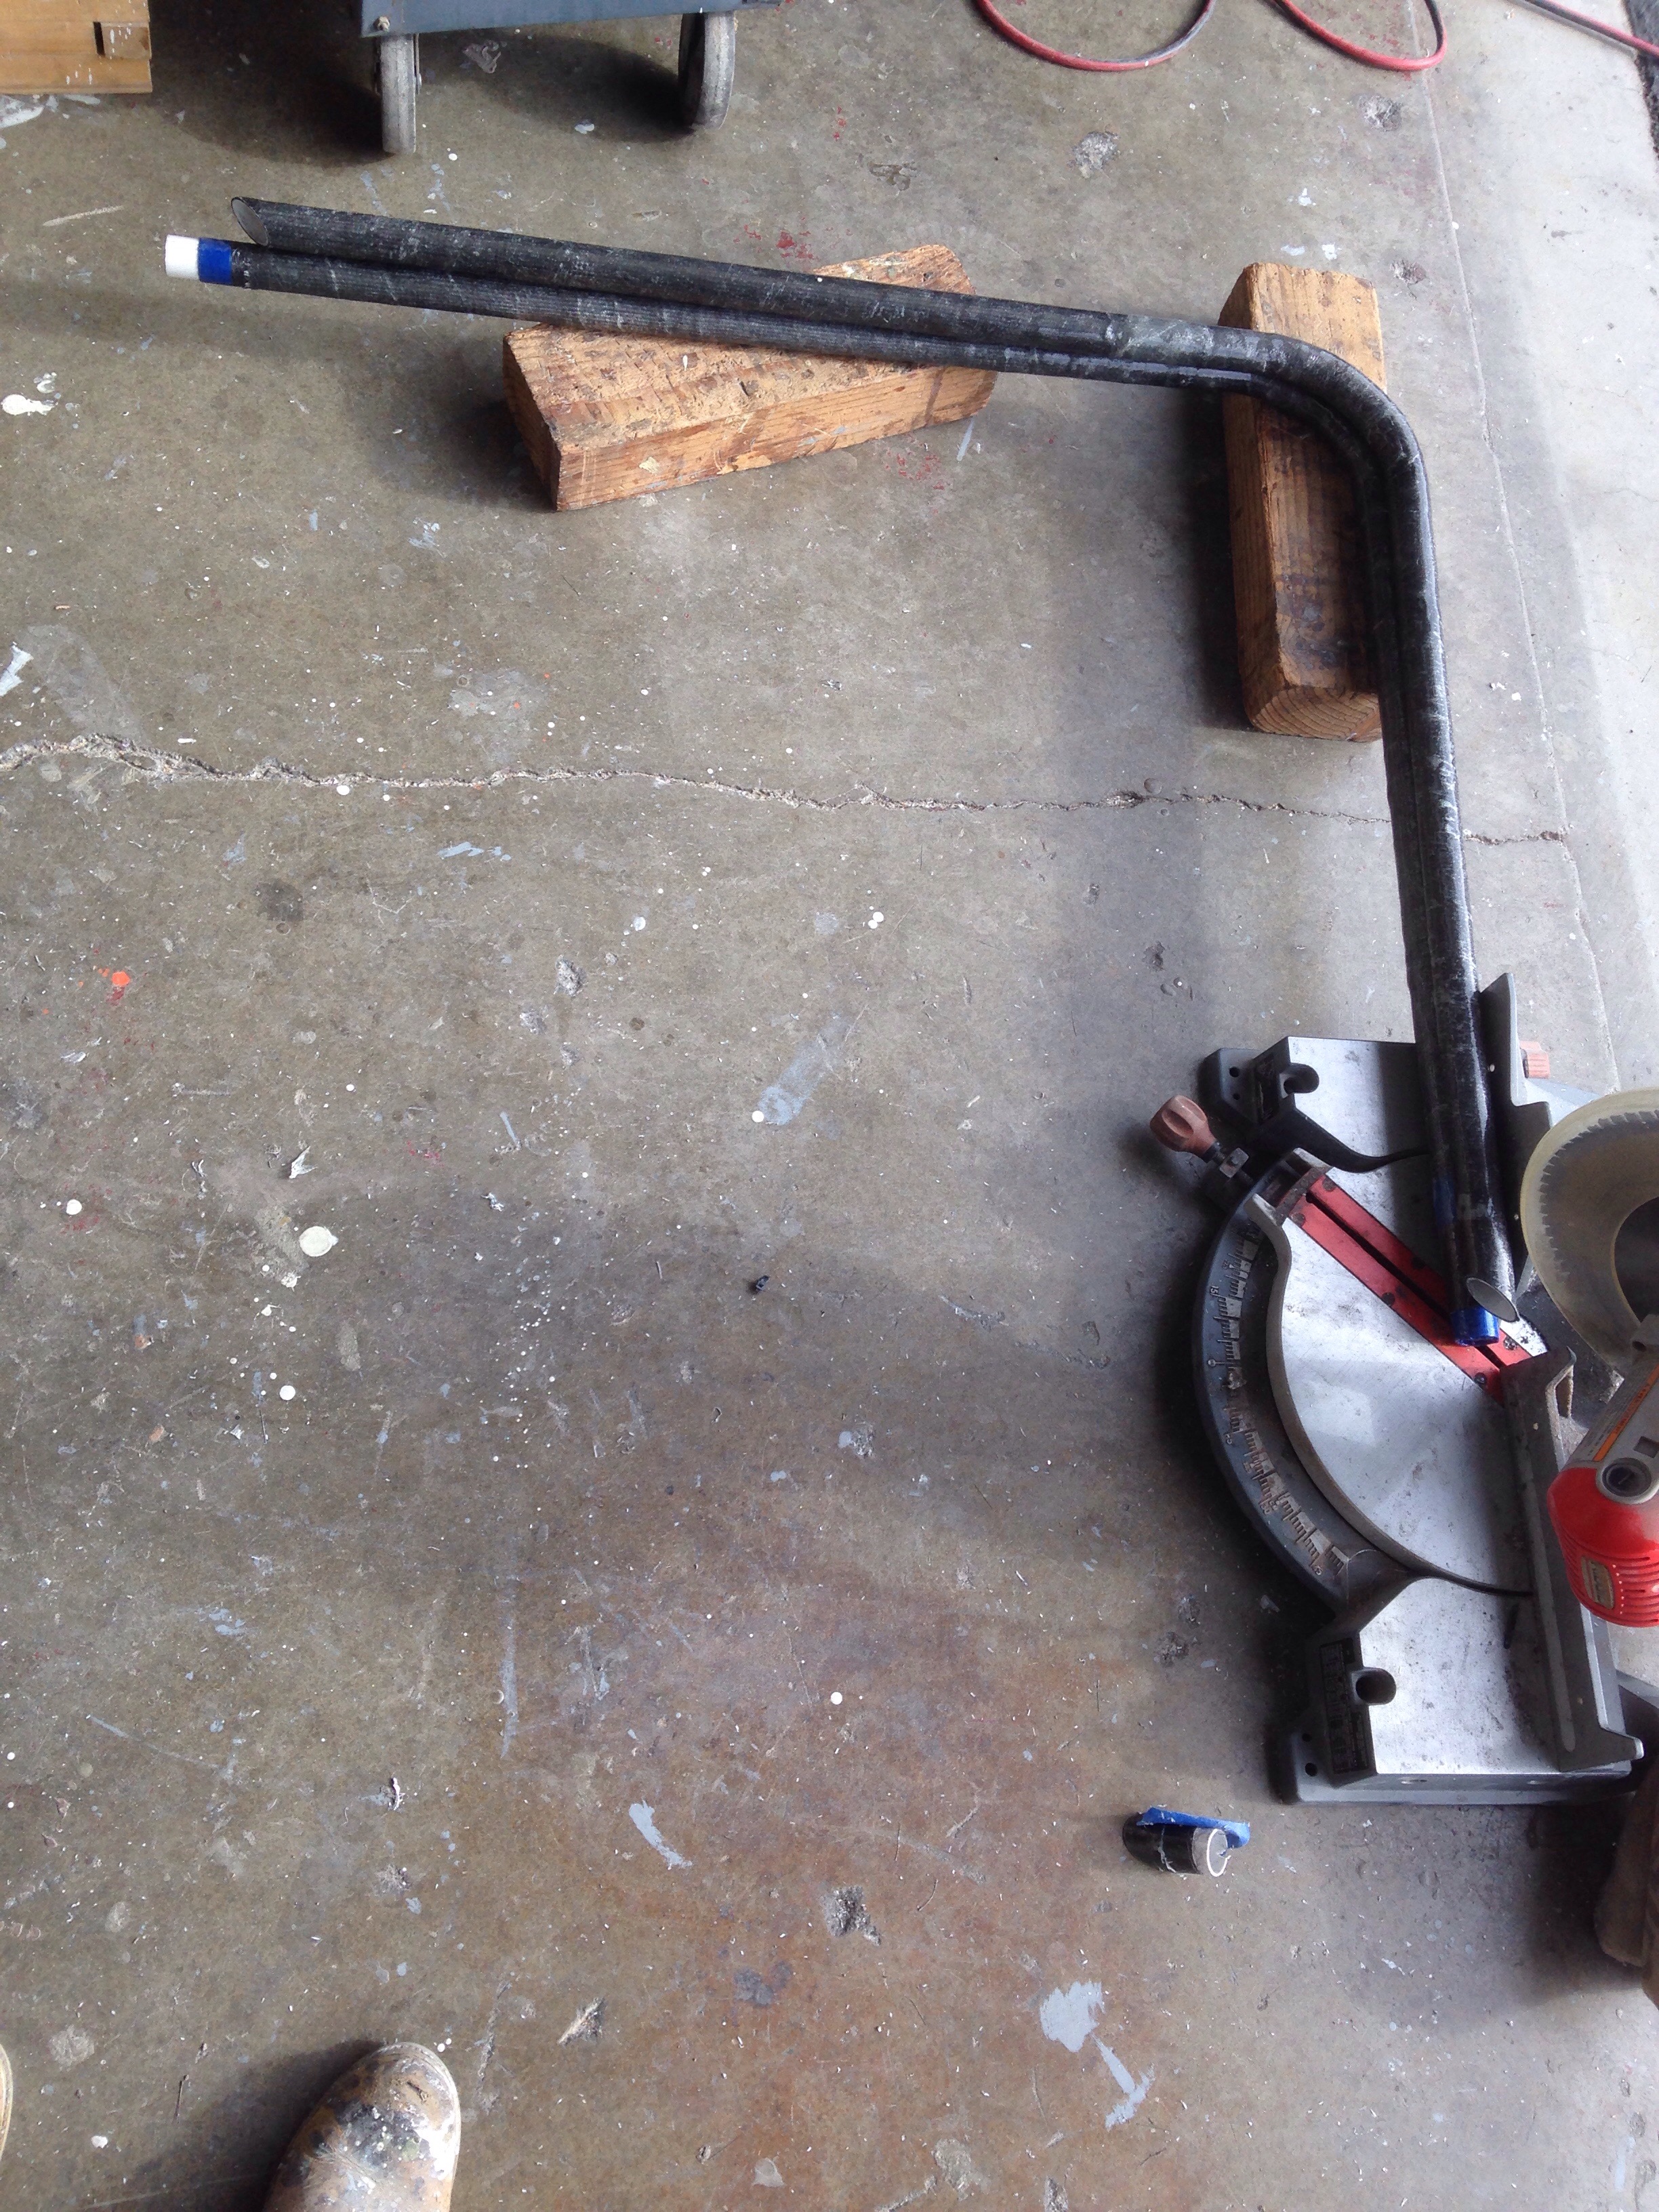
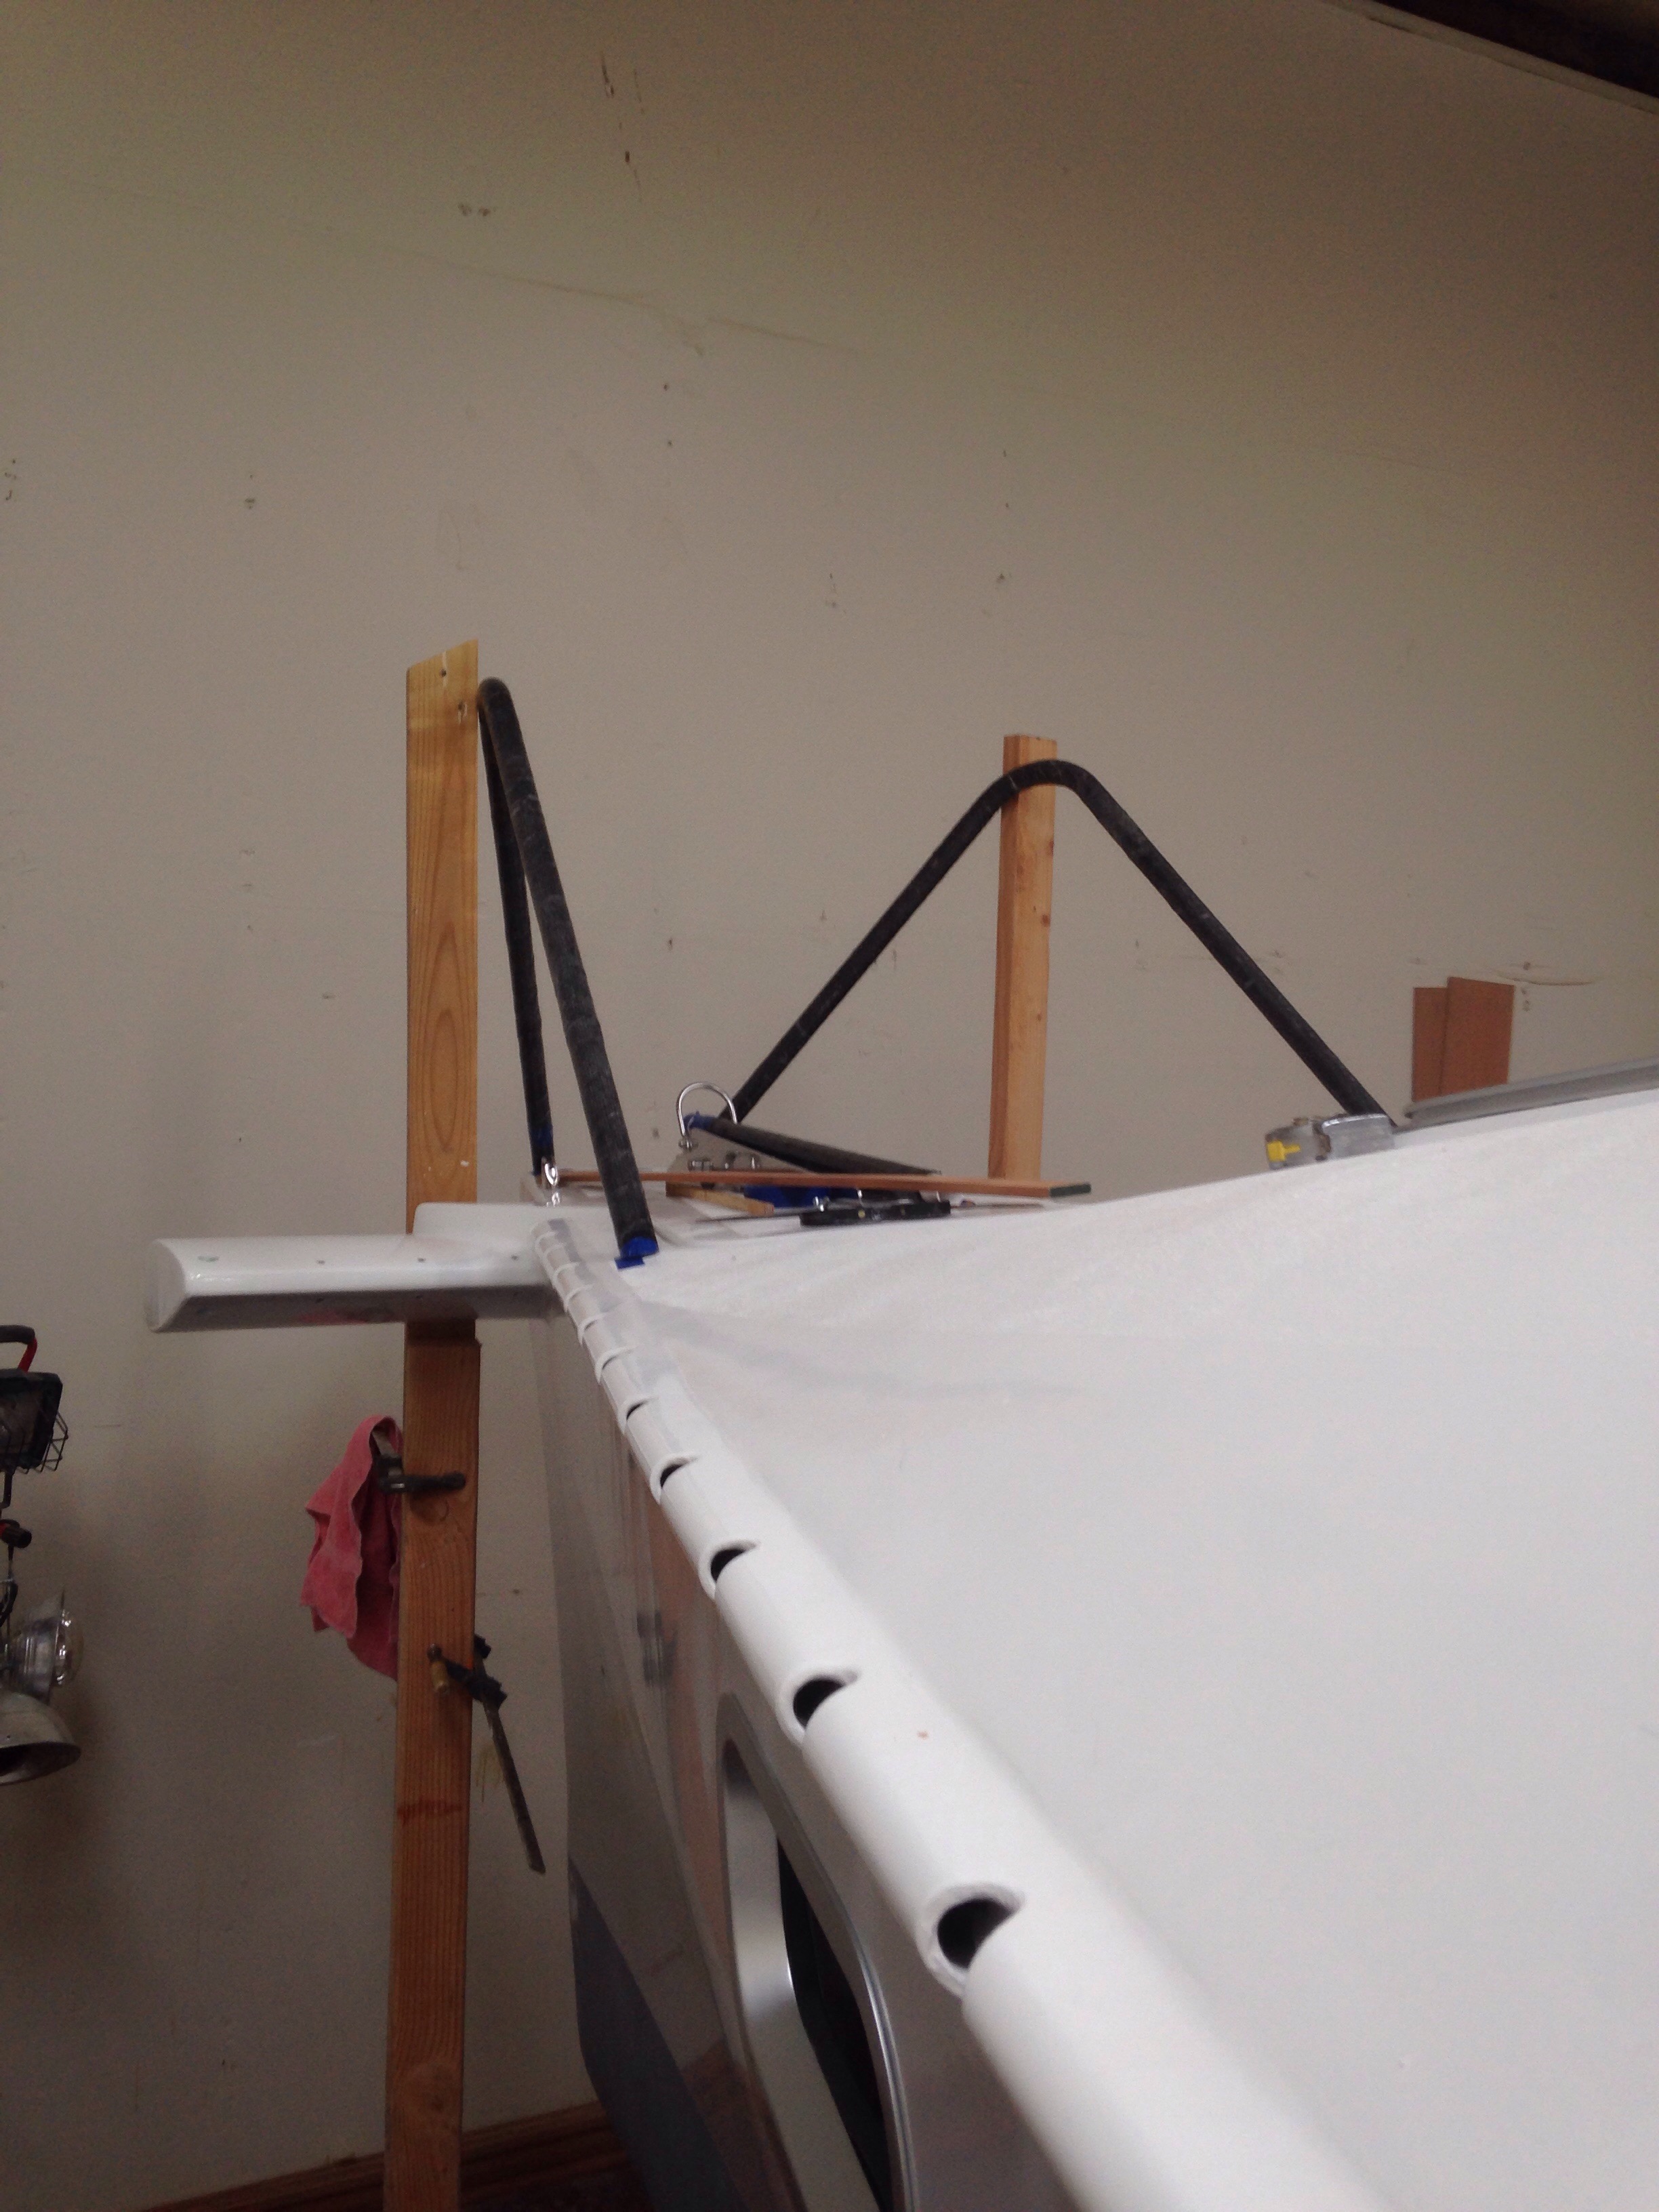
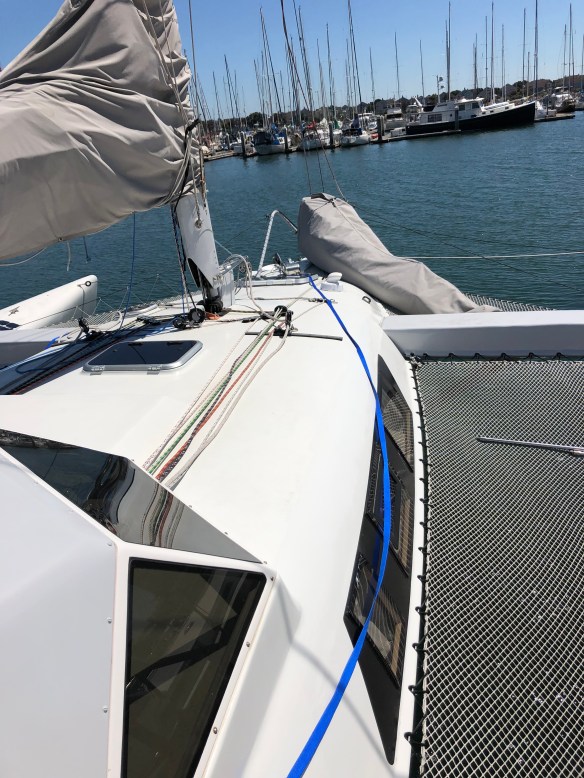
jack lines got fitted. They install easily and get put away when not needed.

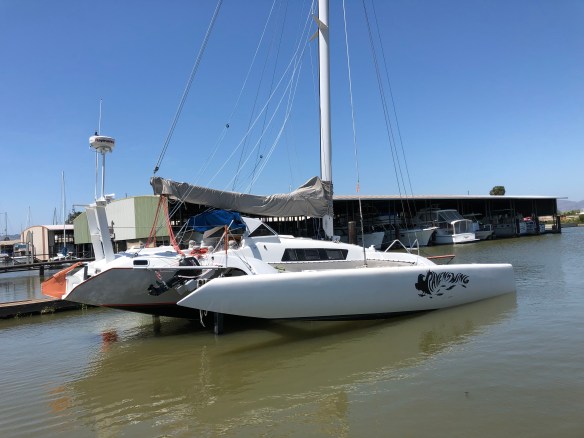
The rudder finally got its permanent fix for the proper fore/aft take setting. Instead of shiming the cassette, the rudder grew an angled wedge up where it rests underway inside the cassette. Not particularly pretty but totally effective. It sailed great in the snot to Half Moon Bay.

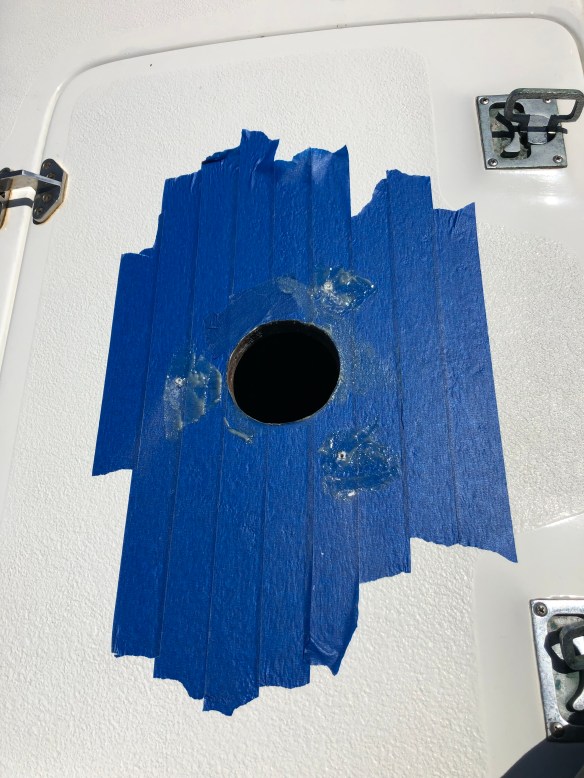
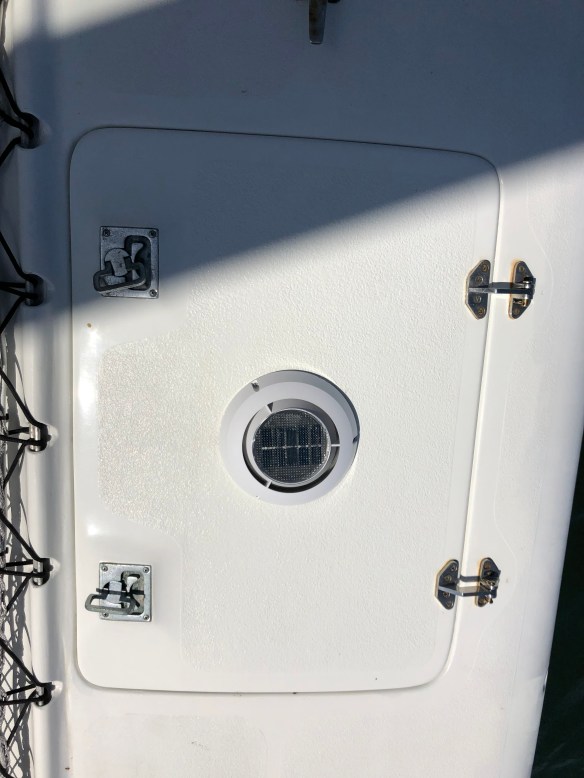
The float hulls have had bouts of “stale air” in the three years since launch. They finally got solar vents. Put them in the hatch doors, so as not to mess with the hull decks.

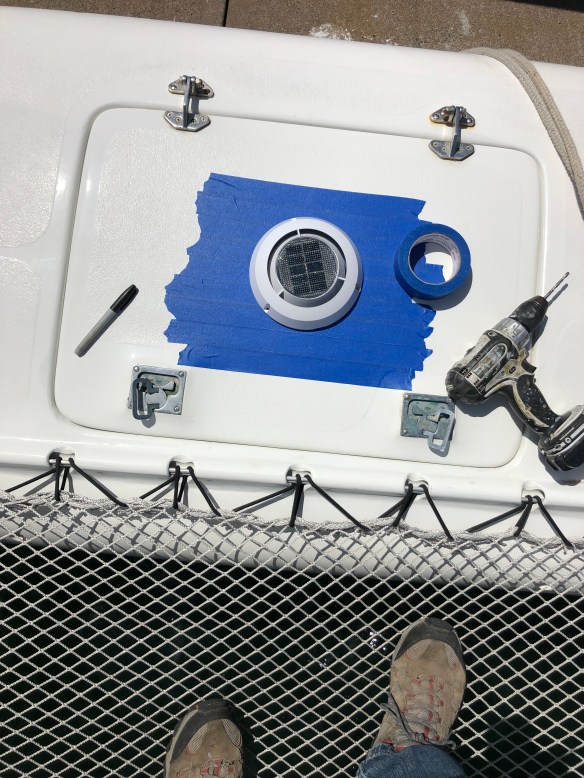
Just before the China Camp trip we received the replacement electric controller for the fridge/freezer compressor. Ouch, that was $300 shot thanks to the failed escape hatch in June that salt-water soaked the equipment room under the cockpit. Fridge unit is working fine again and right now we’re creating the divider to separate freezer from cooler/refer side.

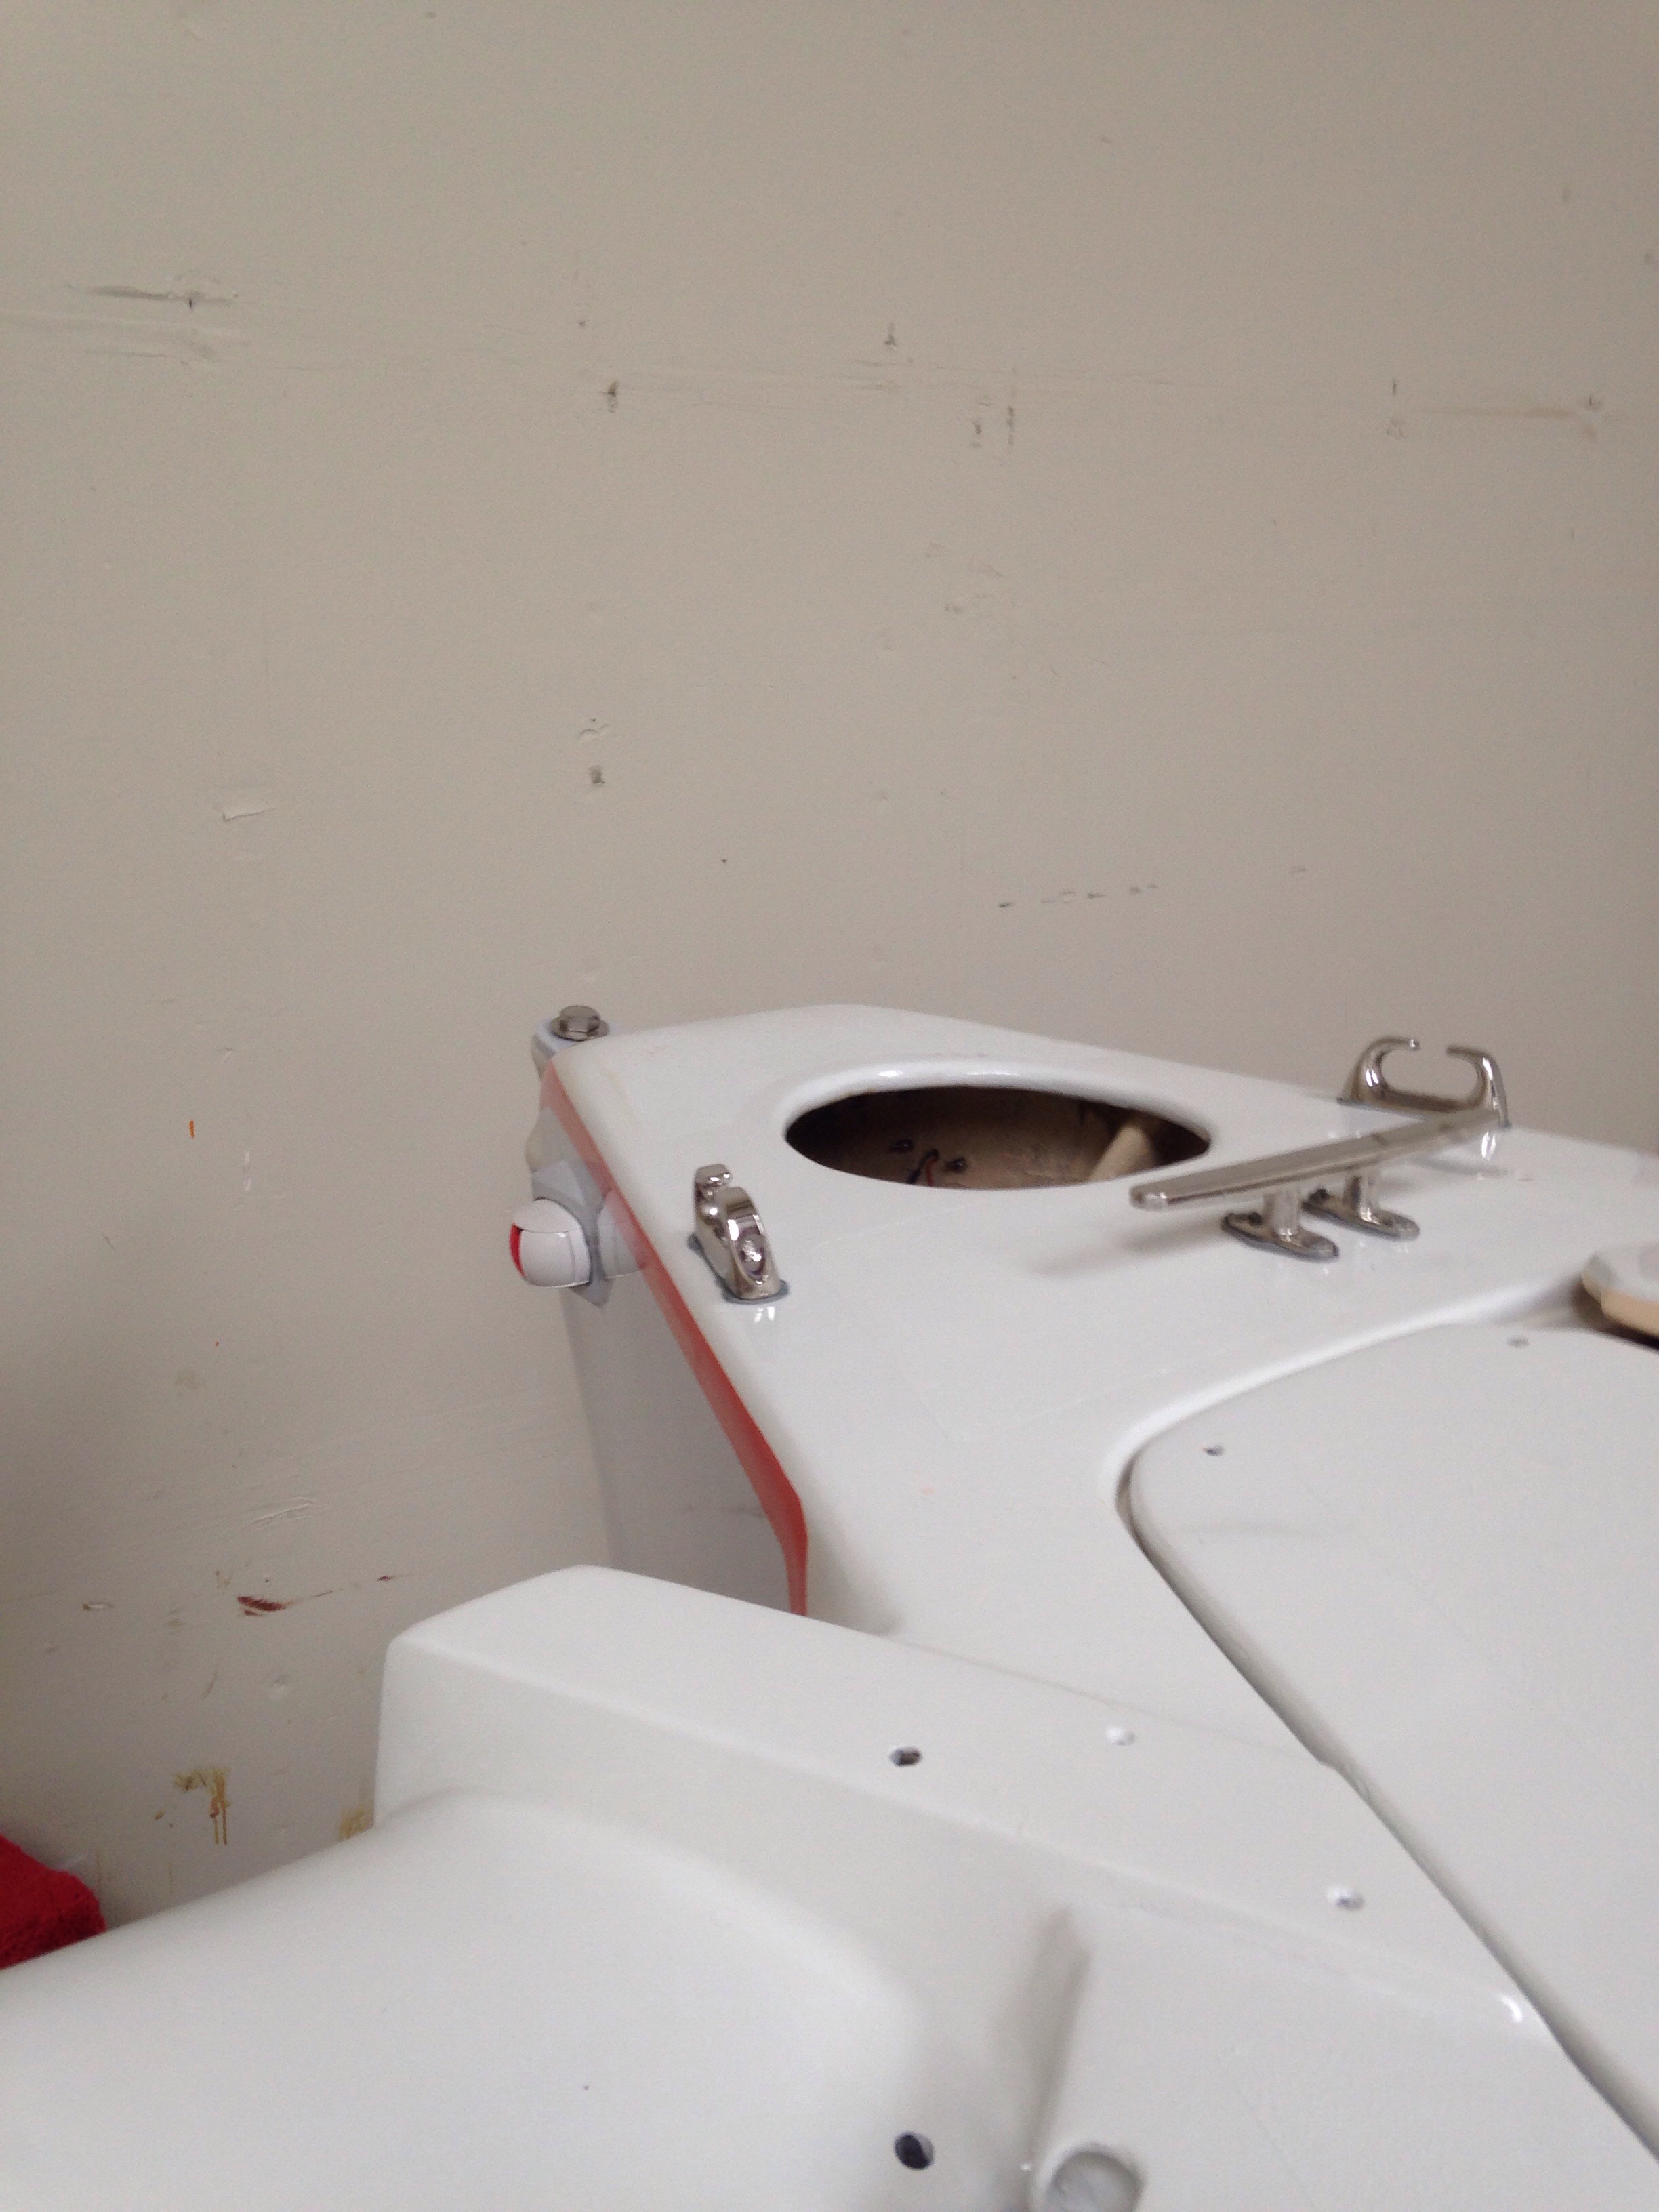
And yea, also had to replace the Lavac toilet bowl after dropping the original during the paint job of the revised water closet floor. This is the new version with a more robust hinge and seal setup. If anyone out there needs original Lavac lid parts, holler.

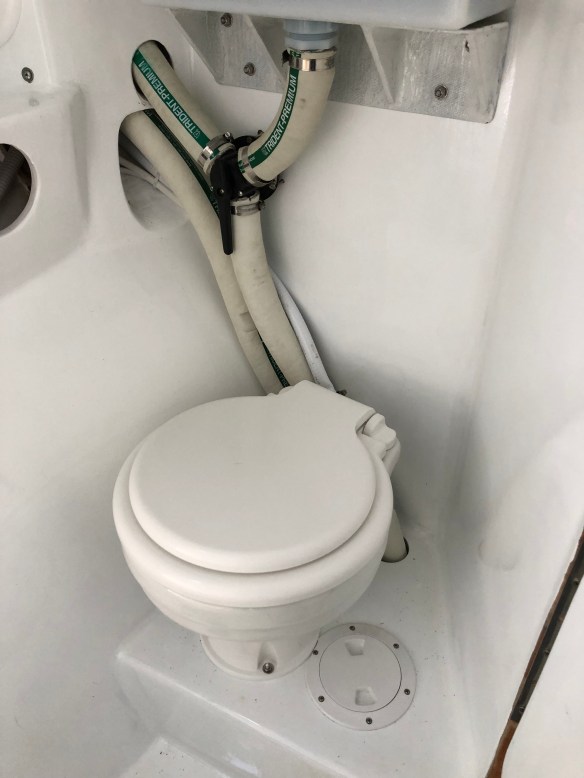
The co-owner agreed to poke her nose out the Gate, aided perhaps by her elder son’s encouragement. Thank you Ravenswing for giving us good times together. I’ll explain next time why Colin was able to come aboard unexpectedly…

Thank you again Napa Valley Marina

This place is great for the Bay Area larger-Multihull crowd. Yard foreman Mike calmly figures out how to haul our funny shaped boats, and they have the skills to tackle most any repair type. I finished up the new orange boot stripe Tuesday evening and they bottom-painted Wednesday. Today Ravenswing went back in the water. The two main modifications came out swell. 
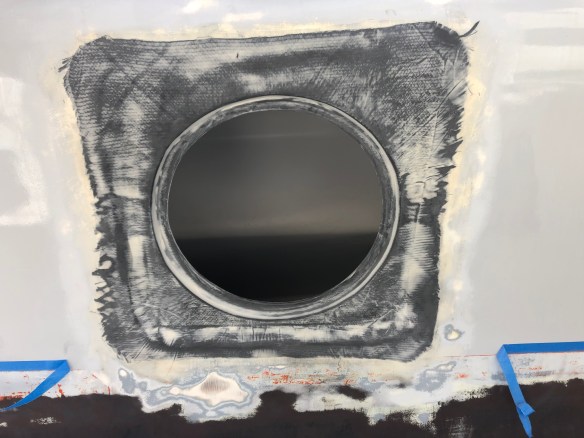
Keith will like this angle, showing how the temporary escape hatch cover is flush with the hull. The real one is back home for final fairing and paint.

The tiller got a batch of 16oz carbon uni filaments placed on each side, as I think we’ve felt a bit of sideways flex under tough conditions. Just another thing that needed an orange repaint anyway! 
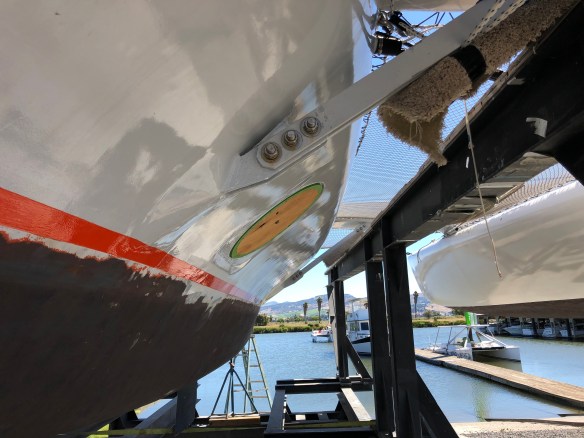
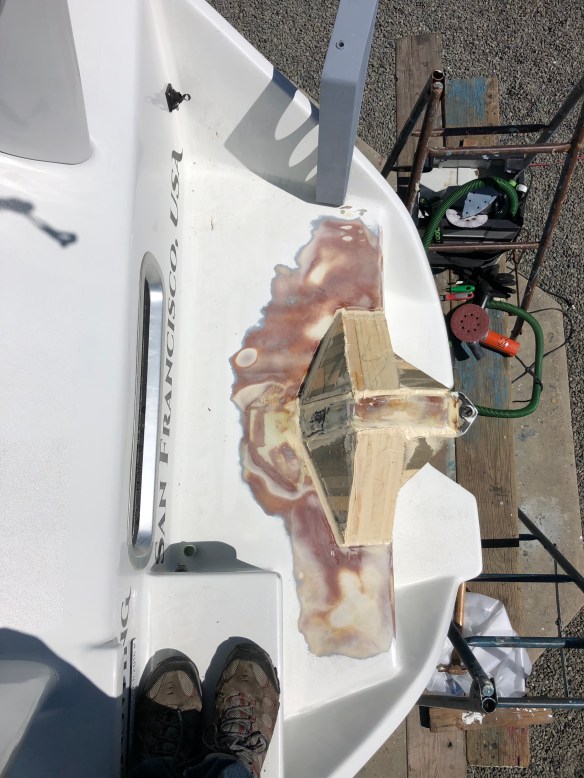
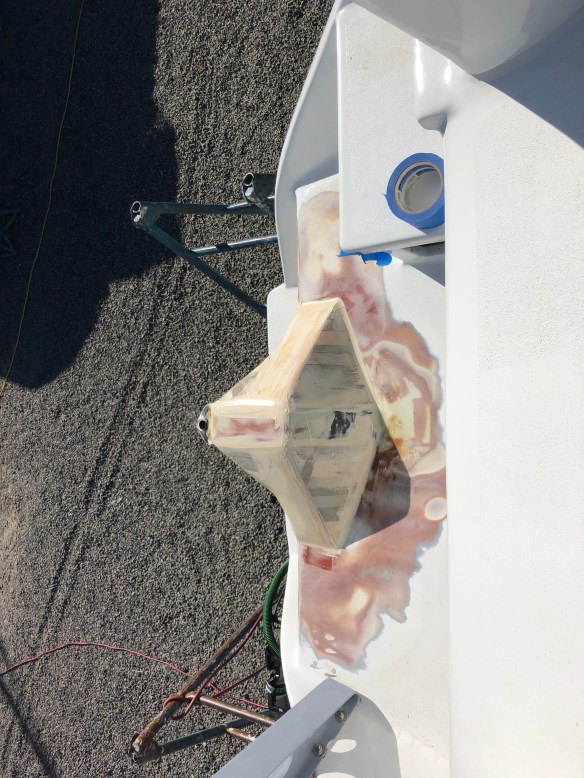
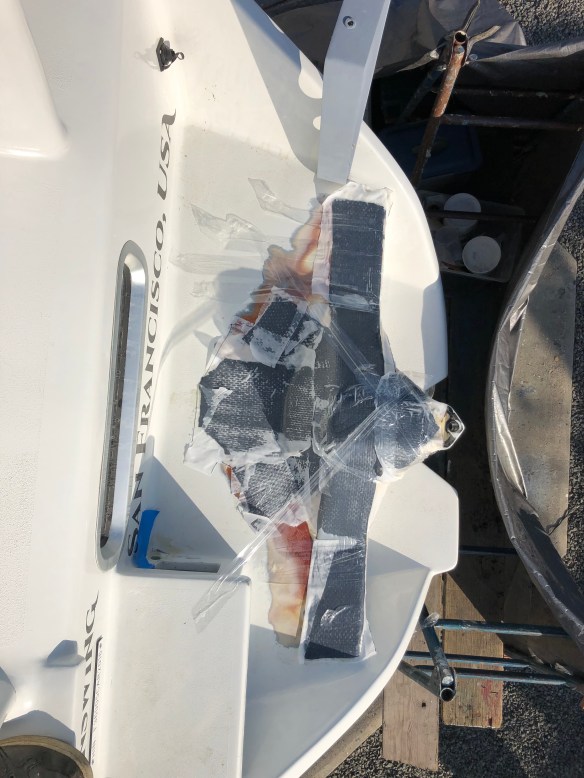
Yeah locals, legendary crew Dan M came out and was immediately put to work. He wonders why it’s called peel-ply, when it doesn’t seem to peel so well…

This guy has made many a tri skipper look good in Bay and coastal racing :). Anybody recognize what shirt he showed up in?

Note to self: Bottom paint history so far was 1) the original Pettit Vivid white debacle, launched 6/2016. 2) sand down and two coats of Pettit Trinidad SR 11/2017

3) light sand and one coat of Pettit Trinidad Pro 6/2019

Orange accent paint is now Alexseal International Orange (hoping this two-part holds up much better than the Interlux bright side before).

The jib gets picked up tomorrow, after some minor leach repair where it rubbed on the old mast’s diamond wires.

And we’re counting on Bay Marine having completed the upgrade to the mast rotation control arm. Without that getting reinstalled, there ain’t no sailing this weekend.

Suction

The vacuum pump got a workout this weekend. 
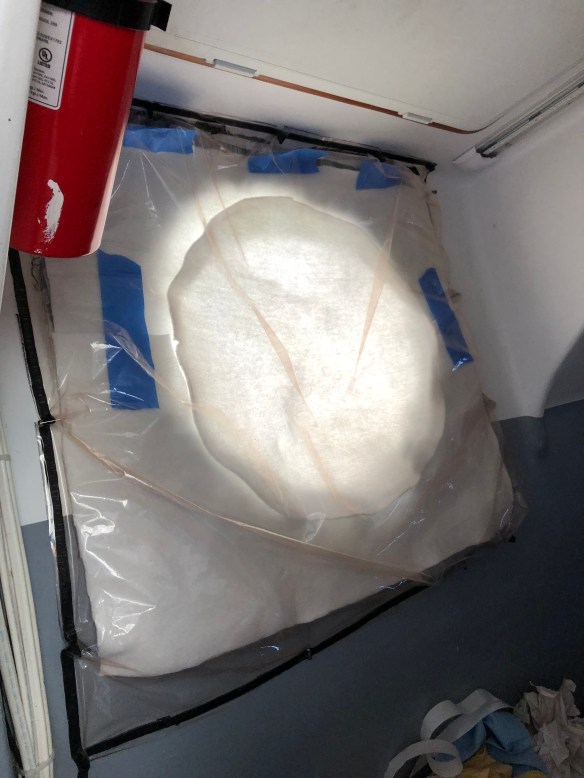
Pulling the vacuum on both sides of the hatch area at the same time was pretty fun fabrication stuff. This one came out very nicely. Fairing went quickly in the hot weather, and the new work got a first primer coat Sunday eve. 
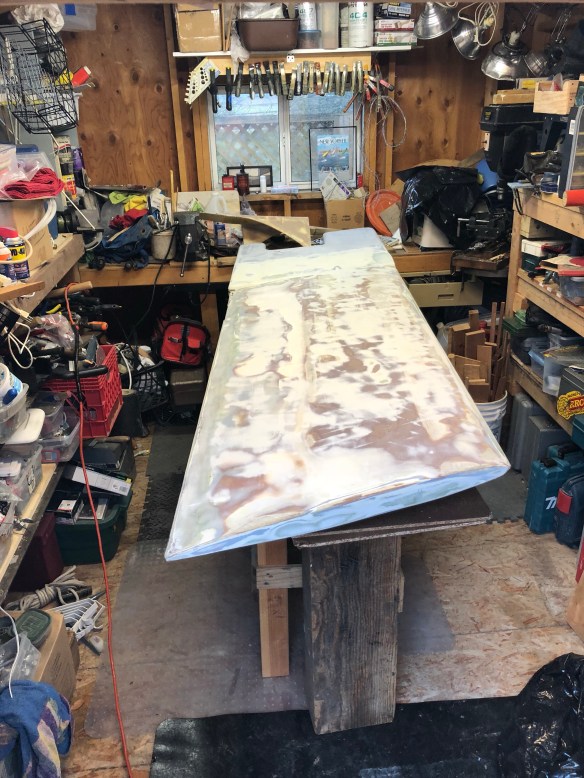
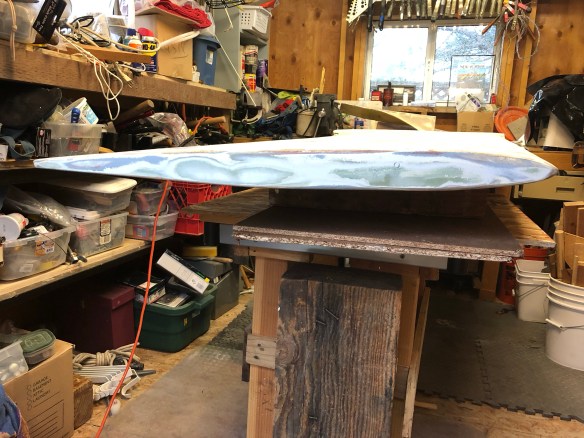
The stronger gudgeon post looks like it should have always been there.

Tiller and cassette warming in the sun to bake their epoxy tweaks.

Will pick up some Alexseal two-part paint tomorrow and replace all the faded orange highlights on the boat. That’ll spruce things up for the fall southbound journey.

good progress

… although this is taking longer than I guessed!

The escape hatch frame is faired in now, ready for carbon fabric lamination tomorrow.

Here’s the expanded pylon / rudder gudgeons post, with all the new foam core in place.

Today the 16oz carbon unidirectional filaments went on front to back, side to side, and diagonally from the top of the upper gudgeon area.

My plan tomorrow is to cover all of this, and down the vertical face of the swim step, with 12oz 45/45 carbon weave. That will wrap up the upgrade, plus a bit of fairing and paint this weekend.

Multitasking

We’ll do quick updates from the boatyard, as some of you are keen to keep an eye on these upgrades.

The rudder base post is an obvious two step task. Once the paint was removed I could see the center web lamination wasn’t strong enough. The gudgeons haven’t budged; it was the area in between the top and bottom that failed. So first today was repairing that laminate by adding two wraps of 12oz BD carbon. The gudgeons themselves are nice and burley. Here’s a look with the paint stripped off. 
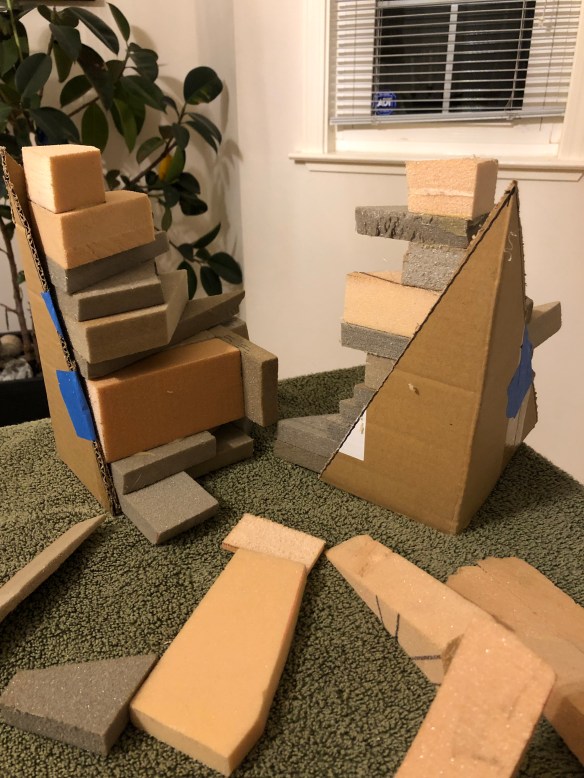
So now it’s back to as-launched, and part two is forming transverse bracing from the top gudgeon down to the back deck. Lots of playing with foam core today, including some last scraps hot-gluing before bed tonight.

The escape hatch new outer frame and water-sealing ring were glued in today. Lamination skins will happen tomorrow.

Keith, the Bomar hatch was pretty tall, so the old recess is too deep for this new approach. I’m not going to bring it out flush with the hull, but rather just finish a nice transition slope. Yea it will be a circle in a square but it won’t look bad and anyway the thing is hard to see under the nets. It’ll be very strong this way. Any thoughts on what adhesive to use to apply the neoprene gasket to the new hull ring?

Project 3 is some minor improvements to the tiller and rudder cassette, and then a repaint. The Interlux Brightside was a fail, as the nice orange faded badly in less than a year. Thinking of switching to Alexseal- they have a nice premixed Int’l Orange color…

Still sea-trialing…

Jim drove down from Medford to take a Delta cruise on Ravenswing, to start getting used to the navigation and safety gear. Tuesday we had a great sail around Treasure Island. The wind went light by the Bay Bridge and we were hoping it would pick up to get us back to Richmond sans engine. Careful what you wish for in SF Bay. Ten minutes later I was regretting not taking a reef. It was a wet and nasty ride across The Slot, and what became more boat trials. Found three things that need big changes. 1) the mast rotation control arm bent its 3/8″ in-mast mounting bolts. 
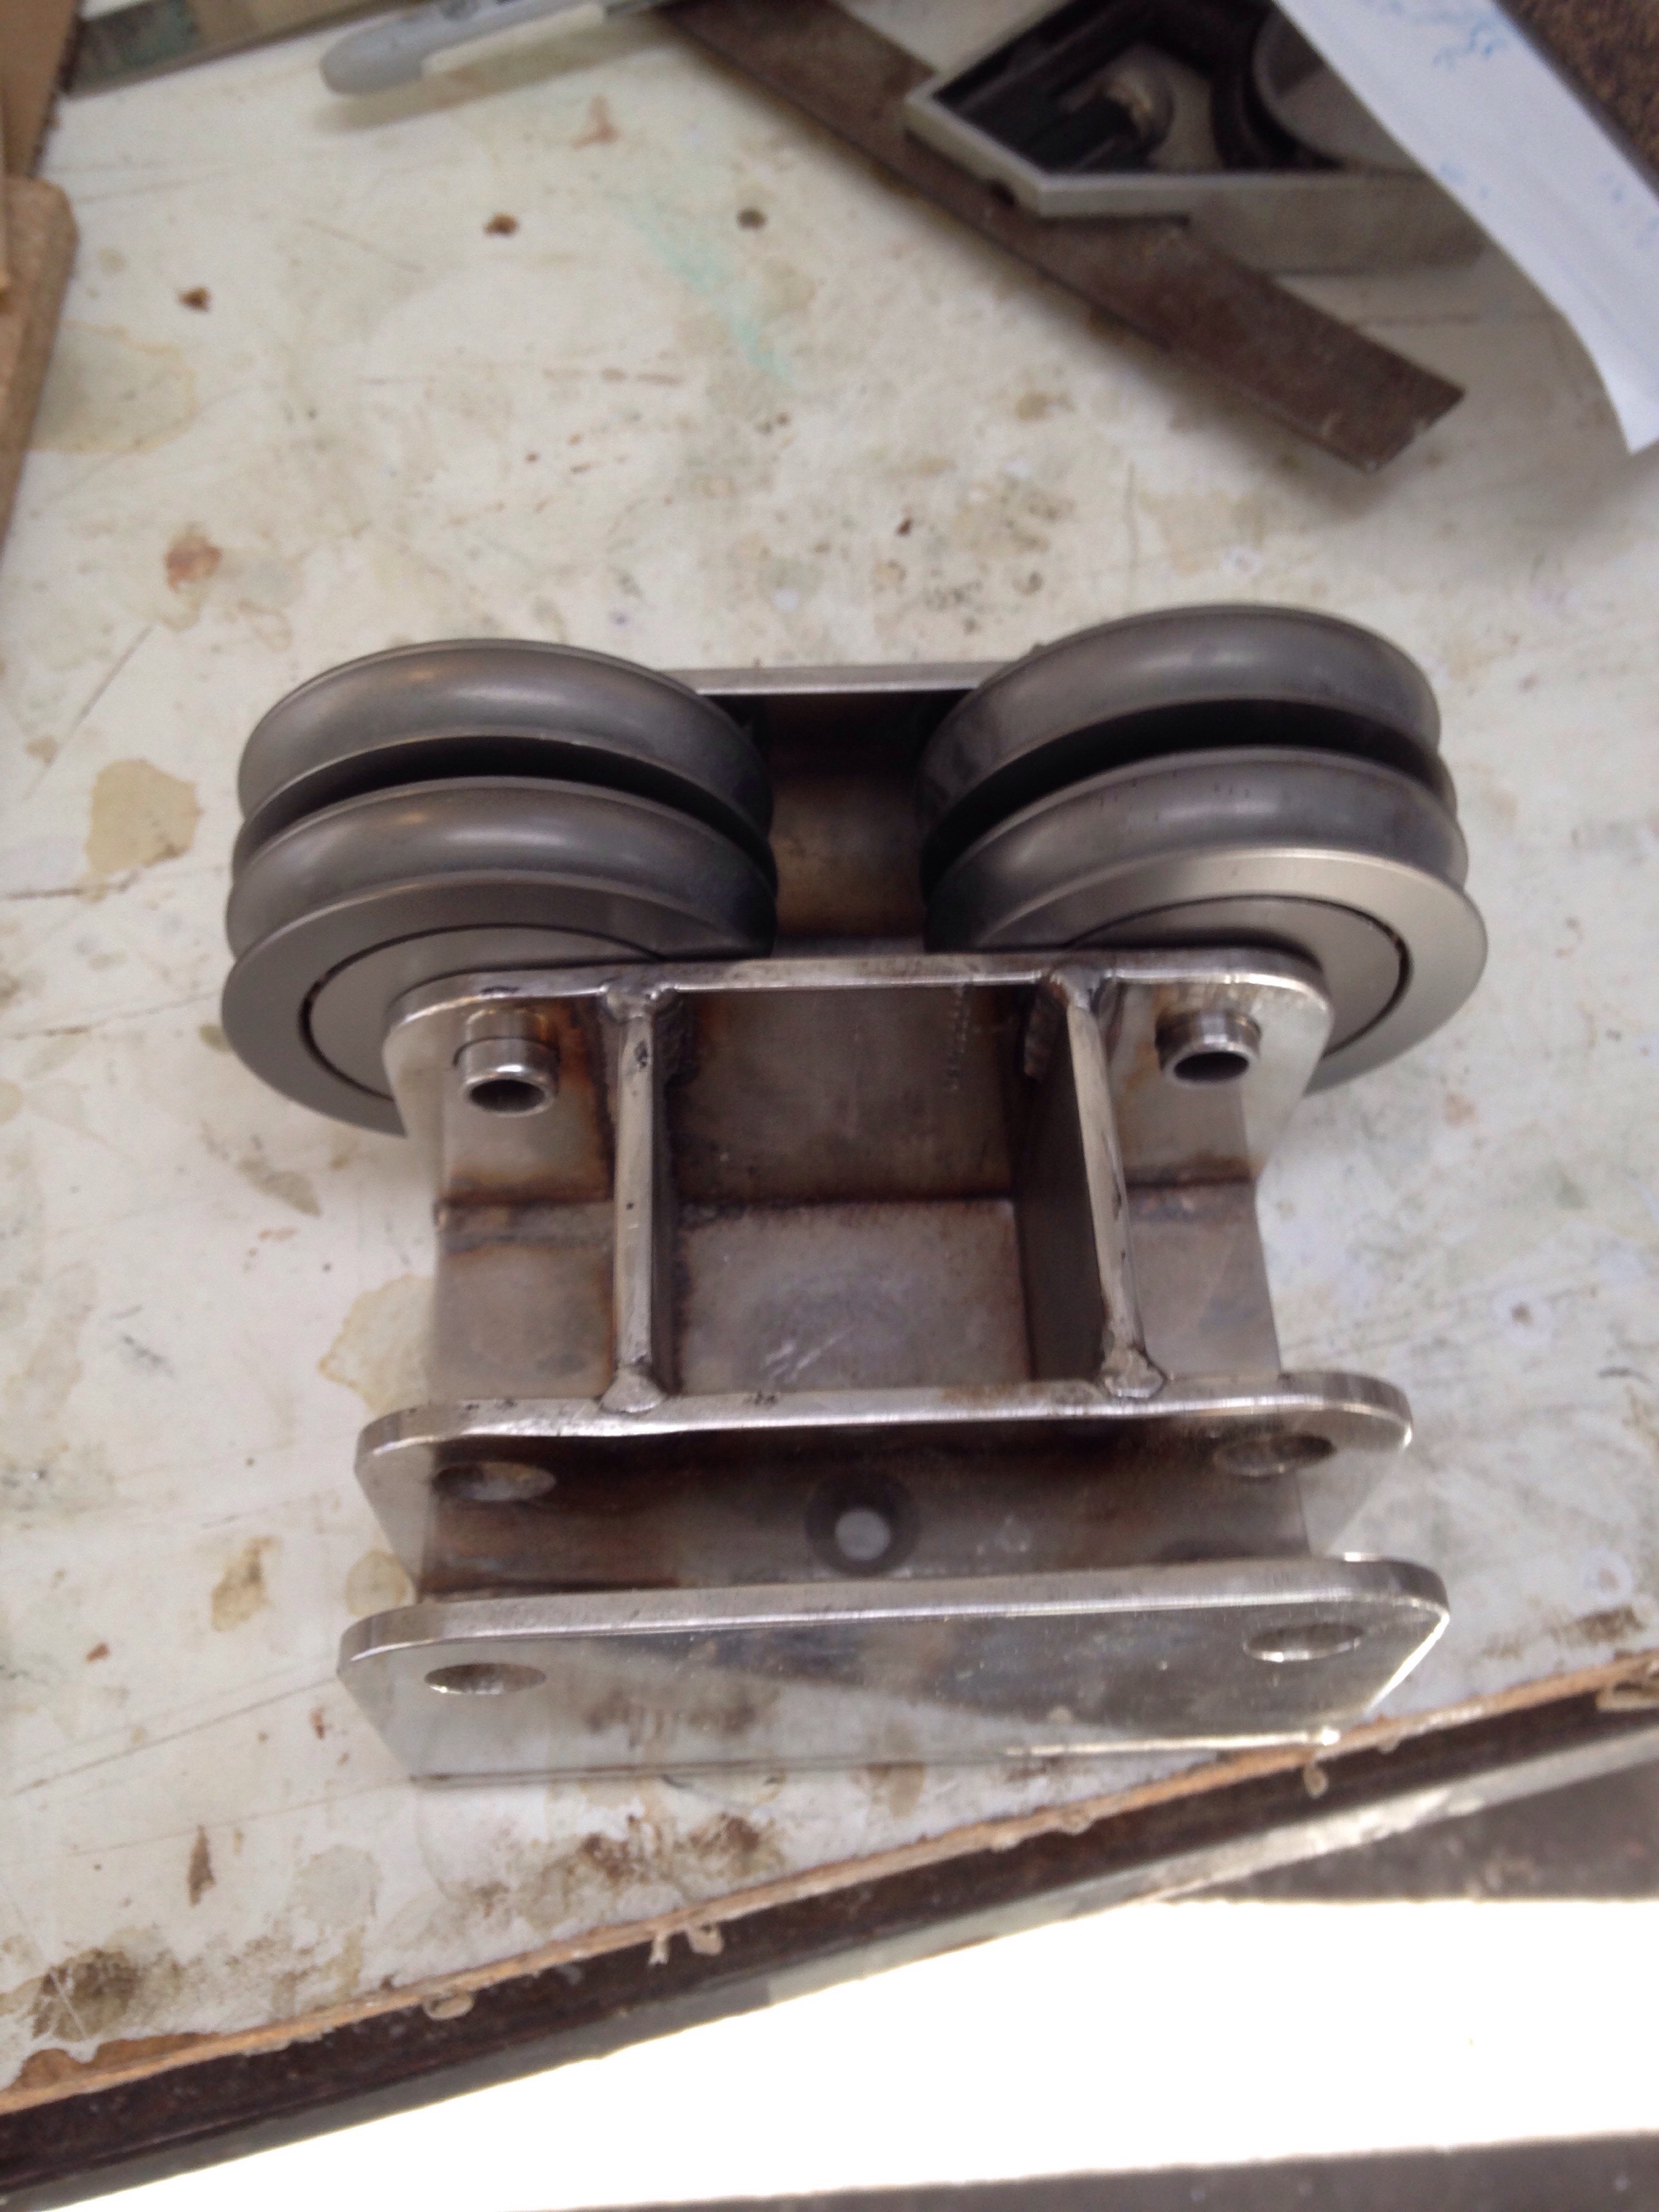
It’s now in the Bay Marine metal shop getting upgraded. There will be five attachments to the mast, instead of the original two.

2) The rudder gudgeon tower was flexing side to side, and actually began cracking some of its fiberglass laminations.

I motored up to Napa Marina early Sunday morning, and today began the strip down for a reinforcement rebuild. This all happened because we didn’t build the kick up box in Farrier’s plans. He wrote that a permanent bond to the hull of the gudgeons base is fine, but the plans didn’t detail it. I didn’t consider the lateral forces the rudder would transmit to those gudgeons, thus the flexing (BAD) post. For any F39 builders, I’ll say that the lamination schedule in the plans is INSUFFICIENT for these side loads. Please feel free to write /discuss this, as sadly there’s no Ian Farrier to question to anymore. In the coming days we’ll see how this fix goes.

3) the emergency escape hatch was forced OPEN by the short chop waves some time during that blast reach Tuesday. As the wind subsided past Angel Island, the boat felt sluggish so I went below to look around. Holy Shit, the damn hatch was open and waves had been firehosing in. It screwed up the new fridge (yet to diagnose), soaked the aft cabin and generally brought somewhere in range of 50/100 gallons aboard. Thank goodness it was (like the 2017 mast), very close to our marina. Wednesday was written off for boat cleanup. Salt water got everywhere. Yuck.

The hatch was purchased by Howard the hull builder and I had checked it off the list as done seven years ago. But looking closely at it now, it’s dangerously misused as a hull-side hatch. Should only be a light duty cabin top install. The two plastic legs barely grab the frame. It’s gotta go. Skateaway Designs provided us the drawing for a proper ocean safety hatch, and I’ll be relieved to NOT see the water racing by anymore. That stuff is cute for watching fishies in a pretty anchorage, but No Thanks at 20kts and nasty weather. Over the weekend i started making carbon and foam parts.

The square piece will get bonded to the hull where the old glass hatch was. There will be an outer door that’s flush with the outside of the hull, and an inner door panel facing into the cabin. Kieth, that third photo down shows you the perfectly flat stopper ring that will take the neoprene for the outer door panel. Pretty happy how that’s looking.

PS – the stack of triangles is a teaser of some new shaping for the rudder gudgeons tower.

So this is Ravenswing’s third haulout since her marvelous launch day 3 years ago. Today we tried out the rail trolley at Napa.

The veteran manager Tom hadn’t done a Multihull backwards there. It was a little tricky but now the stern work area is easy to get to. Otherwise it would have been WAY up in the air hanging over the steep ramp.

I’m telling you guys – seriously – I spent a few hours looking at everything that makes her go, asking the gods, “what else”? needs attention before heading south. We’ve redone the daggerboard, rudder, Autopilot, mast, boom, tweaked sails and running rigging, continue to refine electrical and plumbing. I think these current three reach the end of my worry list. But go ahead, anyone who’s sailed with us, do you have any concerns for us? Let’s get all the bugs out now.

Dodging the rain

Yea! We’re finally getting some decent rain in Northern California. I have no problem bowing to nature in this case, even if it does screw up boat projects. In between showers, we’re getting stuff done. Here are the main sheet block pads done, installed with some leftover windshield super tape.

The starboard main cabin ports got their new polycarbonate pieces. This is 1″ Very High Bond 3M tape, then Sika 295 black sealant around the outside edge. 
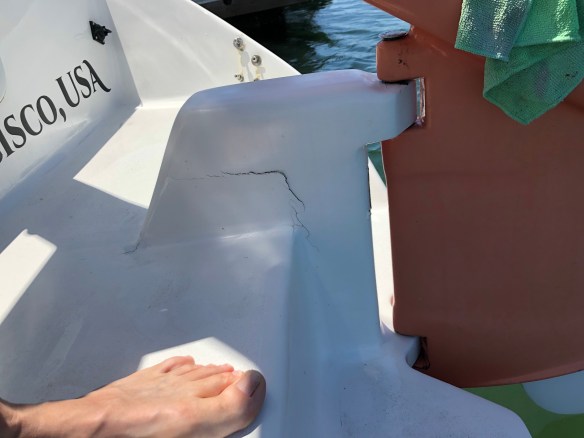
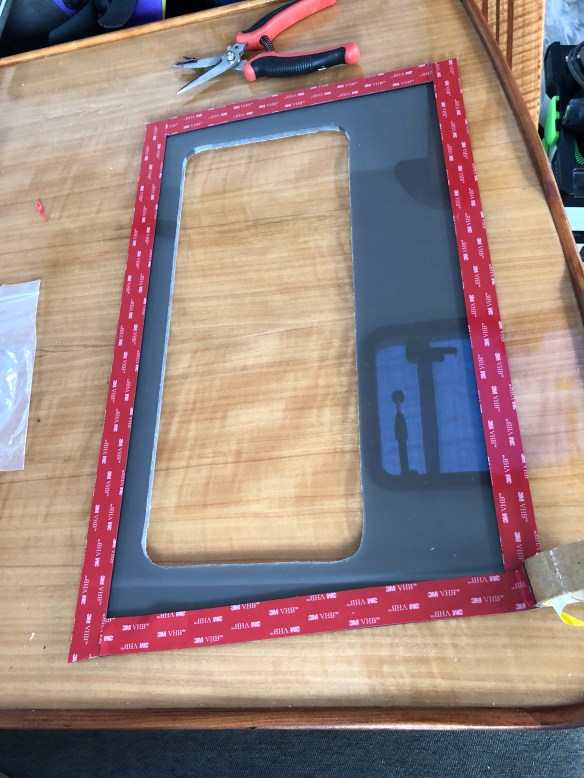
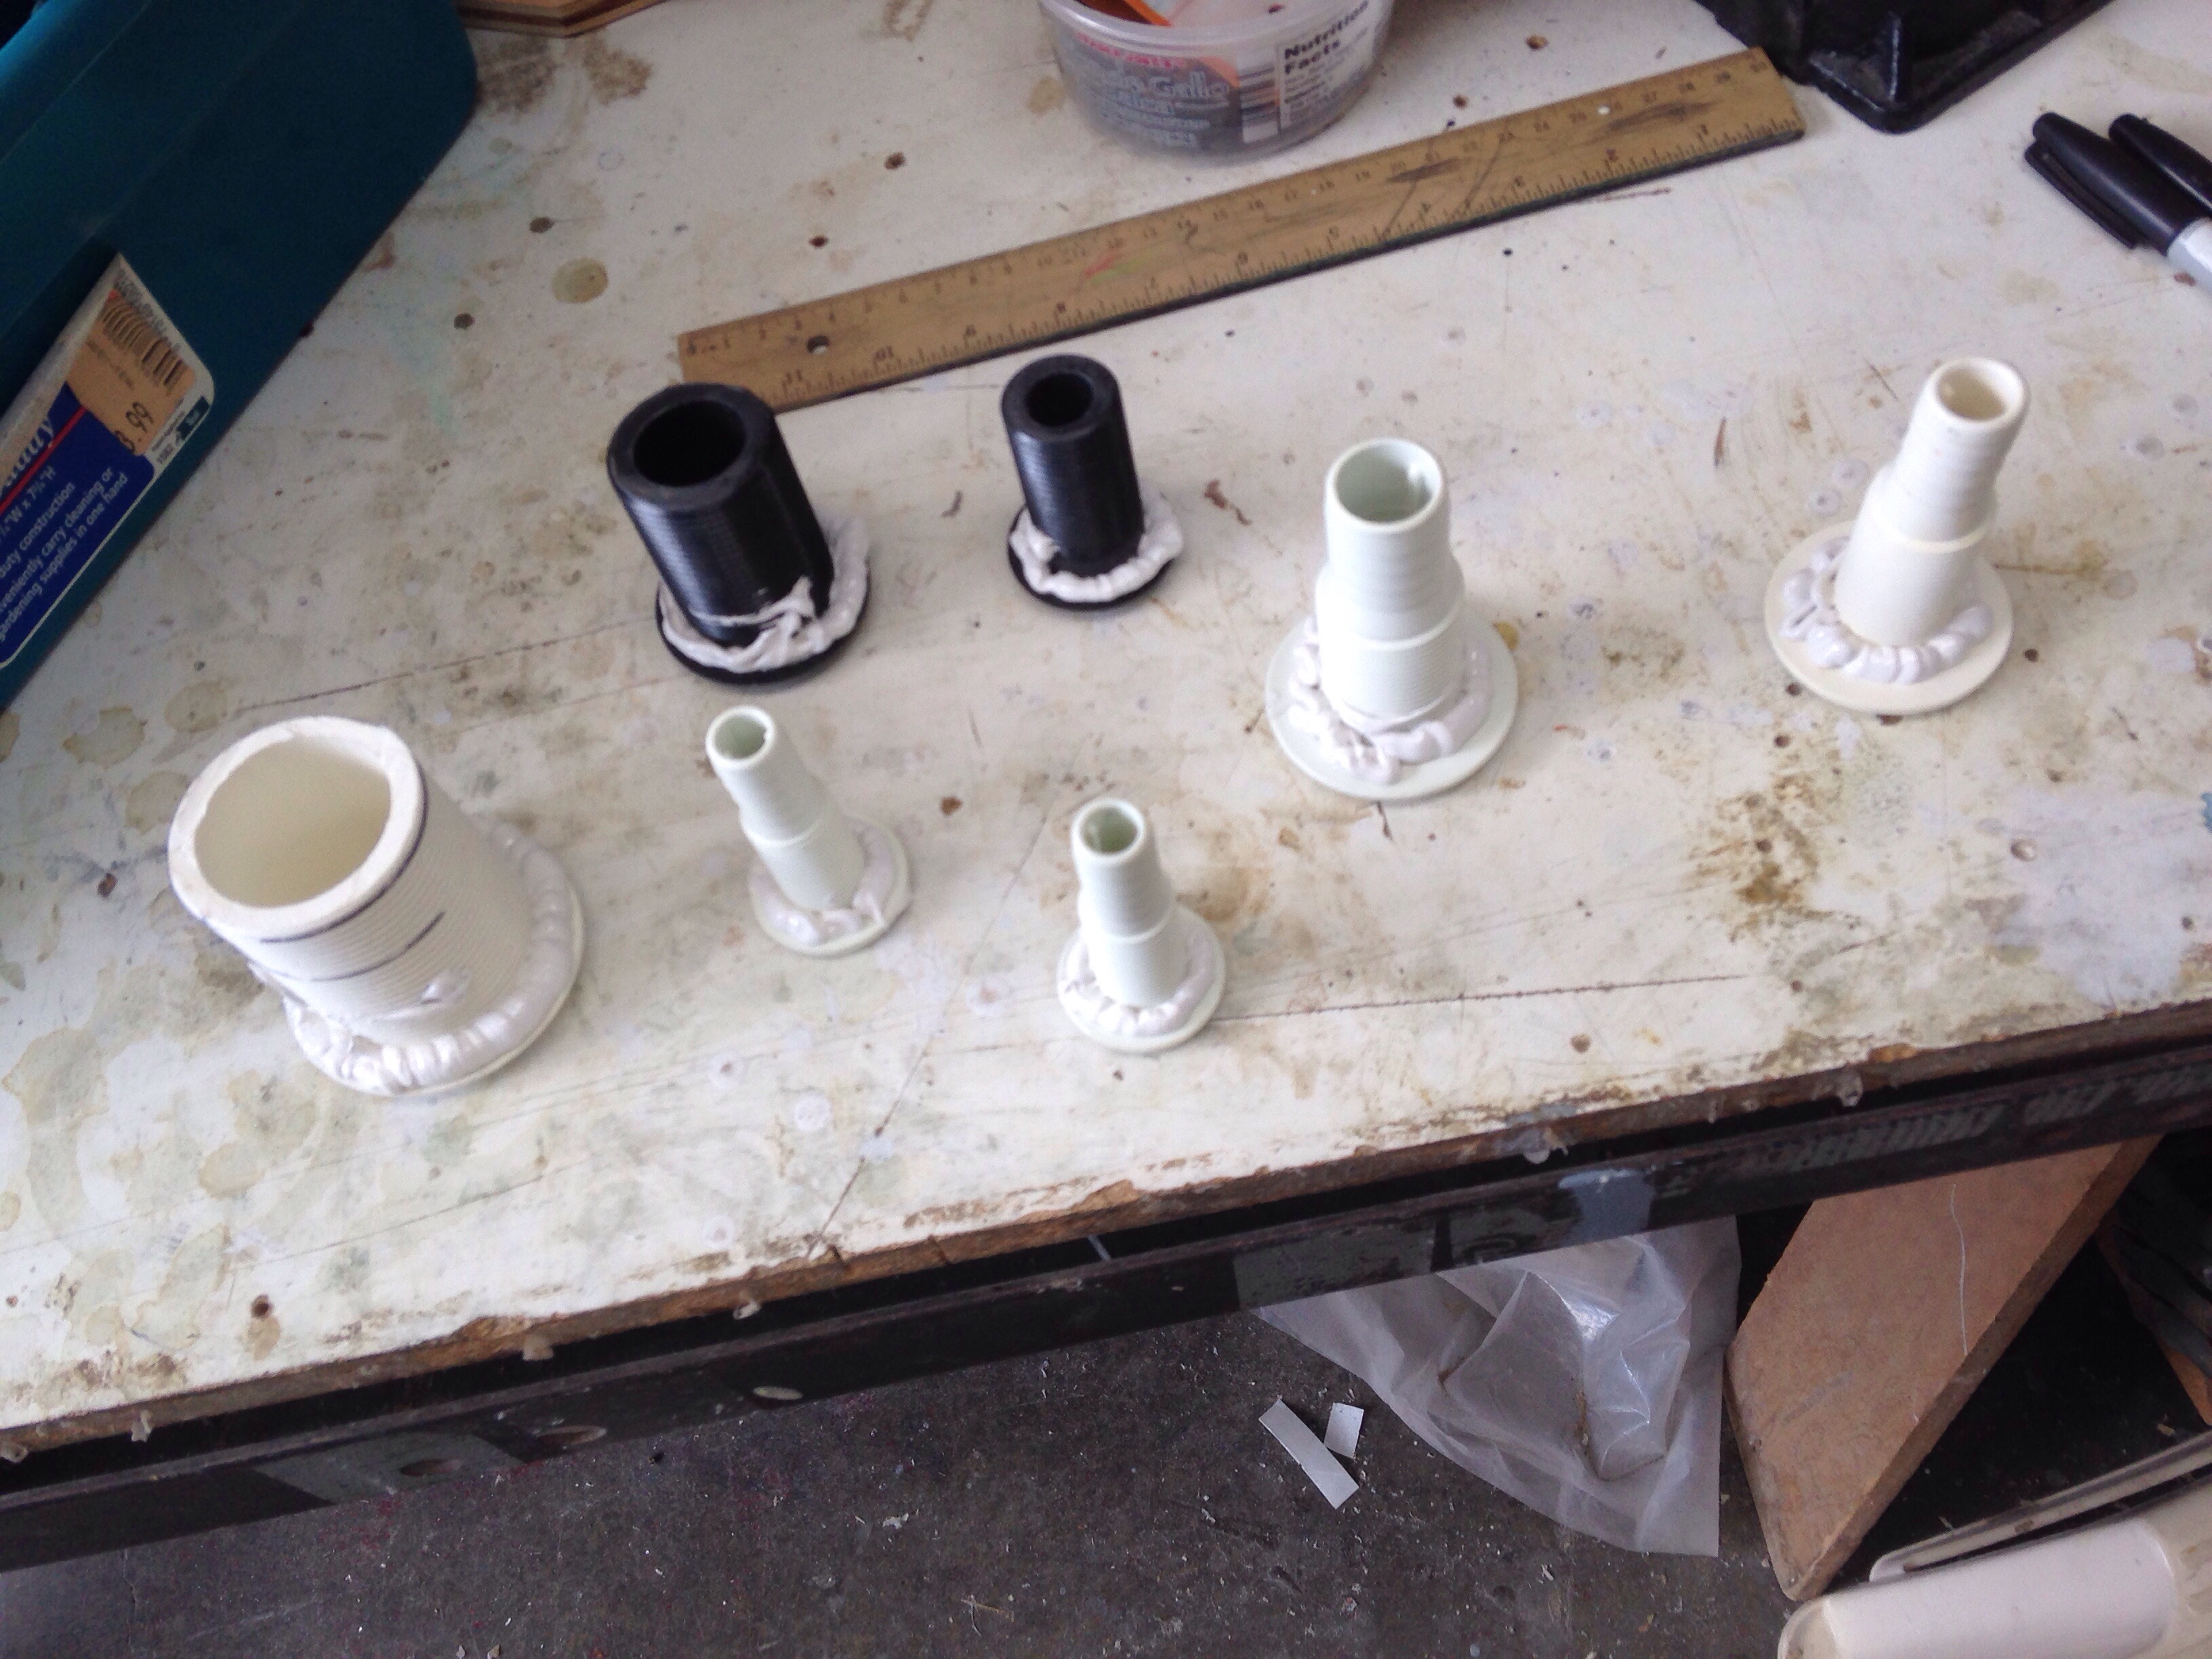
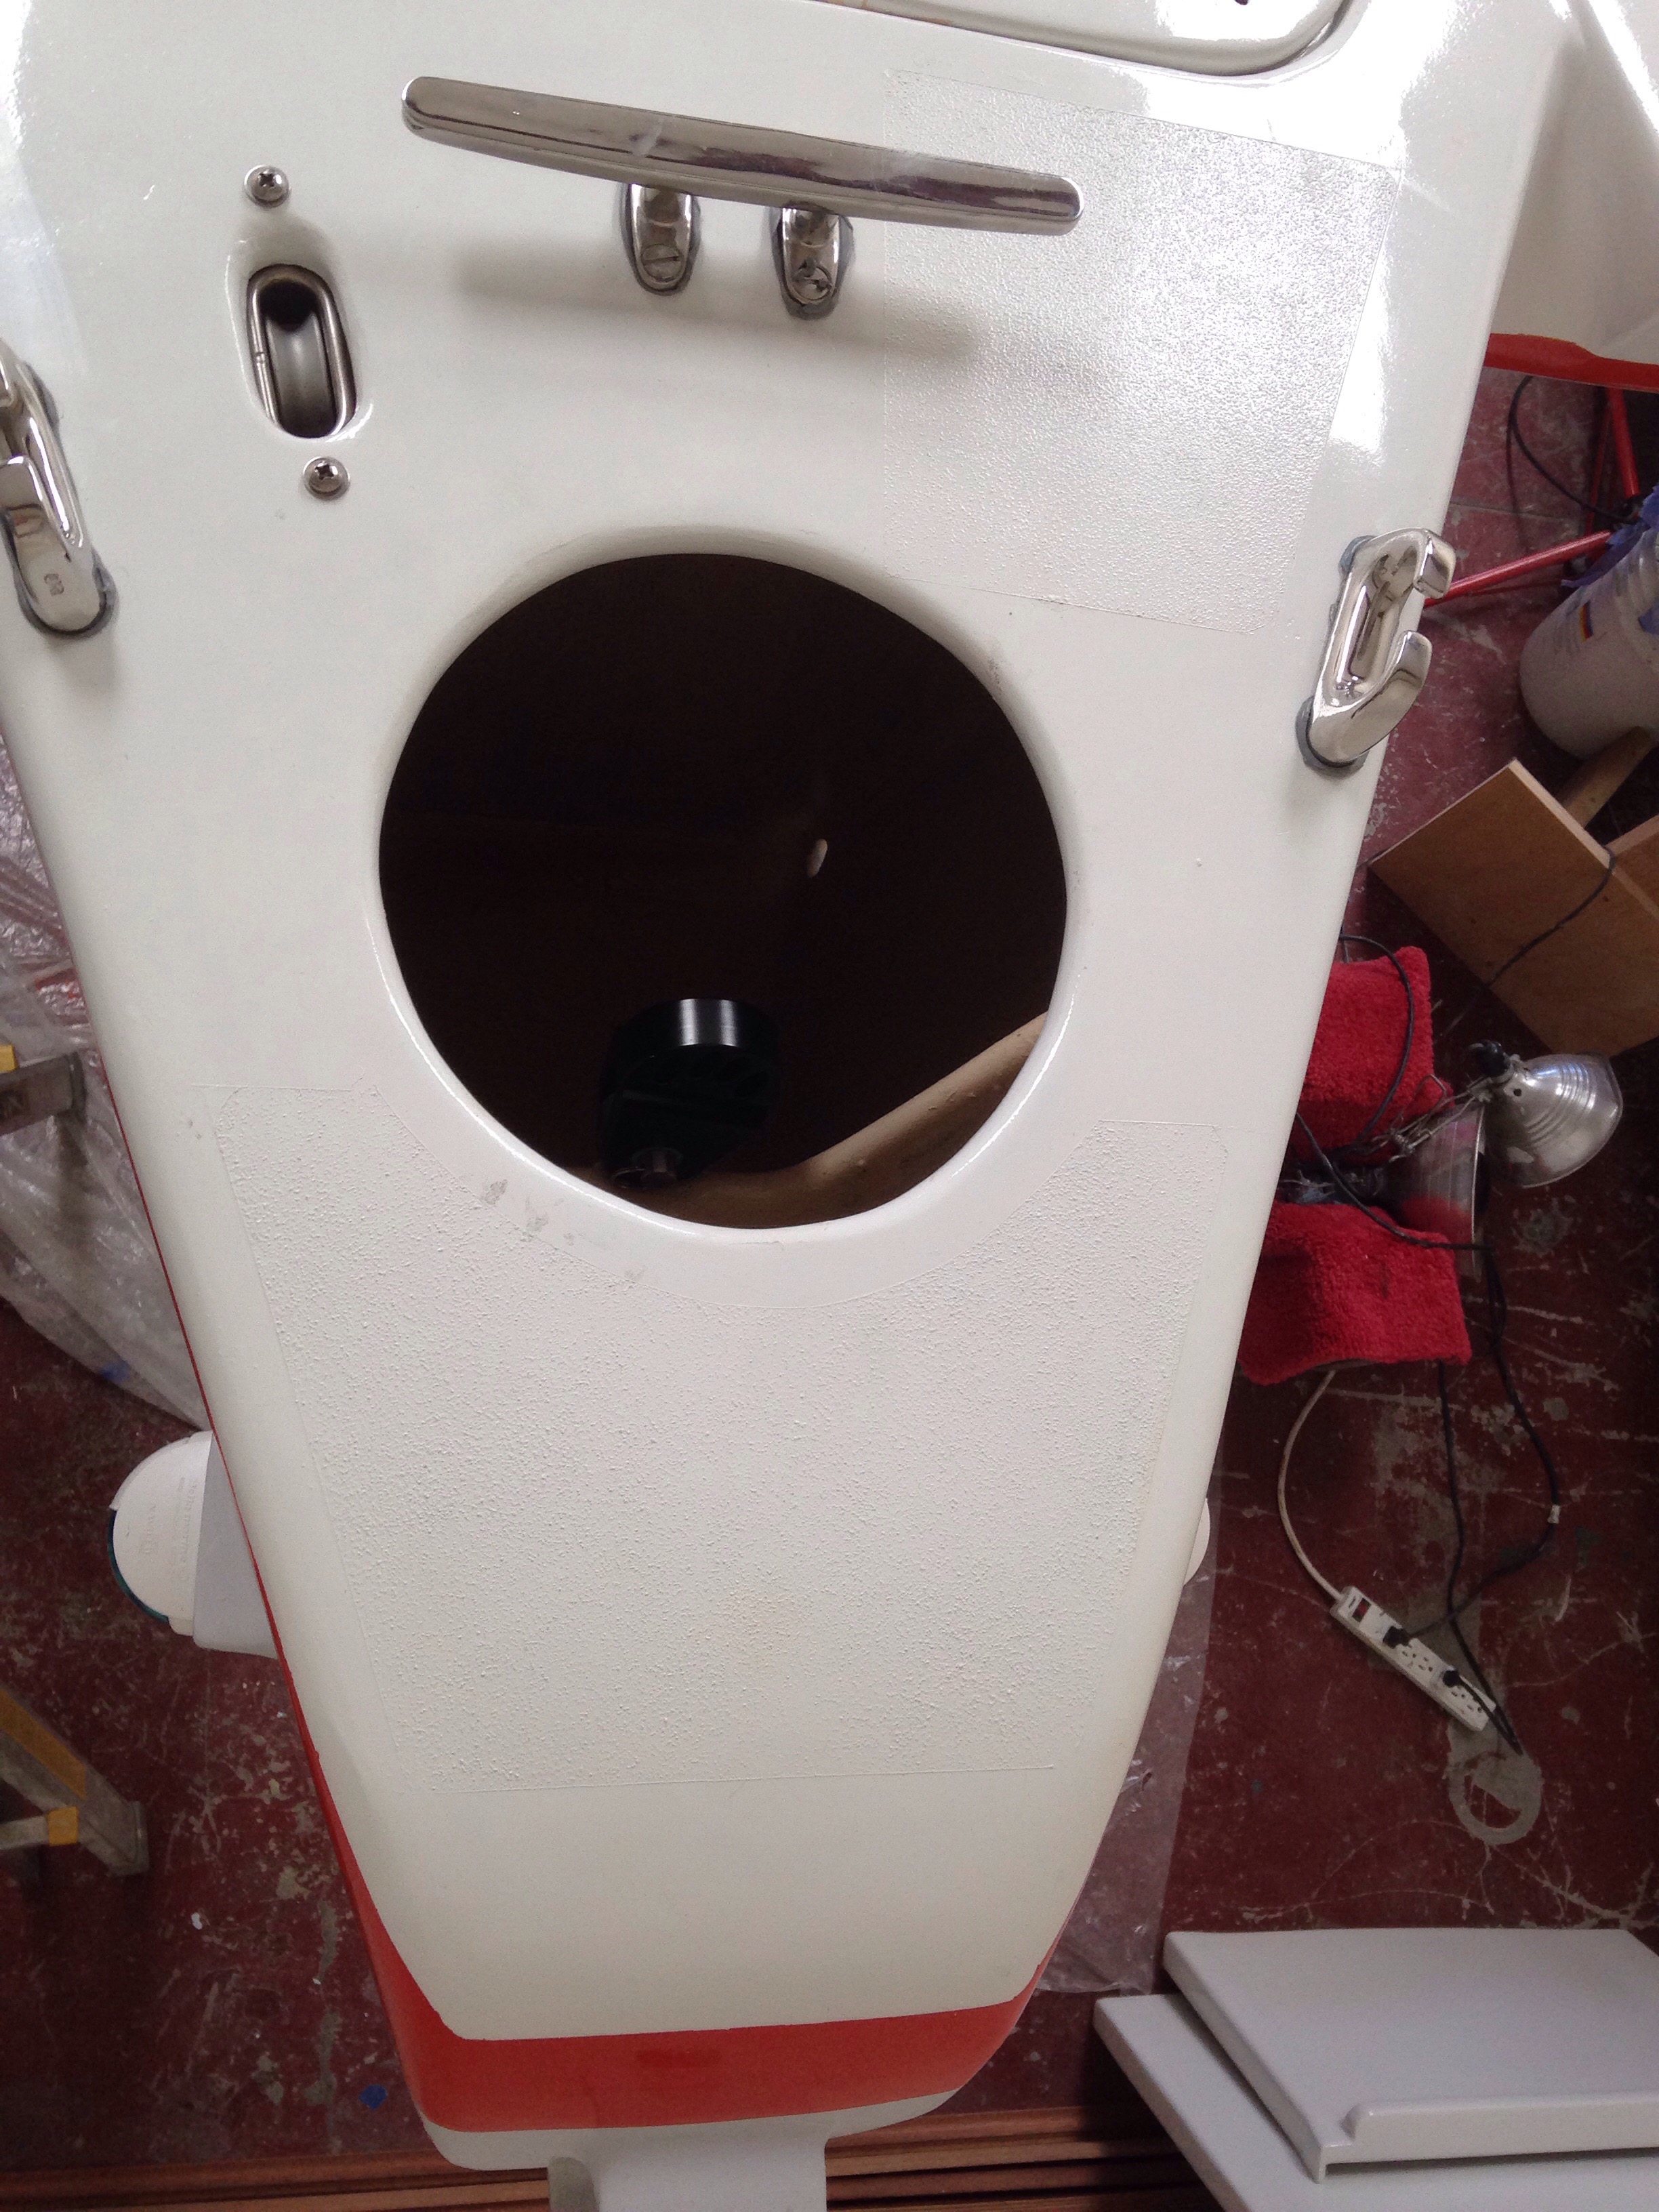
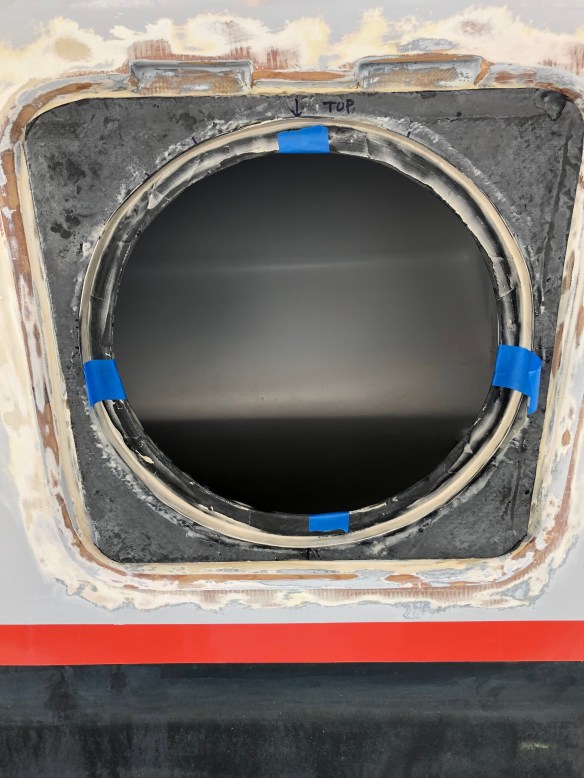
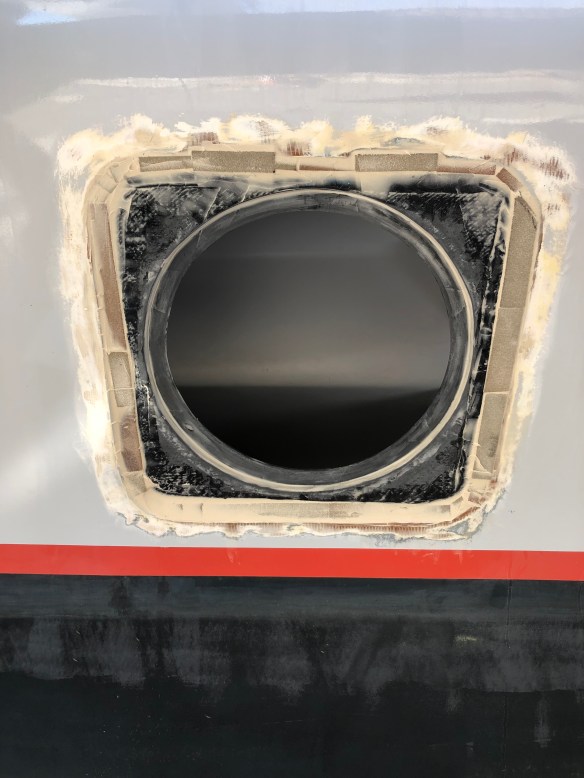
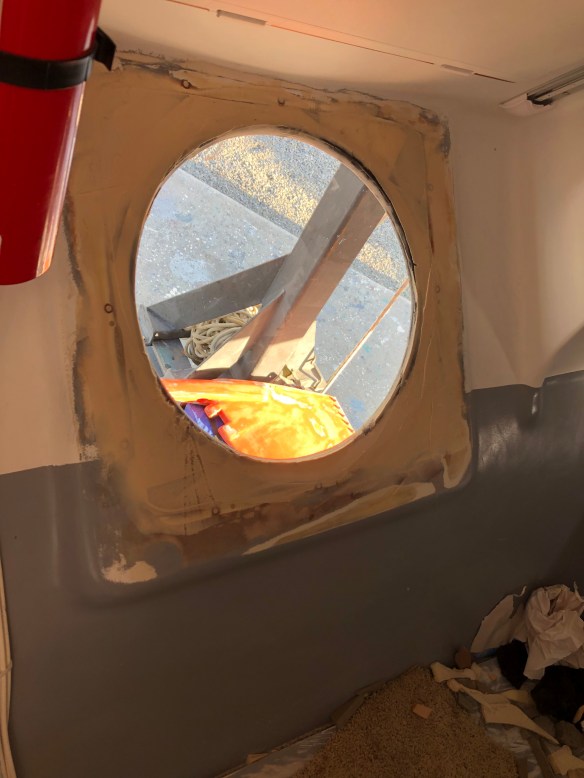
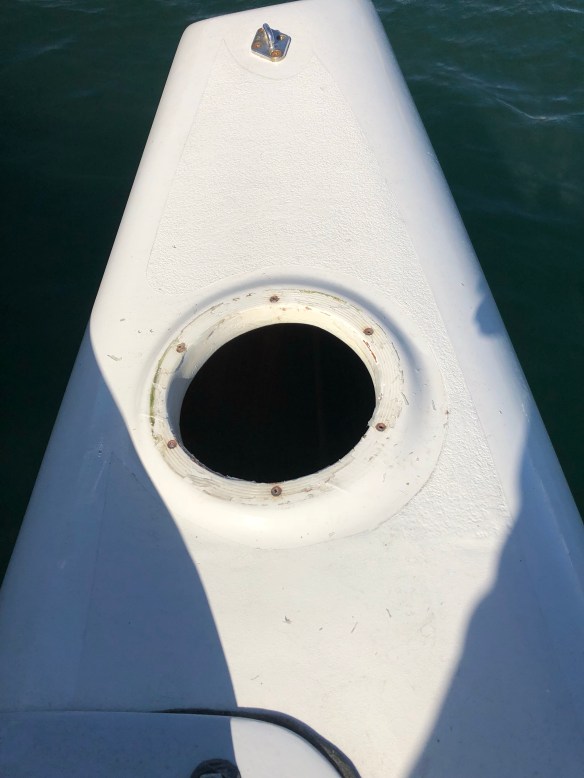
the center one with the big cutout gets a ‘floating’ Lewmar opening port reinstalled next time I go down to the marina.

RickWS, I think we’re ready for baking, as 1.5yrs after launch I’ve finally hooked up the propane. The locker was built into/under the cockpit lazarette, and it sticks down into the equipment room alongside the freezer box. For service, it needed an overboard vapor drain, an electrical pass thru for the tank on/off solenoid, and one for the gas line.

Just need to fill the tank on that next drive to the marina and test it all out. Jeanne is on boat-strike until we can boil water for afternoon tea.

Also completed are those watertight Armstrong inspection hatch covers. First a look at the 10″ ones on the float bows.

So far in the rain both have stayed bone dry, so this looks to be a good fix on a previously poor execution. Here are shots of the 7″ aft ones; these required grinding away the original built-up bases for the old style ports, plus filling in the bolt holes. I’ll try to remember to get a photo of the one-piece Armstrong plates so this all makes more sense.

This next one may sound insignificant, but there was actually quite a bit of angst and procrastination about how to secure the various cabinet / locker doors. Mainly because I was a bit afraid of hitting the wood veneer doors with a crude hole saw. Proceeded with caution and now the doors latch shut!

Along with hot water, Jeanne would very much appreciate solving the tough ingress/egress issues of this boat. We could hop around the F27, but on this one the beams, coamings and cockpit seats are all much taller. I need to make various transition steps as we’re just not spring chickens anymore. First up is widening the coaming where the aft beams cut in to the hull. This is an odd spot in the boat design, and the F36 we saw in WA last September had these covered. So here goes.

They will be a little tricky, as they can only be permanently affixed to the beam and not the hull, for potential de-mounting of the beams/floats some day. We’ll update as we go on this one.

Meanwhile, back at the ranch… the daggerboard has been sitting under a tarp at home awaiting some reshaping work. We got the paint stripped and cleaned up the little work shed to tackle this, now that the weather is moving towards epoxy-appropriate warmth.

That’s an 8′ board in a 12′ shed, so the belly gets sucked in as one works. I’m pretty sure I built it to plan, but looking at it now, plus advice from the master Shipright during our Nov/Dec haulout, we’re thinking it really needs more bulbous-ness at the leading edge. We made a pattern of the hull pass-thru at the bottom of the boat while it was on land, and that is now transferred to a plywood cutout to use as a “don’t add more than this!” guide in this project. If anyone has ideas on how to attack this such that I work symmetrically, I’m all ears. Step 1 will be blocking and clamping it up on the trailing edge (leading edge pointing to ceiling) to at least be able to 
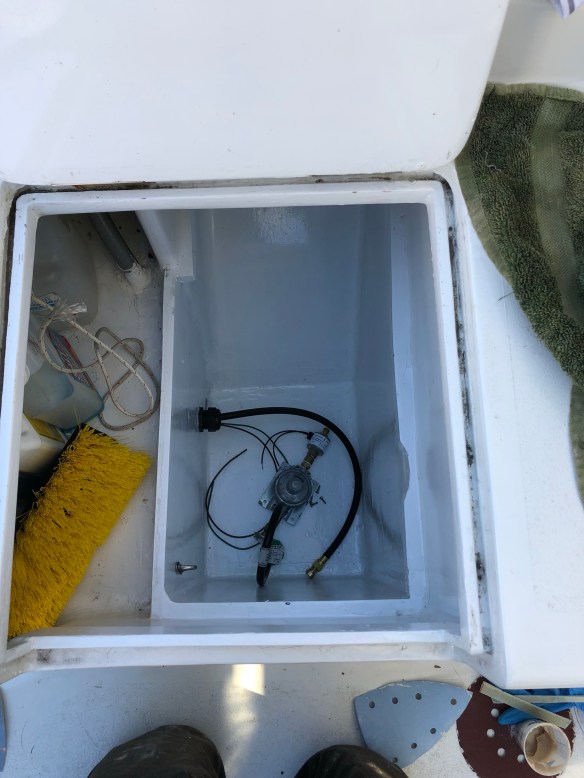
eyeball it. Here goes!

PS. Last time we reported on shore boat #1. Tonight I’m thrilled to report my dear sis Allie joined me on a trip to the SUP shop in Santa Cruz to look at VESL brand paddle boards. She was hooked and bought one while I shopped. Next thing I know, she’d bought mine too! Now that’s family love right there :). We can fight over the paddle board and the loser gets off Ravenswing via the portabote.

At 10′, the SUPs stick out the back of our new pickup’s 5.5′ bed, which of course sounds like an excuse to look for truck racks.

It was a bittersweet goodbye to the amazing diesel X5 bmw, but this Ram with the eco diesel v6 is powerful, comfortable and has averaged 24mpg over 6k miles, half of which were towing a 6,000lb trailer across the country. Yea, that’s my testimonial Fiat-Chrysler. You got this one right.

Fixing stuff

February for Ravenswing so far is about tweaking – some little, some big. And trying not to get frustrated about the hours spent in 2015/16 doing it wrong the first time :)

Fresh water is carried in two 23 gallon Nauta flexible bladder tanks. Spots for each were built along the hull under the dining settee. But we had trouble with the closer-to-the-pump tank collapsing / air-locking as it emptied but didn’t draw well from the forward tank. Also, we flush the toilet with grey water captured in a Plastimo flexible tank from the galley sink. That sink drain has a diverter to choose overboard discharge or grey tank filling. But the spot for the grey tank was cramped, so the toilet pump was not getting a strong rinse water flow. Taking a fresh look at things, the Tank Stack was born this weekend. The saloon/settee table makes it tough to get into the large, deep locker under the forward seat tough to get in. It’s a bit of dead space. At the bottom of that locker was already the forward fresh water tank. Then there are two “levels” of removable shelving above the water tank. We moved the grey tank onto the mid level and the 2nd fresh tank to the top level. Here they are, starting bottom-up…this dance only took four trips to the hardware store for numerous new hose pieces, clamps, etc. Both the fresh water and toilet rinse work really well now. (Hold that thought, soon we’ll have a holding tank fix for your entertainment)

Also this weekend was tackling the starboard main cabin port lights (the incessantly leaking windows). We installed them with Sika 275UV and screws. This was a bad combo and we suffered crazing in the polycarbonate around the screw heads, and condensation issues where larger sections of the window ran over solid sections of the cabinsides. We’ve since learned, or decided anyway, that the modern Very High Bond tapes are sufficient for these port lights. And despite the original intent of sleek-looking faux one-piece glass as seen from the outside of the boat, the new windows will be cut 1″ larger than the holes in the boat, and the whole area will still have the black background. The ‘no fasteners needed’ decision was backed by how well that Sika is holding the original panes. A real bear to get them off! Including actually breaking away fairing/primer/paint in a few spots. 
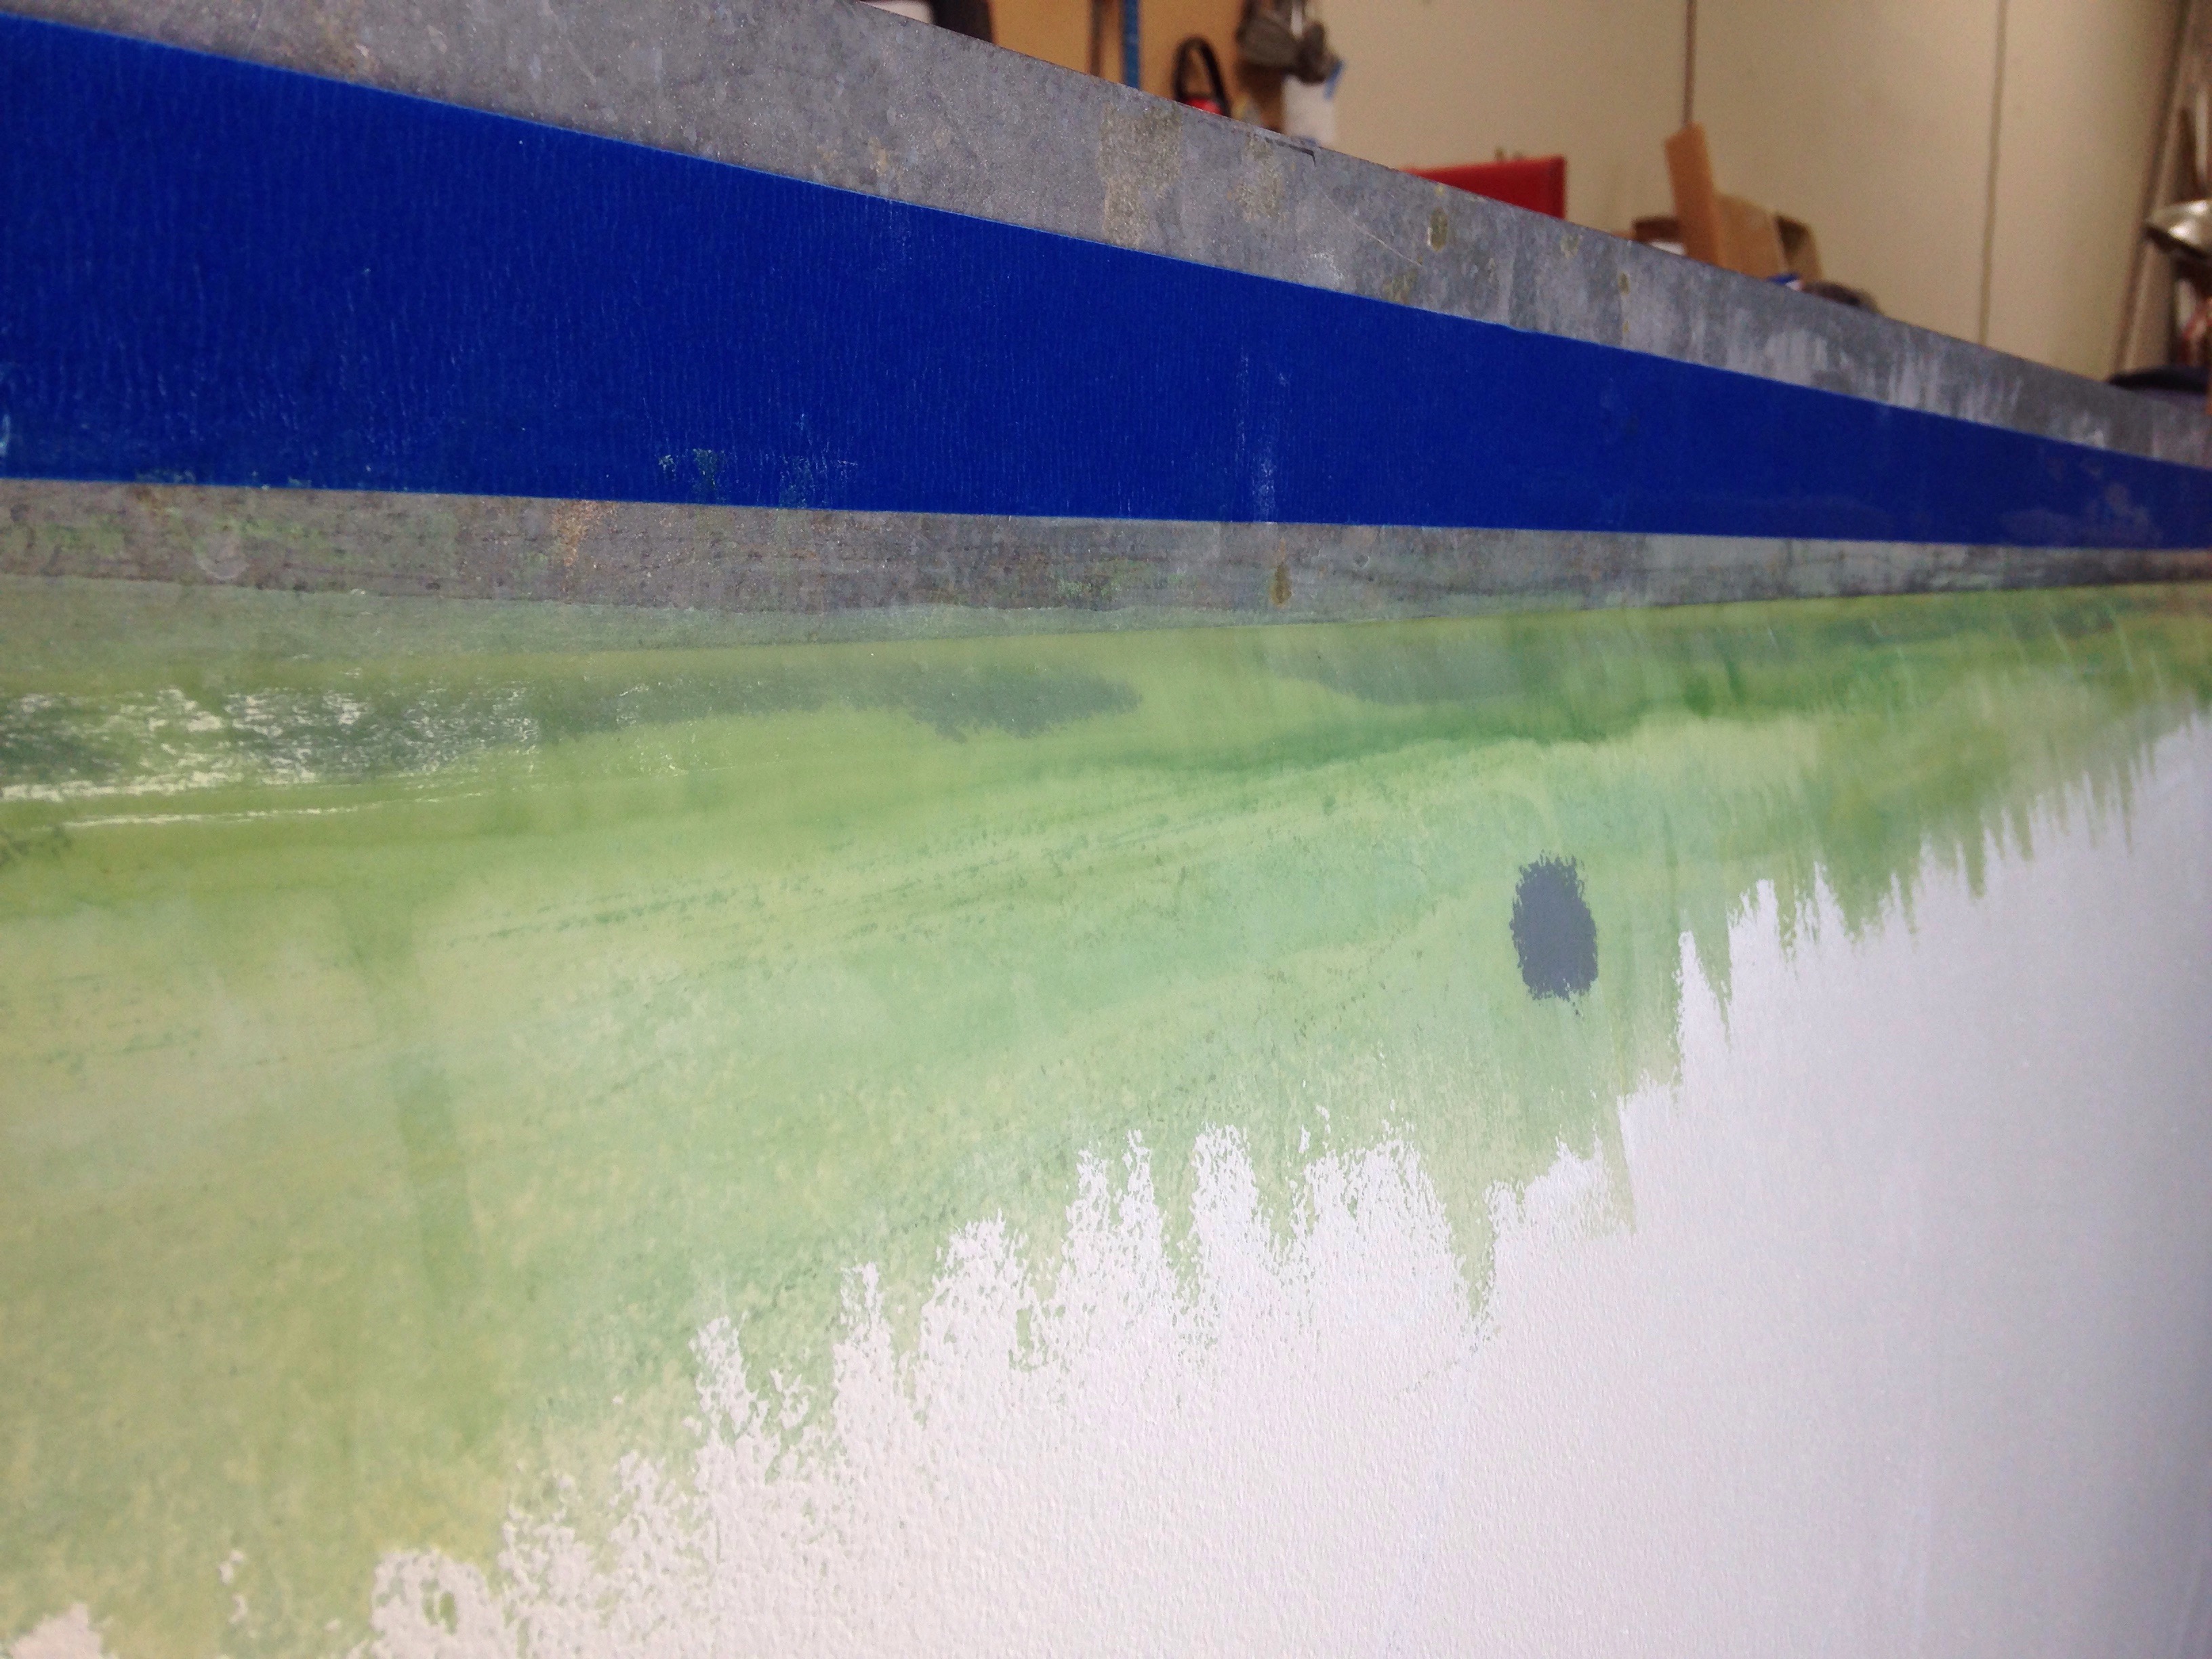
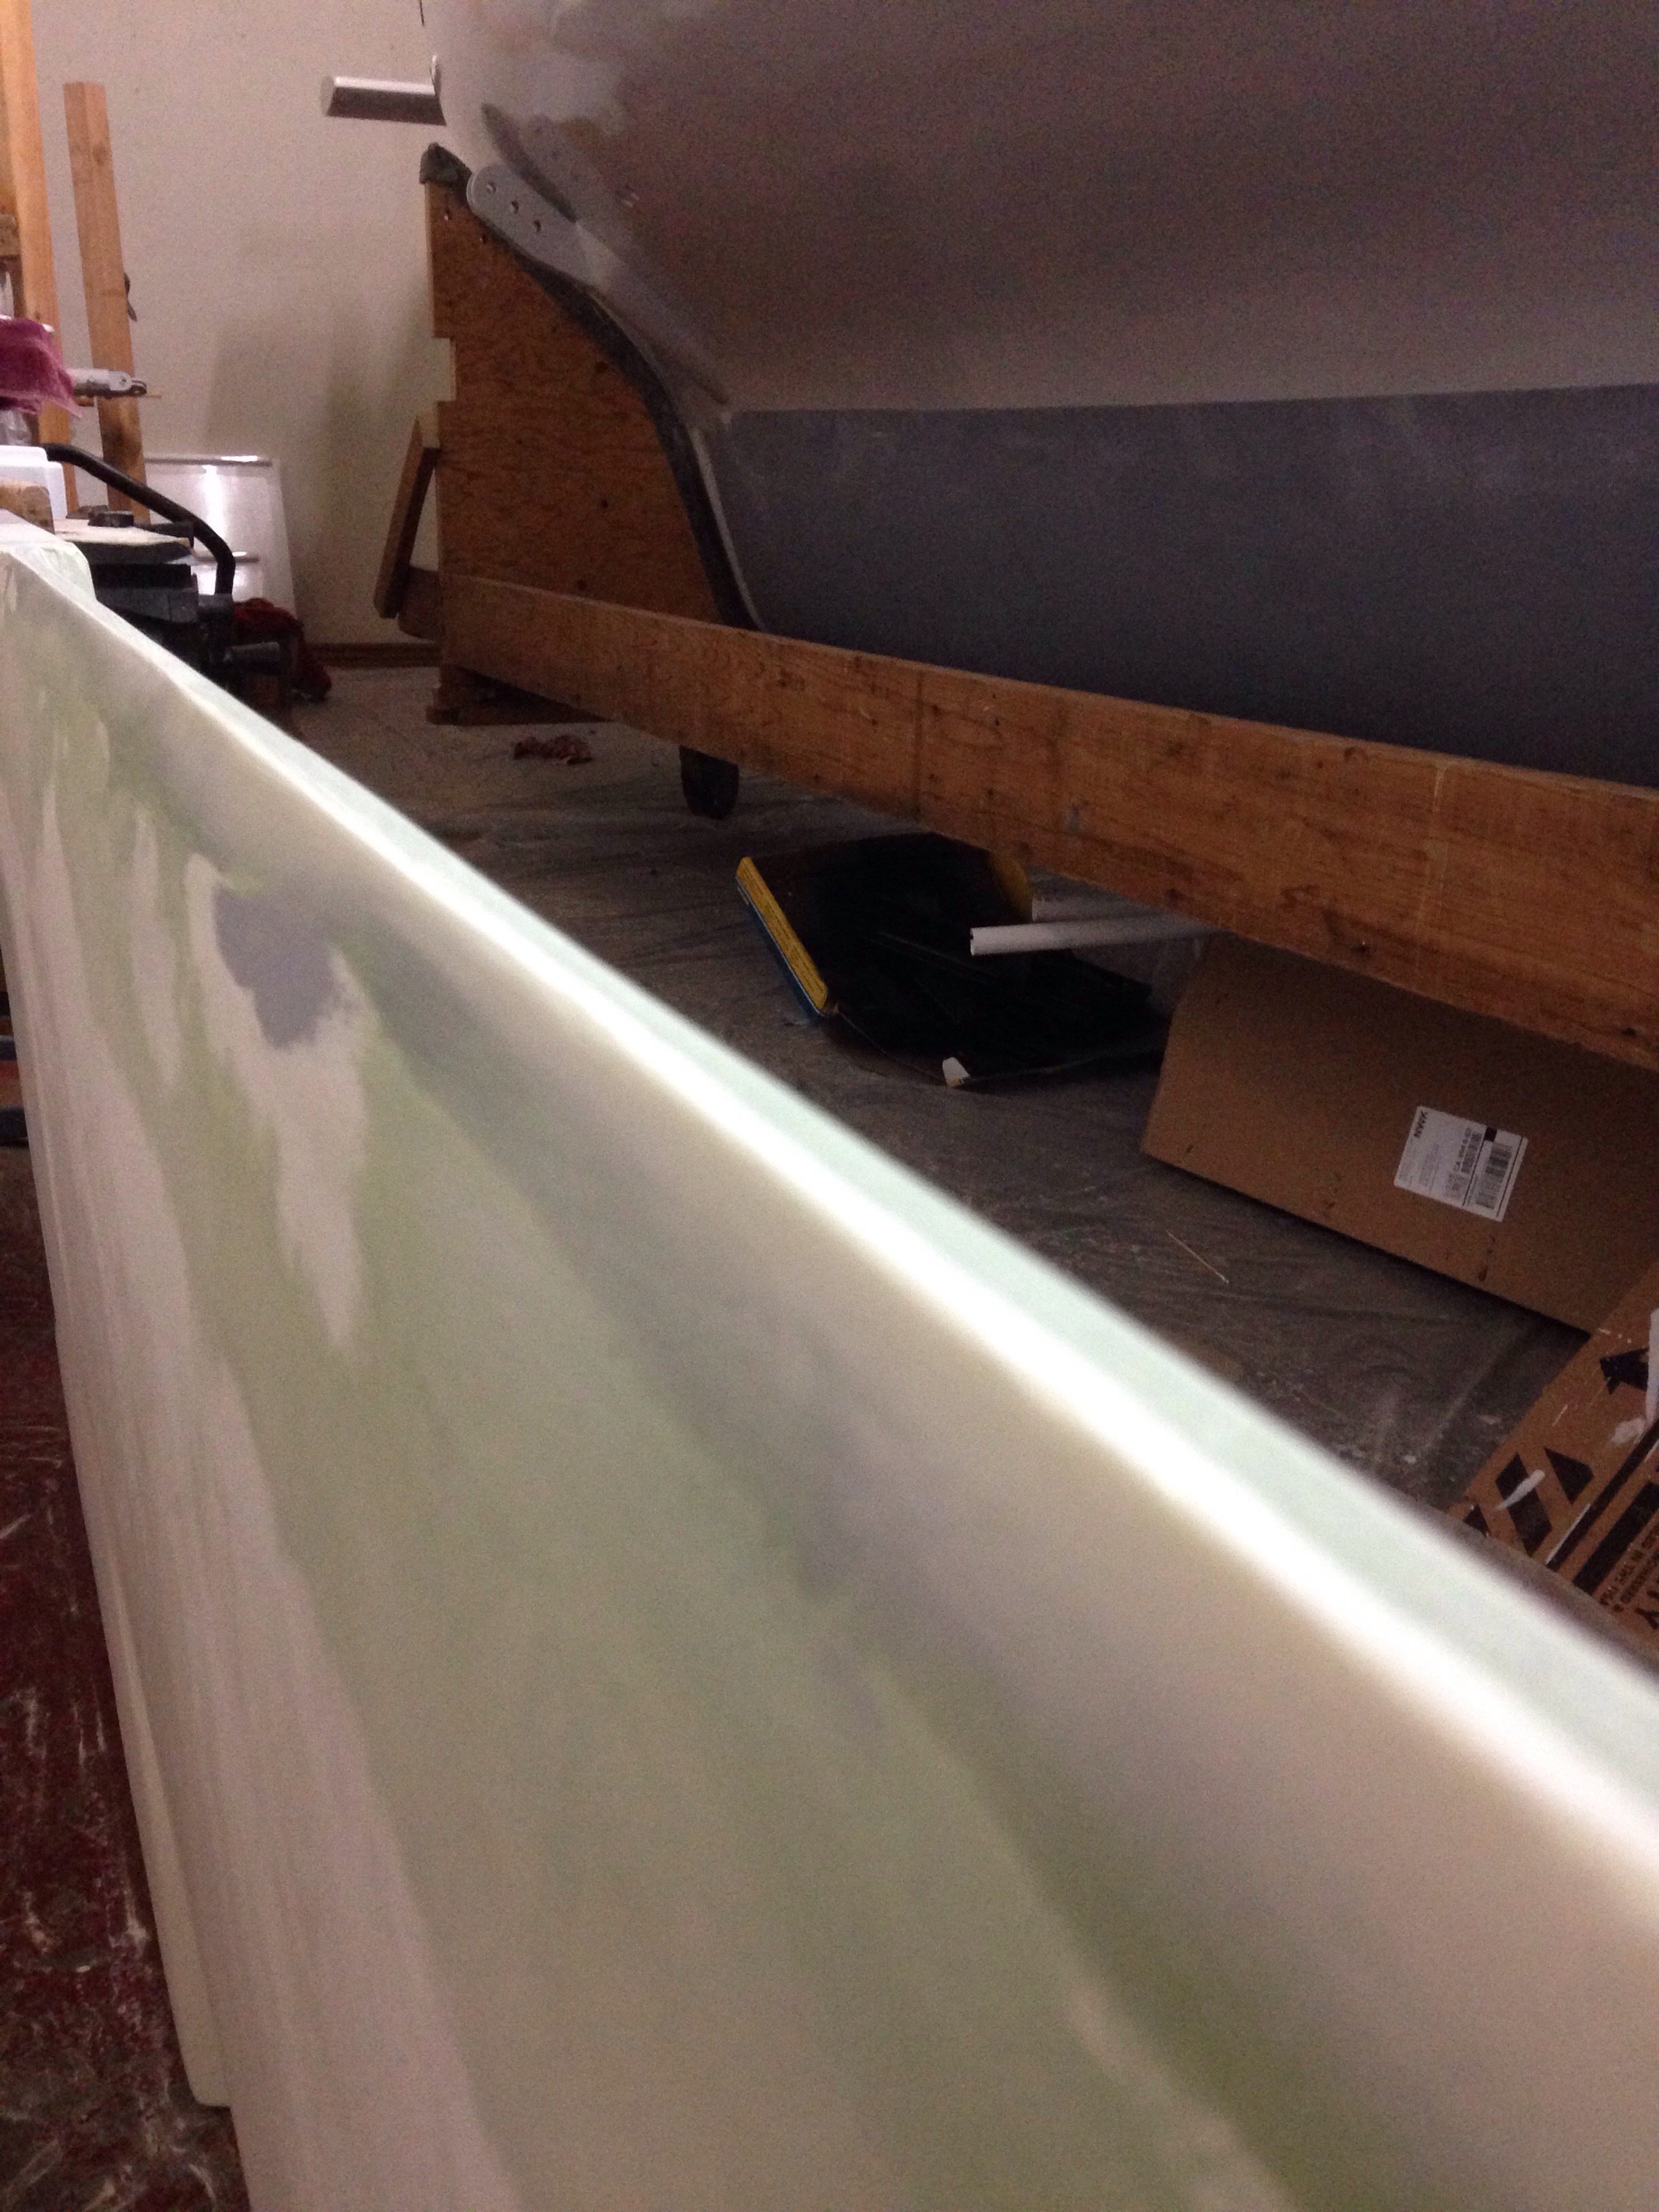
This mess was a couple hours cleanup, including filling the 30+ screw holes, which three years ago had been carefully over drilled from the cedar core and replaced with thickened epoxy. And now we’ve filled those same holes to make them disappear :)
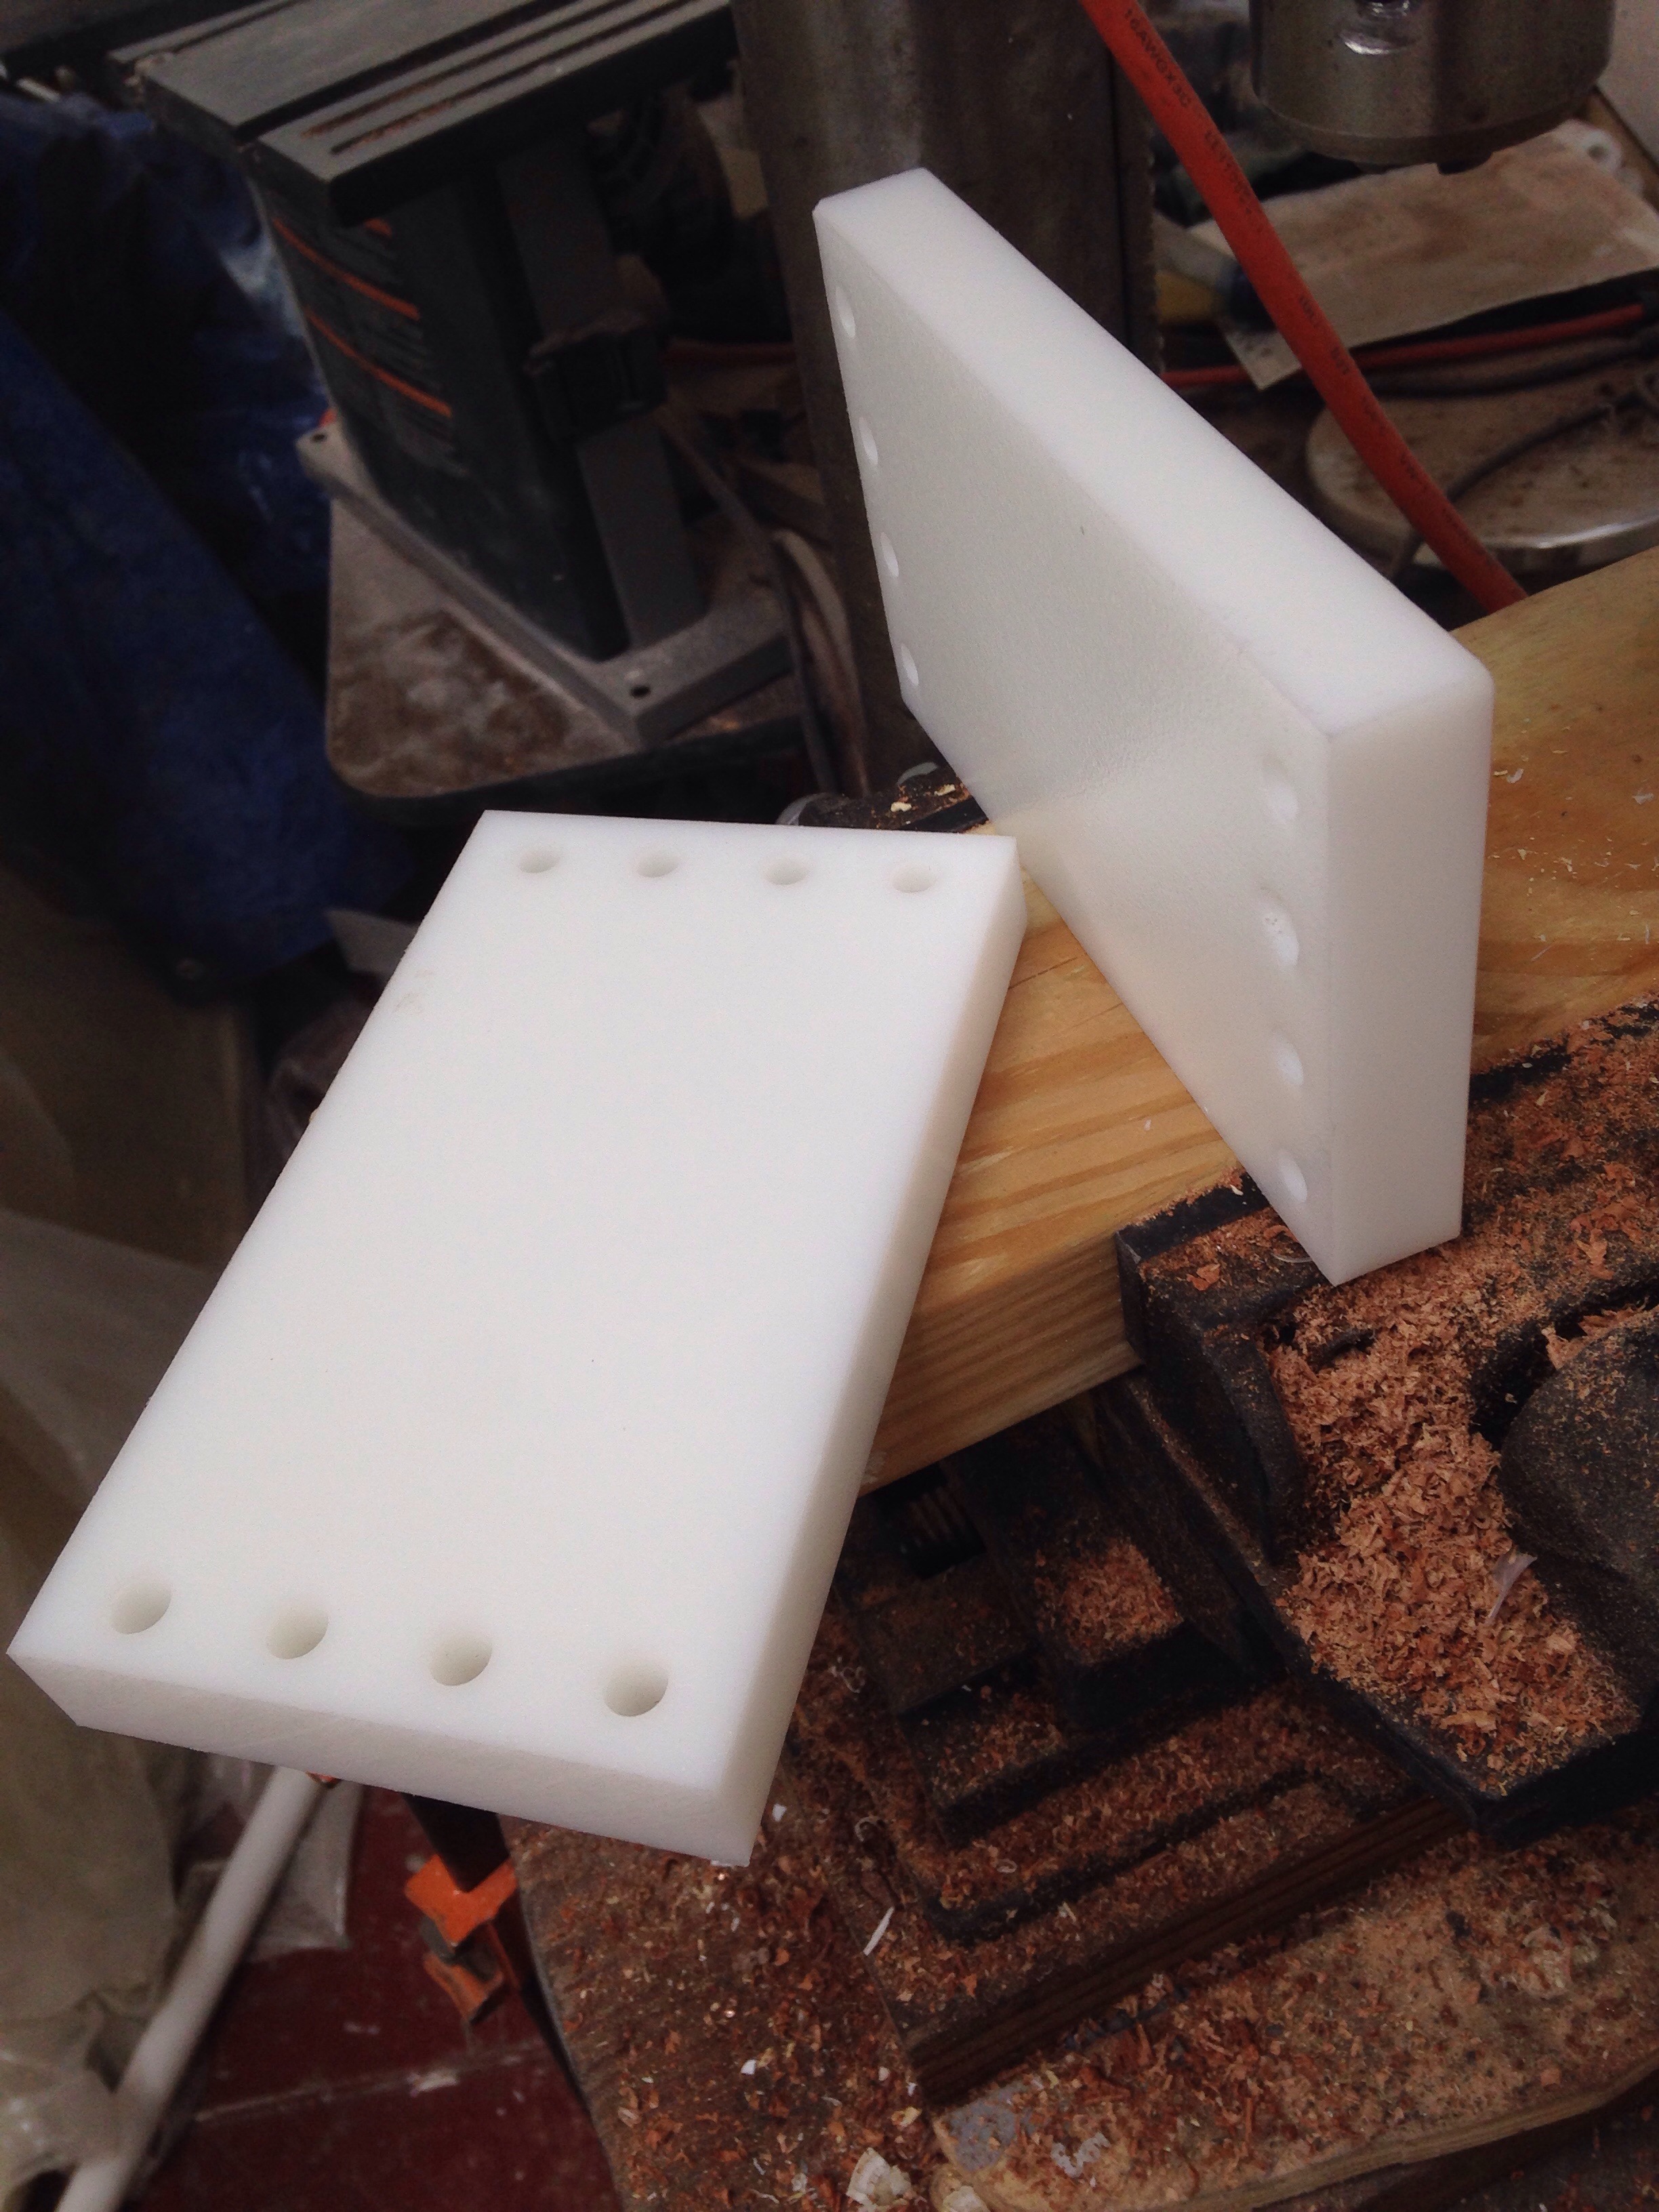
we made paper patterns today and will get them to Tap Plastics when they reopen Tuesday. We made the original set from a 4×8′ sheet of markelon polycarbonate, but this time we’ll pay the pros to use their special saws and routers.

Keith reached our mast builder the other day; bad news is they haven’t started the two masts ahead of ours. Good news is they are geared up to build them concurrently- some efficiencies in assembling – and the owner says he’ll be delivering ours on track this spring. Sure would like to see some carbon being laid out though!

I had a pleasant light-wind sail on RickWS’s Explorer44 tri Round Midnight last week and the conversation has me thinking I need to copy his reefing system. Jimbo knows we struggle getting Ravenswing’s reefing clew under control with that little winch on the boom. I have time to modify the boom and deck right now, so we’re considering running the reefing clews and tacks back to the primary cockpit winches. Need to figure out how to turn the lines from the inboard boom end down towards the deck; how would turning blocks mount? Maybe the new mast rotator arm should be mounted forward of the mast, not aft as it was before…

Fellow plotters and schemers, how would you set up the boom and deck for cockpit-handling of reefing lines on this boat?

State champs!

Gratuitous cross promotion here as we can’t help but shout about niece Molly Carter’s high school varsity lacrosse team winning Northern California state tournament this week. The final game saw frequent scoring, lead changes, many minutes tied, capped with Novato breaking the 9-9 tie literally as time ran out to win the title. Fans rushing the field, dogpile of players, people crying – the whole enchilada. Molly played a lot of minutes as a freshman, so it’s big shoes to fill in the coming years :)
Here with her brother Mack and the champs medal.

20160523-183445.jpg
Back at the shop we had a big weekend of putting stuff together. There are 7 thruhulls; 3 below the waterline and 4 drains for sinks and pumps. First some BoatLife bedding caulk…

20160523-183709.jpg
Press them in, deal with the backing plates and nuts inside, and wipe away the excess goo. Came out fine.

20160523-183814.jpg
The only regret is buying the mushroom head fittings instead of the flush heads. That call was made over a year ago because I was insecure about cutting the 45 degree chamfers. In retrospect it would have been pretty easy. So here’s a tiny bit of robbed speed we’ll suffer.

20160523-184108.jpg
We’re also tackling any last fabrication parts, including this plate inside the cabin that holds the daggerboard down-force turning block inside the dagger trunk. This will get carefully sealed and primed to avoid electrolysis as much as possible.

20160523-184322.jpg

Luis in Lisbon asked about the opening ports. These are Lewmar Flush Mitre #3s:

20160523-184530.jpg

20160523-184549.jpg they don’t really match with the wood trim inside, but we’ll love the ventilation and they look good blending in with the smoked Lexan from the outside. Also, these windows get more obscured by nice fabrics coming. Way to go Jeanne and Leslie for a whole Saturday of magic with foam blocking.

20160523-184824.jpg
Patterns are being made for these pretties…

20160523-184915.jpg
Now that the labor for hardware is done, we’re happy to have invested extra time in making backing plates, cutting individual bolts to fit in to acorn nuts, etc. The trim is looking pretty good according to recent visitors.

20160523-185100.jpg

20160523-185114.jpg
I’ve only ignored Keith’s excellent advice once, which was him saying it’s not worth building a pulpit. I haven’t had good luck with schedules, costs, etc with welders, and since the mast base is out for ransom right now we decided to utilize on hand materials and knock this off the list with labor. It also means we can feel ok about it as an experiment, and modify/change sans-guilt later.
Grabbed some thin-wall (schedule 200) 1″ PVC plus 90degree PVC conduit bends and epoxy putty / light glassed them together. Decided to use the heavy carbon uni we had purchased to make a bow sprit long ago. And the leftover 5oz uni 2″wide roll for spiral hooping around the uni. Then cover it with a light fiberglass sleeve and this nifty shrink-wrap tubing from Soller Composites in New Hampshire (ok, we did spend about $30 on new materials for this project)

20160523-185848.jpg

20160523-185908.jpg

20160523-185925.jpg

20160523-185948.jpg
Here it is part way thru the heat gun process. The film shrinks 2:1, spurring away bubbles and leaving a nice surface.

20160523-190056.jpg

20160523-190112.jpg

20160523-190127.jpg
Because these are working from a 45 degree bend, it was pretty easy to line up the foot cut and site these on the deck.

20160523-194231.jpg

20160523-194254.jpg

20160523-194312.jpg
There is also a cross bar intersecting the forward slope tubes, ahead of the forestay. Along with structure strength, it will catch the lowered furled up reacher.
Tonight we’ll make a sheet of three layer 1708DB that can then be cut in to four of these ‘feet’

20160523-194835.jpg
We’ll show you in a few days how the feet become bolting flanges on to the tubes.
Meanwhile, the daggerboard is getting a bit more shaping love. After applying Coz’s clever guide tool, we realized that the port size was a little flat compared to starboard. Now THAT would have slowed things down. So we’re being careful with this shaping job (that should have been done last year!)

20160523-195203.jpg

If you’re following this story and want to be around at the beginning of the boat’s water life, come on out. The basics are:
Fri June 10: morning: drive beams trailer to Napa then set floats on ground at Napa Sea Ranch (launch site). Deliver mast to Napa Valley Marina (a few hundred yards away). Evening: take empty boat trailer to Santa Rosa and transfer main hull from shop dolly to boat trailer.
Sat June 11: drive main hull to SeaRanch. Lift and bolt beams to hull, on trailer. Lift floats up to waiting beams. Install engine and nets. Expect at least all day.
Sun June 12: finish boat assembly items. Go to marina and dress the mast (halyards, diamonds, shrouds, etc)
Launch the boat!
Monday June 13: motor to Napa Marina for mast stepping.
Go sailing, God willing.

Let us know if you want to details/directions/a role in the process.

The new boat will first dock at Charlie’s house on the Napa River, and within a few days make its way into the bay for a summer dock. Probably in Richmond but we’re still poking around. There will be MANY “sea trials” sailing days and you’re all welcome to come along. We’ll be posting times via this blog, so sign in for updates if you haven’t already.

18 days to go. And the list is still long. I have an evening of tanks and hoses to go join together!

T – minus three weeks!

Ok friends, start your countdown timers ’cause we’re setting the launch date for the June 11/12 weekend. Many self imposed deadlines have come and gone over the past four years, but today we can actually see the finish line. While y’all are grilling, drinking, riding, sailing, etc for Memorial Day weekend, we’ll be hitting this punch list hard.

20160518-224539.jpg That’s the list on the shop white board, and of course there’s another dozen or so items in the margins of the little orange notebook the builder carries around :) (eg fix the flat tire on the trailer holding the beams out in the driveway)

All deck hardware is just about buttoned up now. About an hour more of securing a few more bolts to go. Ventilation should be good inside, with three deck hatches, the two companionways, a dorade up front, two opening ports in the main cabin, two in the bow, and three in the aft cabin.

20160518-225148.jpg

20160518-225218.jpg

20160518-225255.jpg

20160518-225319.jpg

The all-stainless steel purchasing for sailing hardware has Jeanne appreciating the “boat bling” look. All this stuff cost about like buying decent gold and diamonds, but hopefully the enjoyment per hour is well spent on the sea side of the equation.

20160518-225647.jpg

20160518-225710.jpg

20160518-225737.jpg

Last year we wrote about concerns of the captive-pin mast base, especially after seeing the same design as our mast’s step having cracked on the Contour34 tri. Recall the Keith at Skateaway set us up with a receiver cup at the bottom of the mast. Yesterday we finally tackled designing and building a replacement mast step. Farrier’s F39 plan isn’t quite right because he has the halyards on either side of the receiver ball, while we built our mast for them to exit just aft of the ball. So we used Farrier’s load solving but did some shape changing. Things were a bit tricky because the deck slopes about seven degrees off level and we want the ball to sit close to level with the water. Here’s the one we’re replacing. Missing in the photo is a high density plastic insert carved with a cylinder to accept the round steel pin from the mast. Note the old piece is stainless steel.

20160518-230529.jpg
So first on paper, then mocked up in wood. The plywood chunk at the left represents the deck slope.

20160518-230630.jpg
Next was sharp blades on the chop saw and table saw to cut shapes and make the 7 degree bevels needed. Ouch, $125 for about 2-1/2 sq feet of 1/2″ and 3/8″ 6061 aluminum.

20160518-230830.jpg
Took about three hours last night to cut and sand/grind everything in prep for the welder this evening.

20160518-230939.jpg

20160518-230956.jpg
The welding shop was happy to get things properly prepped, with 1:1 scale drawing and a wood go-by mockup. We had left the proper 1/4″ fillet weld spaces at the seams – overall not bad for first time amateurs. Then the casually noted, yea we can do this in two hours; that’ll be $280, sir. After that it’s a stop at the anodizer, and this will be a $500+ part even though we designed it and cut it all out. Geez.

The bow area got its last big job, the forestay installation. Thanks again to Colligo for custom cutting this in titanium. Kind of a pity it’s hidden down in the hole. Keith will note the nice big ring nut to anchor the jib tack adjuster :)

20160518-231624.jpg

20160518-231700.jpg

20160518-231714.jpg

The bottom paint isn’t on yet because the thru hulls aren’t installed because one had to be special ordered from Forespar, etc (see how this works?), and we don’t want to mix up bottom paint until the daggerboard is also prepped. Last winter recall the America’s Cup foils building vet Cozmo pointed out the flaws in my dagger leading edge (“you know that sag will be slow, Carter” has been haunting for months ). He instructed on setting up a straight edge and re-fairing. Here goes: first see the problem gap.

20160518-232213.jpg next we filled that void.

20160518-232252.jpg
And got the leading edge of the board back to a straight line up and down.

20160518-232345.jpg

20160518-232413.jpg
A quick phone call with the foil master tonight confirmed the next step is to make a careful wooden shaping jig cut from a proper foil leading edge shape (have that shape in the Farrier full size plans). He said we only need to worry about getting the right leading edge rounding, and a properly symmetric first three or so inches shape flowing back. So the jig can be short-legged, not pulled all the way down these very large daggerboard sides. A few more hours this week to go.

All the hardware backing plates are pretty woods inside – more photos next time- but anything outside is plastics. This 3/4″ high density stock from Tap machines very easily to make spacers under the rope clutches.

20160518-233317.jpg
This is the stuff we’re doing each evening now as the push to finish the list heats up. Very excited for Saturday when Jeanne and Leslie measure all the seating areas and map out the cushion foam we’ve been squirreling away for a couple years :). Curtains begin this week too. Yea!