Final Thrash

Holy cow, it’s hard prepping the boat for ocean voyaging while also finishing building the thing! We’re extremely motivated by the thought that the tools will only grow farther away with every coming sailing day this fall. So now is the moment to finish those little bits!

Counter space is small and the stove is used only minutes a day. So here’s a new rough carbon crap catcher.

Need more cubbies for the little stuff. This encloses the back part of the chart table.

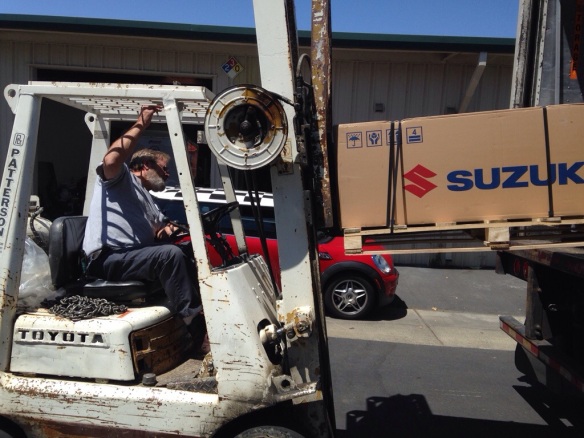
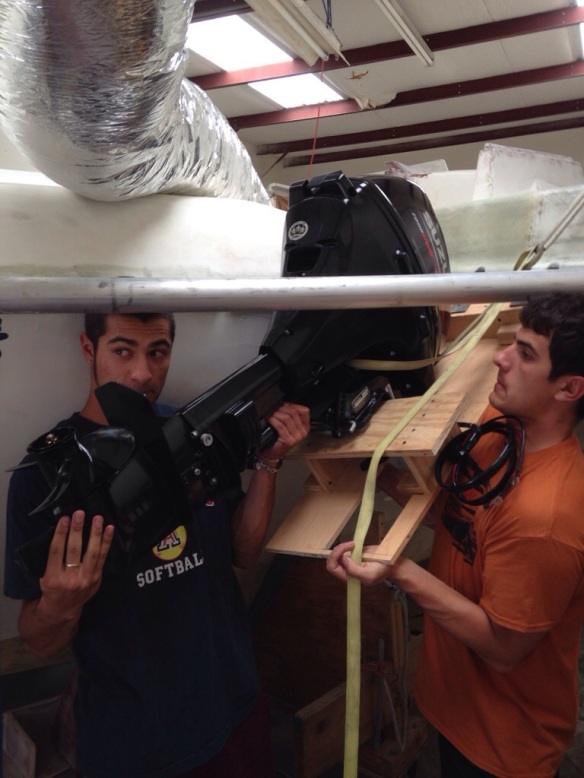
The engine ran perfectly two weeks ago during the long motorsail back from Drakes Bay. ChrisH, RickH and I set out last Friday for the Farallones (and whales) but the motor started misfiring before we left the bay. We sailed back to a Richmond and had a live exercise of building up the stored dinghy, side tying and using the 10hp motor tug boat. That worked well. Chris, after I replaced that fuel filter, the symptoms returned and haunted a Sunday sail with our siblings. So Labor Day became Suzuki Day. I think it was actually the three year old spark plugs, as my solo test drive Tues morn was smooth. Pulling the lower unit to change water pump impeller worked really well with engine lowered into the dinghy.

While buying parts I asked the Suzuki dealer about propellers and our inability to power above 4300 rpm. And we have very little reverse capability with the stock 9″ diameter, 10 pitch. Two years ago I went rogue and tried a flatter four blade but that didn’t solve it. Wish I had found these Suzuki guys in Sausalito sooner. Came away Wednesday with this. 10″, 4 blade, 5″ pitch. Very different and hopefully a game changer. But of course, it didn’t fit right. Here’s the old prop, ready to get the washer and prop nut. And the new one in same position. Note the brass splines not fully covered up by the prop hub. That’s bad. So an overnight package to get the ONE proper spacer available from Suzuki USA today, and hopefully tomorrow we’ll be motoring again.

Old knees make getting aboard a little tricky. This booster now helps. Charlie, that’s a recut of the aft cabin companionway ladder you and i designed over a Subway sandwich in Santa Rosa five years ago. Time flies.

And for Kai, no more worrying about our dinghy tags. Finally figured out to bond flexible plastic to the hull with pvc patch glue. And a trip to AAA with $15 to get replacement stickers. Yes I know they’re not the required 3″ away from the boat’s number. Live dangerously.

Still lots to do in two more days before Sunday’s departure. Think good thoughts for motor and spinnaker testing tomorrow. We may be sailors but would really appreciate a calm day tomorrow. Good luck with that around here :)

Three weeks ago the boat participated in an organized Crew Overboard Recovery drill. Great exercise and big thanks to Chris, Dan and Anton. In retrospect, we didn’t stop the boat soon enough. I had chosen to drop the sails, which we did quickly but a lot of distance gets by quickly in a breeze. Round up and stall is my new mantra for this. Meanwhile, our quick-deploy 4:1 hoist got Anton on deck really well. The gear and crew worked great. Truls did a nice write up here. https://www.latitude38.com/lectronic/2019/09/04/#crew-overboard-but-not-by-accident

Boatyard punchlist

Ravenswing came to the Spaulding Boatworks yard for minor repairs to the deck and port float hull from the mast fall. We had a small list of “well, while we’re here…” things to do. 

First up was maintenance and installation adjustments for the engine. In retrospect we should have bought an extra-long (30”) shaft, to get the propeller lower in the water and avoid some of the cavitation we’re experiencing in waves. With some surgery we could lower the motor 2.5” in its mount box. 


Then we bought longer control cables to facilitate routing them up higher out of the way in the equipment room. Also changed the lower unit oil for the first time; it was in good shape after the break in period. 
The big task turned out to be a redo of the escape hatch. It had been installed with the hinges on the forward edge, but when it opened, the swing was deep through the water. Also, the hull recess didn’t properly match the metal hatch frame, and I had offset the hinges a bit to compensate. Which of course had led to some water getting past the seal at high speeds. So what we thought was to be a couple hours maybe for hinge adjust and reset turned into a job across four days. The hull flange had to be chopped 3/4” along the top and then that offcut bonded down on the bottom edge. Then the hull had to be rebated around the hinges for the new (proper) swing pattern. We think the hatch will just clear the water now when opening. 

Those pics show you the new black Petit Trinidad bottom paint. Gone is the snazzy white look,  but this proper bottom black looks pretty serious. And we paid the yard pros to do a real boot stripe this time. (Straight, unlike our amateur wavy job last year).

We’re tackling our daggerboard vibration / howl issues in two ways. First is stopping the slop when the board is down. The trunk is 88milimeters wide inside, except for the top and bottom three inches that had extra glass wrapped over from the deck (and hull bottom) into the trunk. The hull builder did that for strength, but not to the plans, and it made the opening only 81.5mm. I made the daggerboard head (via shims) just a hair under 81mm to fit the opening, allowing 6.5mm slop once the Board was down. So to compensate we ripped long 3mm clear fir shims to bond on each side inside the trunk. They got epoxied coated and painted on the workbench, then epoxy-putty bonded in. That was tricky; buttering the 5’ long pieces and carefully sliding them up into the trunk, not letting the putty hit until the placement was right. Four went on each side. Bottom paint still needs to be applied to these inside the case, up to the waterline. 

Part two will be some reshaping of the board, to be tackled when we take it back home after weighing the boat. 

Final finish paint to the deck repairs went on Saturday so we could launch today.  But a 9am call from the manager informed us that paint didn’t get warm enough and had glazed over dull. So they’re redoing it, hopefully for a Wednesday launch. Also meaning we still don’t have the boat’s weight for the mast builder. 

On Friday afternoon I helped the project manager attend to the 54-yr old hydraulic scale. Turned out to be a simple low-on-fluid problem. As the sun was setting we hatched our plan to check the calibration. Here was our victim. 

The data plate shows its curb weight at …6,970lbs. Crazy to think that little forklift weighs close to our 40’ x 28’ boat. Anyway, up it went

And the scale shows …

… a very accurate match to the tagged weight. Certainly good enough for our mast-build needs, and we’ll put this scale in the crane rigging on Wednesday. 

As much as we need fall rain, we’ve had enough to totally screw up this haul out trip so just another 36 hours sans rain would be great. 

Anybody wanting to go for a motorboat ride Wednesday, Sausalito to Richmond, get in touch.  

Much to their surprise 

The shop neighbors just laughed and shook their heads as they closed up their businesses Friday afternoon for the holiday weekend… The boatbuilder had said this mess would disappear by the time they reopened!

 
Most of the tools were home already before that photo, but as usual we were trying to “multitask”; still building parts until the last possible moment. We were packing to the tune of the vacuum pump as this table full of cabinet doors and companionway boards came to life. 

No fireworks this year as the Fourth gave us new doors and a disgraceful amount of landfill waste

We will live ‘greenly’ on Ravenswing, but the construction left a debris trail that was a bit unnerving at the dumps this morning. It was pretty weird handling every scrap with all their memories of missteps, fixes and clever accomplishments over the years. But also a HUGE relief when the landlord snapped this photo with the keys in her hand and the Carters no longer the Piner Industrial Center boatbuilders!

Big thanks to Michael the woodworker for all the tool loaning and advice over the years. To Mark for wrenches and the forklift in a pinch. To David for painting advice and labor leads. To Marcus for Giants fanaticism and damn funny humor. The Piner guys get a McCovey Cove day Aug20 on the boat; we’ll be the ones on your TV with the huge World Series Champs flag that Marcus got from the steps of City Hall celebration in 2014.

Hey Griff, pool-cover Nevin traded his new portable air compressor for our old huge one, so I didn’t have to move the BigPig out of the shop and we have a nice beefy 2hp compressor in the garage now :)

We could not have finished the boat these past five years without this place. A note to current or contemplating builders: it’s easy to underestimate the costs of a rented or borrowed shop in a build budget. Mostly because IT IS going to take longer than any of us plan, and that rent check has to keep being written. For us, the extra 12 months rent devoured our electronics savings account, so Ravenswing launched without the Tesla-like lithium batteries, light weight 600 watt solar array or desired Furuno comms/nav goodies. But overall, choosing a workspace one mile from home was the best thing we did for this whole project. The proximity made getting to the boat work an easy thing, so more got done any given week. Do what you can to avoid commuting to your hobby job! Finally, go big. 48×24′ was really too small for this boat. If ever again, the shop would have to be large enough for the tri or cat to stay in its fully assembled wide condition. 

So now the boat to-do list gets tackled  from the dock. First up is solving motor cavitation (severe power loss due to poor water flow or air bubble entrapment). The protection leg in front of the motor is too long. Not sure how much, but it sits 3″ below the waterline and cutting 6″ is the common sense move. Pre-cut here:


Half a foot later

Then we took the offcut to Charlie’s table saw and salvaged the bottom cap, clean-up sanded the cap and the motor mount, and prepped a batch of peanut butter thick epoxy/cabosil paste. Loaded the kayak to continue the 6pm surgical reconstruction…

And plastered that cap up where it (hopefully) belongs

That seam will get cleaned up and covered with a bit of fiberglass next week after this current business trip. If I’m lucky, our boat dock host will have tackled some lazy Jack improvements this weekend :)

We’ll get her sailing for real very soon. 

We shouldn’t be fabricating on the last day!

Fish or cut bait, so they say. It’s time to go sailing, even if a few interior trim details aren’t done, or the plumbing isn’t 100% complete. But the last shop / building day began with making custom clevis pins for the steering system. 1/4″ SS rod here getting cotter pin holes then cuts to eight 2-3/4″ pins …

20160609-232353.jpg
So while Install Steering was intended as a one hour repeat of work done many months ago, final parts and tweaks took all the way to 3pm. All good now and the steering feels great – the water will be the real judge.

20160609-232604.jpg

20160609-232618.jpg

20160609-232641.jpg
During the daggerboard edge refinishing we also squared up the bottom to a nice knife edge. I am further incentivized to keep this thing from touching ANY underwater obstacles. No repair hours, please.

20160609-232847.jpg
And here it is yesterday, painted and heading up on deck. This is NOT a trailer boat :)

20160609-232958.jpg
We got in on deck and stood it up to drop in to its trunk, but after repeated tries / angles we couldn’t clear the roof. We’re not confident that the dagger shape is the same as the cutout in the hull bottom, and if we need to enlarge the slot we need to know NOW, with time to rebate and re-epoxy. So Jeanne and Griffin made patterns from the actual daggerboard and we messed about enlarging the slot a bit tonight.

20160609-233324.jpg
Epoxy seal went on tonight, primer in the morn and new bottom paint tomorrow and Sat before launch. That’s cutting it close.
Leslie took a whack at the motor controls and this all mounted nicely. Looks easy but the cables and wires passages through the boat were tough. Many more hours chewed up there.

20160609-233539.jpg

So that’s a wrap, and transport activity starts in the morn. The must-do punch list is short, and bigger bolt-on items can come later in June and July.

20160609-233755.jpg

If the logistics go as planned (boat hull fits on the trailer, for example) we’ll be floating by Sunday. Let’s hope all the wheels actually roll this boat to the water! Stay tuned.

30 seconds with Anton

To review, months ago we decided to launch with a gas outboard motor instead of an inboard diesel. But there’s been gnawing angst about having the permanent gas tank inside the main hull and all the associated piping. So yesterday during Anton’s first visit to the shop he dives right in to my current “roadblock” issues. On the gas tank, it takes a half minute of looking around to ask, “why aren’t you putting it in that big cockpit coaming box?” Brilliant solve!

20141206-003202.jpg
We grabbed some quick measurements before hitting the fish taco place; turns out there are about 27 gallons in the cubic inches available. A custom tank could go where the green tape is marked.

20141206-003459.jpg
After an hour of shabby mechanical drawing, we sent off the bid request to ATL flexible fuel tanks in NJ. They make tanks for racing vehicles, insides of airplane wings, spaceships and other tricky applications. The tank will wedge itself in and be very secure. And the fuel line will travel right next to the wiring conduit tube shown a few months back. Here’s what about 6300 cubic inches measures out like:

20141206-003844.jpg
And for the future crew reading this, yes this means the “old” tank space under the galley floor just got reclaimed for beer and wine storage. Jimbo’s wine in a bag will be just right.

Anton and Charlie also solved the steering pivot shaft that would not drop in to place. First was inserting the $60 fancy German bushings.

20141206-004233.jpg
Rather than trying to machine away a tiny bit of the stainless steel shaft, we made a sanding bore out of wood, tape and sandpaper, spun by the battery drill. With a half hour of messing about the shaft seated in all 8 bushings and the rudder swings perfectly (not a trace of slop / wobble)

20141206-004524.jpg
Here’s the cassette holding rudder #1. Note the forward tilt mentioned in a prior post. And that the rudder hits the shop floor about a foot before it gets down in sailing position.

20141206-004726.jpg
And the trim tab rudder #2 can’t have the tab swing unless the rudder is all the way down — that’s an interesting way to “turn off” the windvane effect in the future, ie just lift the rudder up a few inches.

20141206-004929.jpg
And now to finish the steering, the turning arm was built.

20141206-005034.jpg
The forward end gets the foam dug out to make way for the tiller to slide in.

20141206-005147.jpg
A big wedge was then cut from the rear portion so the steering arm could surround the cassette.

20141206-005317.jpg
So now all that stuff is ready for the tiller. The foam core got shaped with proper attention paid to the driver’s end – we experimented with shapes until finding the right size for Mrs. Carter’s hand. Happy wife, happy boat, right?

20141206-005554.jpg
With Keith’s comments in mind, the hoop-strength carbon lamination is curing tonight and the lengthwise unidirectional carbon will be applied Saturday. By Sunday we’ll finally be steering the boat!

Engine bracket, part 2

We advanced this project through the structural laminations and it came out nice and strong. The engine mounted up just fine, and titled up to the sailing position very well.

20140820-224748.jpg

20140820-224822.jpg

20140820-224901.jpg

20140820-224946.jpg
Once the motor was in place, Dad and I built a triangular wave-piercing shield for the motor leg, with the idea of protecting the vulnerable looking exposed transmission linkage (that you see 2/3 down the leg of almost all Japanese small & mid size outboards).

20140820-225229.jpg
The diagonally cut slot lines up with the pull starter cord of the engine. I suppose it could actually be done from a launched dinghy but not very realistic to pull start this thing from on deck. We’ll stick a rubber plug in there until it ever/never is needed.
The final step was rigging the engine controls and a conduit tube from the cockpit through a corner of the aft cabin, the ceiling of the engine(less) room, through the emergency gear locker and out through the hull, forward of the beam far enough to make a gradual right hand turn to meet the motor. I like the controls here, in between the feet of the driver and not asking passengers to move their legs…

20140820-225540.jpg
Now follow the conduit tube, made of Semi-flexible 1.5″ PVC “spa pipe”, from that corner by the Suzuki control box:

20140820-225709.jpg

20140820-225726.jpg

20140820-225738.jpg

20140820-225754.jpg
The black ‘Y’ inside the emergency gear locker will allow for a split in the rigging tunnel, with the gas line and battery wires heading forward in to the engine/equipment room and the shifter/throttle cables plus key start/electronics wires passing through to the cockpit. Outside the hull, there’s just enough flex in the white pipe to allow for the swinging of the whole engine bracket.
While that big white pipe is kind of ugly, it’ll be somewhat out of sight under the net and beam. Plus it will be a useful grab bar when approaching the grocery-loading chores thru the escape hatch from the dinghy.
Overall we’re very satisfied with how this all came out, especially since it’s a custom job taking inputs from various minds and boats. Thanks again Keith!

20140820-230350.jpg

And today we got our heads around how to build the 8′ long bow sprit in carbon, instead of the sticker shock of “a grand” just to buy the carbon tube premade. Turns out it all starts with the concept of forming the new tube inside a mold pipe that has been split lengthwise, and blowing up a balloon bag from the inside once the materials are laid up in there and the pipe halves strapped together with clamps. This should be another interesting caper! Stay tuned for that one and meanwhile we’ll get back to the windshield tomorrow, making patterns for the acrylic window panels.

The shop closed at 3 today, just in time to get to the docks at Vallejo to crew for Charlie aboard F27 Tri Chi. It was like homecoming, as the boat was built just 2 months before Origami. We pounded thru BIG chop in San Pablo Bay, sailing fast to a nice 2nd place finish. Next time the chute goes up and the boat can win Vallejo beer cans! Nice driving Charlie :)

Engine mounting bracket underway

The wood mockup for sizing and positioning the engine has been measured and translated to structural parts. Everything is very light, except the solid hardwood actual “transom” piece cut from an old butcher block table. Sturdy and zero dollars – nice.

20140811-232520.jpg
Here you can see the basic shape; the bracket makes an inset box shape to keep the motor as far forward as possible under the beam.

20140811-232702.jpg
Getting the hinges on top securely attached seems a pretty big deal – do this wrong and the motor could fall in to the sea. So we’re doing lots of reinforcements underneath the foam triangle shaped cap.

20140811-232853.jpg

20140811-232906.jpg
This whole box shape is the structural part holding the motor. After it’s trial mounted later this week, we’ll add a wave-piercer / motor leg protector based on ideas from Keith Burrage’s lovely Skateaway tri back east. We all need to get a ride on that ship – the photos look fantastic!

The windshield frames are finally done and will get measured for the window inserts tomorrow. And the lazarette opening with a drip rail system went in today. More photos coming as those misc projects get finished. I was working on that main cabin skylight hatch base this afternoon when the Robin Williams news came over the radio. Seems like just a bit ago that Drew and I waved hello to him over burritos in Sausalito – so sad his torments ended a talented life at 63. Perhaps more sailing could have been a therapy :(

20140811-233934.jpg

Fits just fine

Thanks again for good counsel from Keith Burrage, Richard Woods and Mike Leneman on ‘going light’ with the engine. This is, after all, supposed to be a high performance sailboat. Today we received the 107lb Suzuki 20hp four stroke with fuel injection (no carb, Dad, so no repeats of fighting the old Evinrude on Lake Pinecrest!). Finally there’s a small EFI motor. And at $2,350 after rebate, with delivery and all the accessories included, this complete package is actually less than just the folding Gori prop needed for an inboard diesel. Wow, better sails ahead.

20140729-175619.jpg

20140729-175638.jpg
After many days of angst about this motor placement fit, it turned out great. The boys provided the muscle and we liked both the in-water position (waterline at the upper splash plate, prop nice and deep), and it stores up even higher than i wanted.

20140729-180531.jpg

20140729-180549.jpg
Now we can get started on the real bracket. Stay tuned.

While awaiting the motor it was time to pop a skylight in the living room.

20140729-180832.jpg

20140729-180846.jpg
This hatch fits under the boom, away enough from the mast rotator arms, and is oriented to draw the breeze in to the main cabin while underway or anchored in to the wind. Also good for sighting the main pretty much over the sea berth. Seems a nice extra bit.

Motor mount hinge change

Oops, those custom hinge brackets to mount on the cross-beam turned out to place the hinge pin a couple of inches too far aft. So that’s two very strong but very useless parts for the bin. Took a new approach today tucking the hinge up under the net lashing tube, and building it all in place. The green piece is the G10 hinge tube, held in place by thick, fiberous epoxy putty.

20140721-231348.jpg
The wood piece is a hardwood backing plate to help carry the motor’s force in to the beam. This new piece is adjoining the existing hardwood block that is the beam-to-hull anti compression pad.
Had to devise our own laminate schedule, so for the permanent record the hinge tube is held to the beam with two layers of 12oz uni glass, two layers of 12oz bidirectional and one layer of 45/45 double bias 17oz. All five layers wrap 48 inches long, reaching well out on the the beam fairing piece both top and bottom. Seems really comprehensive to me, but if any experienced builders reading this think otherwise, please holler. Thanks

20140721-232029.jpg

Swing away motor

The F36 plans call for a traditional inboard diesel engine and propeller shaft thru the bottom of the boat. We can’t do a sail drive because we want the boat to be able to sit on its hulls in zero water, as in the extreme tides of Baja or England. So… Here we go “off plan”, switching to an outboard engine on a swing-up mount on the back of the starboard beam. I’ve been thinking up an approach that is both temporary and long term; if we don’t like the outboard the entire mount can be easily removed with only 1lb of hinges left behind and the trampoline put back in the engine’s place. Or when a cost-effective electric pod drive solution becomes available we can switch over. Or if an inboard diesel is really the answer, that can be retrofitted at any future time.

The measurements for a Yamaha 25 long shaft were found online and we made a faux motor of Luan door skins to practice with placement. The net lashings tube almost looks like a motor mount hinge, but it’s not parallel to the waterline and it wasn’t built to the shear forces and weight of the motor. So we need to work around that feature, and not cut it off the boat. The rudder gudgeons seem like a good model for the motor mount hinges and we have some spare G10 tube and a 16″ piece of 1/2″ stainless steel rod that will make a nice hinge pin with the right bushings in place. First up is fabricating the hinges.

20140715-221006.jpg

The funny shapes of the two pieces are what fit over the net lashing tubes on the beam. The other three will run on the top tab of the motor mount (yellow board is a stand in to see how this is going to work). I’m thinking the motor should be mounted as close to the hull as possible, as the hull shape curves away considerably down by the waterline. The weight should be tucked in close there, and things like the freezer and galley on the port side should counter balance this engine placement.

20140715-221518.jpg
We’ll pick this project back up next week once the bushings are in hand so we can align all the hinges and permanently affix the two big ones to the beam (instead of that blue tape :)
Thinking we’ll want to wrap them at least 18″ around the beam in both directions with heavy weight uni-directional cloth.
PS – the mounting box will be made to push up against the big diagonal brace under the beam, so the motor forces are spread out on a couple of surfaces, not just the hinge pin.