We feel your pain

It’s just plain not fair that our kid and friends in the East are nailed with all this cold, when out West it’s full-on sailing season.
But keep working hard Colin, while Dad is out messing about with boats. Today the workshop went dark for a little on water R&R thanks to Charlie’s F27 and her new screacher. We did a lot of hanging out in The Slot watching these guys.

20150224-223215.jpg

20150224-223234.jpg
Really interesting watching both Oracle and Artemis Americas Cup teams trying to keep the boats up on foils thru the tacks and gybes.

And it was great fun to have accomplished multihull designer Richard Woods aboard today. Check out his boats at Sailingcatamarans.com
Smart boats that are kind to the builder and a joy to sail – the way they all should be!

Watching the boats practicing hot sailing gives another shot of energy to the build shop this week. Sorry Keith it’s so darn cold in PA that your boats can’t come out to play :(

20150224-223914.jpg

20150224-223933.jpg

2 kinds of anchors

Continuing on here with the chainplates that “anchor” the mast in place above the boat…

The 12 layers of carbon came out of the vacuum process nicely.

20150223-222136.jpg
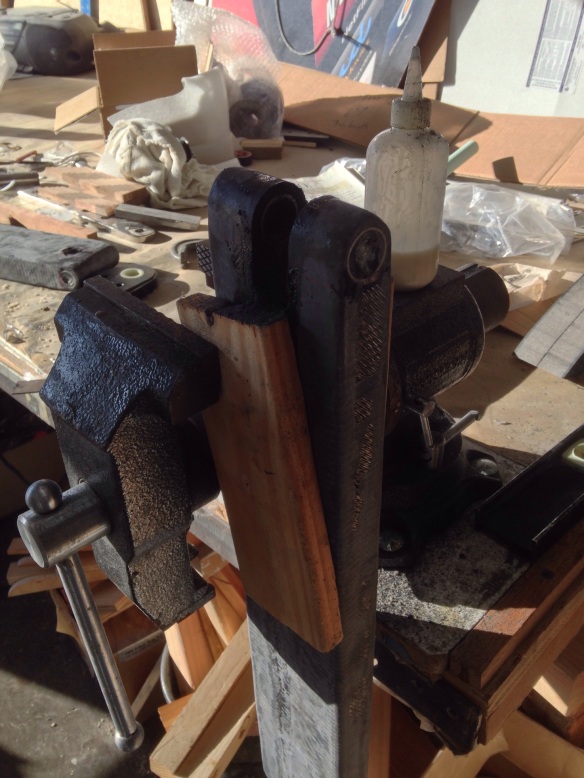
Next up was cutting the inch-wide slot for the shroud-end distributor. After much deliberation about how to make this cut thru the steel tube and carbon fiber, turns out a cheap hacksaw blade and some elbow grease got it done just fine.

20150223-222510.jpg
These chainplates are the last primary structural parts that need an epoxy post-cure, so they can’t be installed quite yet. Today we found an auto body shop that will rent us the needed three hours in their paint baking booth – more on that next week.
Now for the chainplate destination – on a bulkhead inside each float. This gets a bit tricky because the floats were built for traditional steel chainplates so the bulkheads aren’t canted forward in the desired angle. I asked Farrier and he ok’d rotating the chainplate and applying the fiberglass reinforcements at an angle supporting the mast-pull direction.
Here is the bulkhead before cutting. This job would be so much better during float hull construction, the way it’s shown on the more modern plans.
You can see the plywood insert (as a yellow rectangle) inside the fiberglass, showing the location for thru-bolting steel chainplates.

20150223-223509.jpg
The cuts were made via drilled pilot holes then a jig saw. Had to use the big sawzall to cut the few inches at the bulkhead-to-deck join, where the jigsaw couldn’t reach. Nasty little job with too big a tool. With the cuts made, here’s how the chainplate will sit below deck. It’s a pretty big anchor in there!

20150223-223758.jpg
And only a little bit pokes above deck. See the big clevis pin and the distributor (in black).

20150223-223952.jpg

20150223-224015.jpg

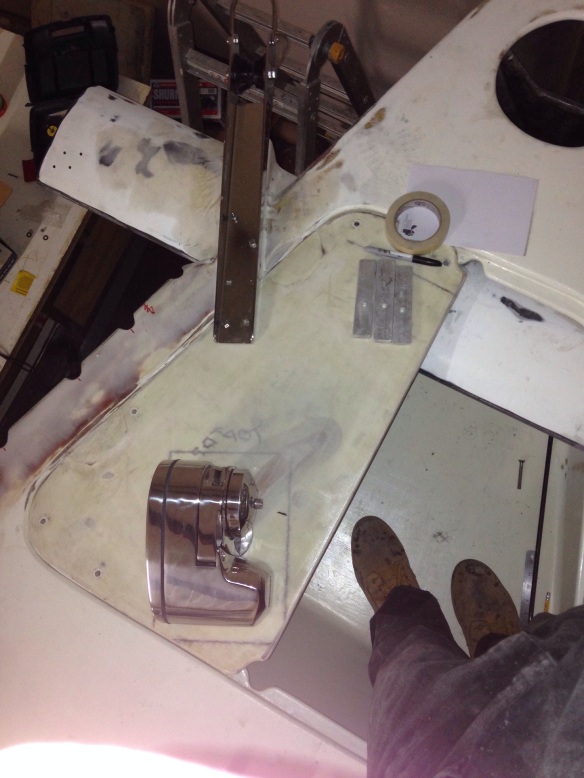
This past weekend’s project was mounting the anchoring gear. For the people who’ve visited the shop and wondered about the funny ‘Wings’ on the bow, these photos will explain it.
First up was building a flat base for the anchor roller, to mount over the deck edge and the curved bow wing.

20150223-224420.jpg

20150223-224504.jpg
Then we needed a place for the windlass. Because the anchor locker is shallow (about 16″), it requires a horizontal, not vertical, style windlass. The bow is pointy and the locker spans the full width with two big doors. So we decided to turn the port side door in to a windlass platform instead. Even with one side closed, there’s still plenty of room to stand securely down in the locker during anchor work.

20150223-224956.jpg
Because this is experimental, we didn’t want to permanently seal that hatch door. So we beefed it up with two more layers of thick glass and made substantial aluminum backing plates that reach under the deck.

The bolting pattern ties the windlass, port hatch door, anchor roller and wing mast section all together. I think it will all be plenty strong for a 35lb anchor.

20150223-225422.jpg
Notice in the last photo the blue cord holding the anchor – it passes over the windlass. That won’t work, so we’ll be moving the big bow cleat off center, to the left of the windlass and installing chocks to control the turn in the anchor rode when it’s not on the windlass.
The windlass is a Lewmar 1000 ProFish. It has sufficient pulling power for our gear, but experts would say go up to a larger one. This is a very solid nearly 30lb, 1000 watt unit; I just can’t see putting a 50-60lb windlass on this bow. ProFish means it has a free fall feature, so you don’t have to power the anchor down. It’s meant for fisherman who need a fast anchor deploy over a hot fishing hole.
And you can have a look at F39 Fram’s build where Henny has moved the whole thing back another 4-5 feet for better weight distribution (but I didn’t want to give up the closet space that requires).
Anchors aweigh – soon!

20150223-230537.jpg

Flip Flopper

Politicians get a bad reputation for changing their stories. Here we told you the boat work moved to the interior, but now a post about more exterior fabrication. Seems to work out best if we have multiple projects going at once so things can progress while other parts let the epoxy cure (lots of timing dance lately!)

First up is the boom – got the last structural thing done, adding carbon-wrap spacers to the bottom side. Less than a pound of material has now replaced the 20lbs of heavy laminate we sliced off this old mast last year.

20150219-231814.jpg

20150219-231839.jpg
Rick WS brought Matt and pro rigger Guy Stevens to the shop today for a tour, and Guy managed to rattle off about 20 great ideas for the boat, including solving the reefing and main sheet attachments for the boom. I was deservedly chided for putting an out haul track – those holes will now be filled in and we’ll do nice spectra grommets (continuous line hoops) around the boom for reef and main sheet block anchors. This also made me see how to nicely hide the reefing lines inside the easy-access boom. Nice.

The final cabin top opening hatch went in, this one over the shower.

20150219-232428.jpg

20150219-232451.jpg
In this close up of the hatch cut out area, notice how the cedar core strips are tongue and grove fitted during the primary hull construction. This wasn’t called for in the plans, but the extra labor should be giving us more structural rigidity for zero added weight.
All three of the hinged deck hatches got 3/4″ ply spacers added above the deck as mounting flanges (seen as the tan square over the hole in last photo). It’s against the trend of the new flush mount hatches, but I like raising this lip up to help keep splashes out when sailing in spray or perhaps rain and the hatch cracked open.

Today’s work was a task that’s been a worry for three years; finally time to make those big cap shroud chainplates. (For Mom: these are the very important bases sticking out of the decks of the 2 outer hulls, to which the mast rigging is affixed. Old ships had metal plates bolted to wood timbers and the chains going up joined at the plates). Making them now in composites and permanently bonding them deep inside the floats means they should never need replacing. Two weeks back I showed the steel pins and lashing ‘bear paws’; those get joined to:

20150219-233524.jpg

20150219-233546.jpg
Only the light yellow section will be visible above the deck – the long tan part is what is glued and glassed inside the float hull. Here goes two layers of heavy 45-45 bias carbon with ten layers of 9oz uni carbon sandwiched between the double bias layers.

20150219-233827.jpg you can just make out the staggered uni layers in that photo.
Here’s what’s curing overnight:

20150219-233931.jpg
This weekend we’ll make the slices in the boat to accept these 24″ long carbon chainplates.

Concurrent with the fabrication work we have two pros tackling the stuff that would get the amateurs in trouble. Joe at Digital Marine in Sausalito came to the shop and devised the whole electrical system layout – now he’s translating the ideas in to schematics and parts lists. There are hundreds (it seems anyway) of choices to make in this realm. While he figures out the ‘what’, I’m doing the ‘where’, busy building hidden but accessible wiring chases around the boat. Every wire will be nicely labeled and available along its entire length.

And up in the sky, Keith Burrage of Skateaway Designs has thoroughly modernized the sailplan from our dozen year old plans. We’ll get a better main shape, an exciting full batten reefable jib and a lightweight furling reacher set on a shortened bow sprit. For my F27 brothers, I’ve decided this is not a screecher, ie we’re going to cut it fuller to make it a better 90-120 degree sail, and rely on a better jib and main setup to head upwind. I’m excited about the main and jib sail cloth – just about to commit to radial cut HydraNet, which is Dacron with Spectra weaved in. This means very light weight, easy stacking, excellent durability and rather racy performance with all that spectra/dyneema structural rigidity weaved in. Further helping the shape-holding is the computer aided design personalized to our rig and boat performance. Keith thinks the main will have over 100 panels so that’s a hell of a lot of sewing to do this spring.
We will also do true running back stays to the main hull, unlike the “baby caps” out on the floats of other FBoats. This should further stabilize our light mast and give more performance shaping options.

Things are moving in high gear now and the credit cards are being pounded. As Dad says about growing old, “this ain’t for sissys”!

Dining and navigating

Well the boat shop has been busy but there hasn’t been time to post here. The work has moved back to the interior while some final steering and anchoring parts were ordered. I met with a marine electrics specialist to discuss wiring the boat, and agreed to have Joe create a systems schematic as our blueprint. While he prepares the specs and develops the parts list, we’re back at the boat planning the cable runs, panel location and tricks to conceal all the wires while also keeping everything trouble-shooting accessible. Captain Holway will be very happy when he sees how the electrical access turns out.

After the head, we moved on to the dressing/wardrobe cabinets and now the nav station and galley. All done first in cardboard as templates for the foam core fiberglass panels.

Here’s some seat back storage in the dinette, looking aft towards the galley.

20150210-002412.jpg
Then panning left; the light tan bar in the middle serves as the backsplash to the galley counter and stove.

20150210-002534.jpg
The galley shelves all got bonded to the hull walls tonight.
The big hole where you see the orange cord disappearing is the space for the stove/oven unit.

20150210-002651.jpg
The freezer box is now faired in with its extra cubic foot extension, and now awaits paint before final install of the cold plate and refrigerant/compressor tubes. This thing is a tight fit – the black pen lines on the sides are where the side walls of the freezer box meet this back panel. We had this box dimension when shopping at the boat show, but this got pretty snug!

20150210-003255.jpg
Worked wrapped at 11pm tonight with a push to get the radio / electronics cabinet installed above the navigation desk. The large cut-out is to make this face panel hinged for easy access to wiring and installation of various nav and communications components. There’s a foul weather gear locker to the right, a handheld electronics cubby above that, and a sloping cabinet below the desk for charts. The desk’s wood trim was roughed in with fir, but needs some skilled woodworking to make this be a proper focal point in the boat’s fit & finish. Any fancy wood inlay ideas for the desktop out there?

20150210-003919.jpg