
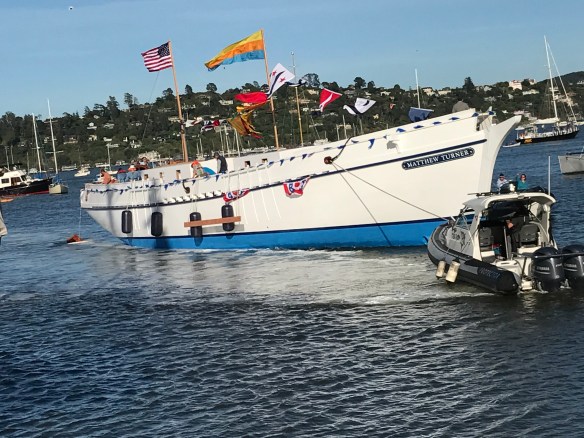
Dad, Joe and I stood on the Federal dock in Sausalito, joining thousands of fans watching the launch of the Matthew Turner. 
Pretty sure we showed you this build in progress a couple years back, and it was truly amazing to see the community coming together to create a tall ship the old fashioned way. They recorded something nuts like 150,000+ hours of volunteer labor. We visited the build shed many times, but I always had to sit on my hands and not pick up a tool, because if I had, Ravenswing would have taken ANOTHER few years. So it became a quiet little footrace in my head instead. Gotta Launch Before the Turner. And it turns out to be another example of best intentions, but we put our boats in the water before they’re really done. Something about that expensive shop rent generally creeps in…
The Call of the Sea Foundation will have an incredible flagship soon, with the Matthew Turner as a working classroom. Check out this organization, what an amazing way to spend some vacation days.

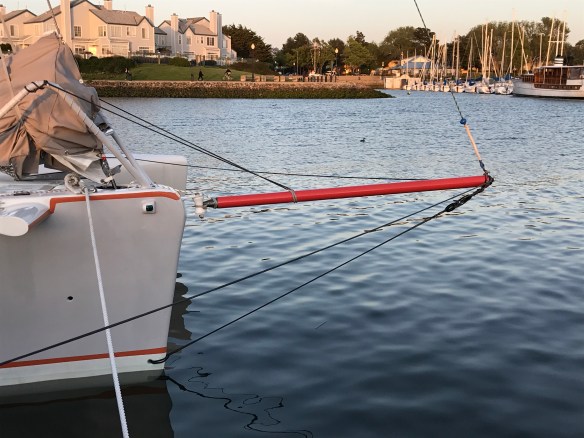
We used the rainy season to tackle the ‘bolt-on’ things that needed finishing and painting. Our damaged, empty house has become a paint studio. First we splattered orange highlight all over, and most recently it’s been grey and white for the interior redo of our little Nash travel trailer. The tree fell on the house exactly FOUR MONTHS ago and reconstruction has still not begun. Damn you, State Farm, for dragging the builders through a painful bidding process. But, complaining aside, decent looking boat parts have finally emerged for installation. First up tonight is the bow sprit.
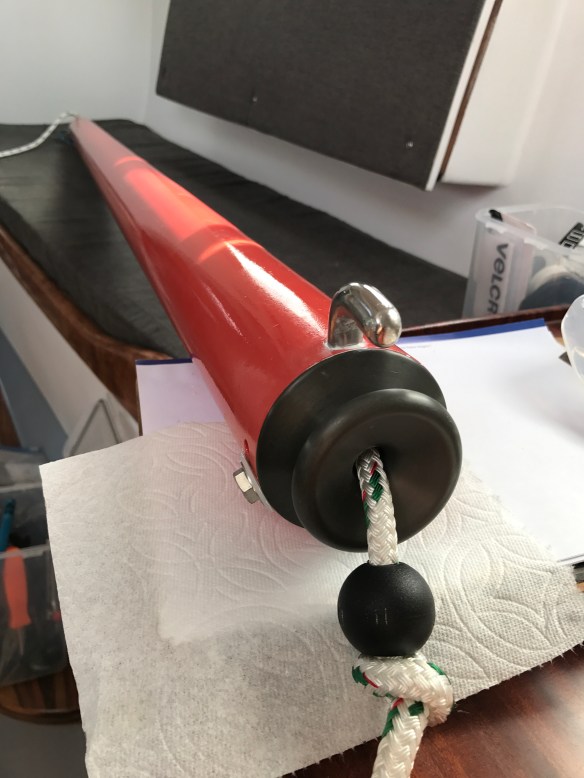
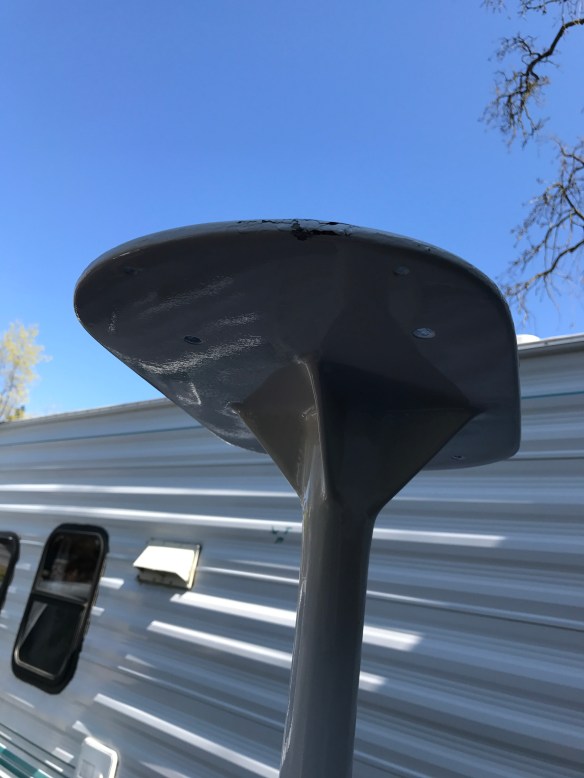
That’s the extreme forward end, with Keith’s beautifully machined and anodized aluminum doughnut. The spinnaker tack is exiting from inside the pole, and the ridge surrounding it holds the two whisker stays and bobstay. Here’s the to-the-boat end:
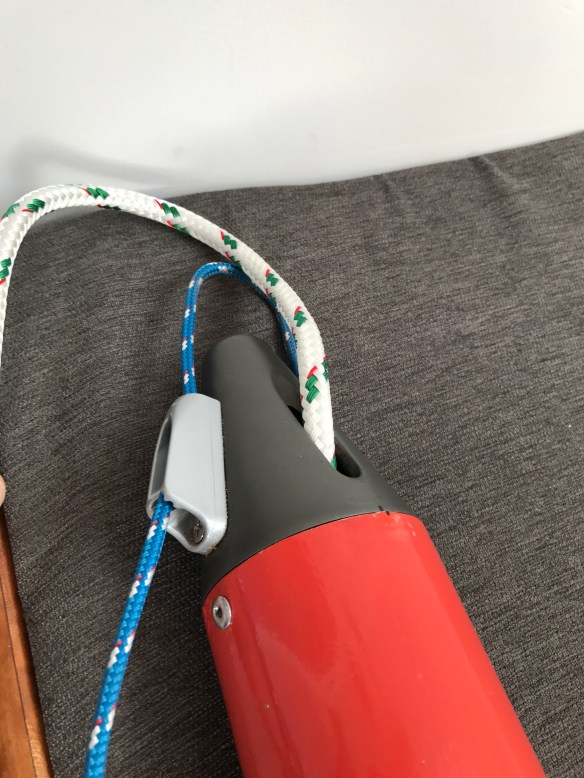
Spin. tack exits the pole and runs along the deck. The little blue line wraps around the delrin receiver at the bow. Drew was right, this small line did not hold up to the windstorm last week, and was replaced today with a bigger piece of dyneema. Finally installed this afternoon:

Keith, the bobstay is perfect – thank you! I like the luggage-tag bottom end, and we’ll keep an eye on it for chafe against the bow stem. The delrin receiver at the bow definitely needs to be pinned to stop unwanted rotating; need to do that before we hoist the sail. I’m very concerned about how we’re going to get the reacher furler installed and removed underway. Farrier’s plans call for this pole to swing to the side, but it’s unlikely the setup will reach far enough for handling the extreme end. Eager to test this soon. Thinking of adding a centerline bow cleat dedicated to the two adjustable whisker stays, so we can easily move the pole tip side to side while standing on the bow. There’s a built in backing plate just above the captain’s forward berth, itching to be used.
Mrs. Carter called the ball on the hard top paint, and the orange highlight rocks!


Sharp eyes saw six little dyneema loops sticking out of the orange top. Those are attachment points for a solar panel. No bolt holes needed now. The bits of rope were pulled through drill holes then flared out on the underside, and epoxy sealed.
If you go back to the February picture of us driving bundled up, you see the original height of the radar. Which would have sent microwaves into our brains. So thanks again to Sewell Mt. Bob for the windsurfer mast offcut that became a radar tower extension. Got it all painted and delivered to the marina. I set it down on the pavement while getting other things out of the pickup, and a little zephyr knocked it over. Nasty ding in the foam core and fancy paint:
 That photo is the next day, back at home for touch up, interrupting work on the Nash (aka tinyhouse). A few days later, it was back to the boat, this time carried carefully.

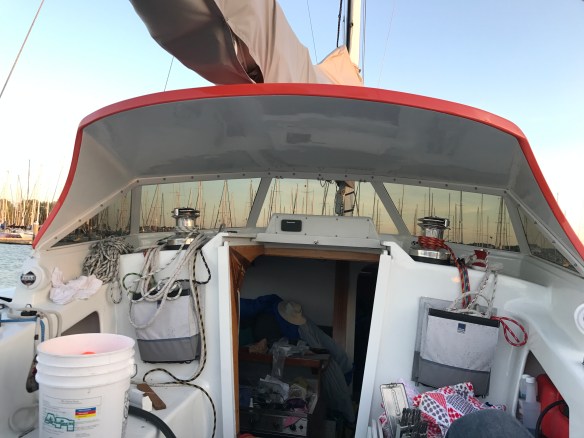
Just under the radar we’ve mounted two LED deck lights, which really flood the place with great work illumination. They can also be pointed up at the sail for visual signaling at sea. It’s a lot of light for small power burn.

Seeing the engine gauges reminds me we figured out how to change the motor oil with the outboard leg lowered down into the dinghy and a bucket. But suzuki does NOT make it owner-serviceable to change the oil filter. Argh. going to need to research that one, as I couldn’t find it poking around the various powerhead components (20hp 4 stroke EFI).
The steering is officially finished with the simplification project. Just a big ‘ol orange tiller now, with molded in receiver for the extension handle.

The helm is extremely responsive and direct-feel. Time will tell if we’ve made the right choice, compared to all of the elegant, elaborate steering systems on the other F36/39’s.
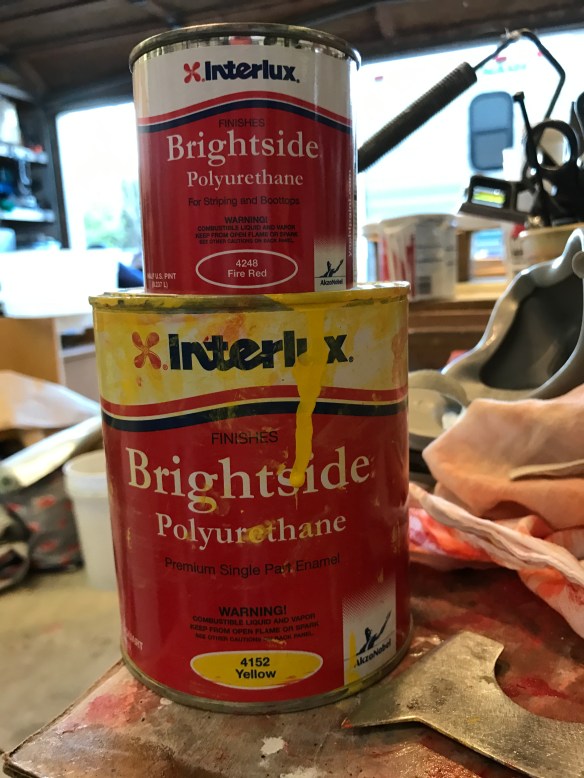
For the note-to-self file, our new orange color (steering, bowsprit, dodger) is equal parts of these two Interlux colors. The Brightside one part is much softer and will wear out faster than two part Perfection, so next time we’ll look to see if the better paint comes in red and yellow.
For my friends out there who will still be building F36/39 float hulls, perhaps you can make your center compartment soles early in your process. There have been many painful sessions doing various jobs finishing the floats, painful because of squashing ones feet and legs into the sharply pointed float bottoms. We have now built proper floors, and will enjoy them for a long time. I just wish we had done it BEFORE the big chainplates, beam sockets, hardware prep, etc. jobs.
We had to clamp up a 2×4 extension to the 8′ lamination table in order to make 99″ x 16″ floor sections. 
Then in the hulls we ripped some of the leftover original cedar planking for 35-degree flooring sills. Puttied and taped those down and let them cure for an afternoon. 
Note how they’re asymmetric to the hull shape. If we had done this job back in the build shop, we probably would have made it all parallel. But in the floating boat, we realized, hey, let’s make the soles level for user-comfort! We’re not going to permanently install these big boards. They’ll just rest on the stringers so things can be easily cleaned underneath, or even removed if we’re crazy about racing weight someday. And yes, we took a little more time to make bilge-access panels (that still need some primer).
Unfortunately, you’re seeing some mold spots on the right side of that photo. The floats get excessive condensation buildup, so we’ll add some solar-powered vent fans to the hatch covers this summer.
OK, that’s the update. Hopefully we’ll get back to more frequent posts including more sailing action reports. Congrats to Drew for driving his F27 Papillon to WINNING the Doublehanded Farallons 2017 multihull fleet. After hearing his great story, he suggested this year’s Delta Ditch be Raveneswing’s racing debut. That’s a fine idea, Mr. Scott! Time to apply for that PHRF rating…
I know I promised the lithium battery system description – stay tuned, as Anton edited my schematic today and it’s not quite ready for prime time. Getting close.
Locals, let’s go sailing next week, once the rainstorm clears out. Maybe Thursday afternoon. Let me know if you can make it.
