Hitting bottom

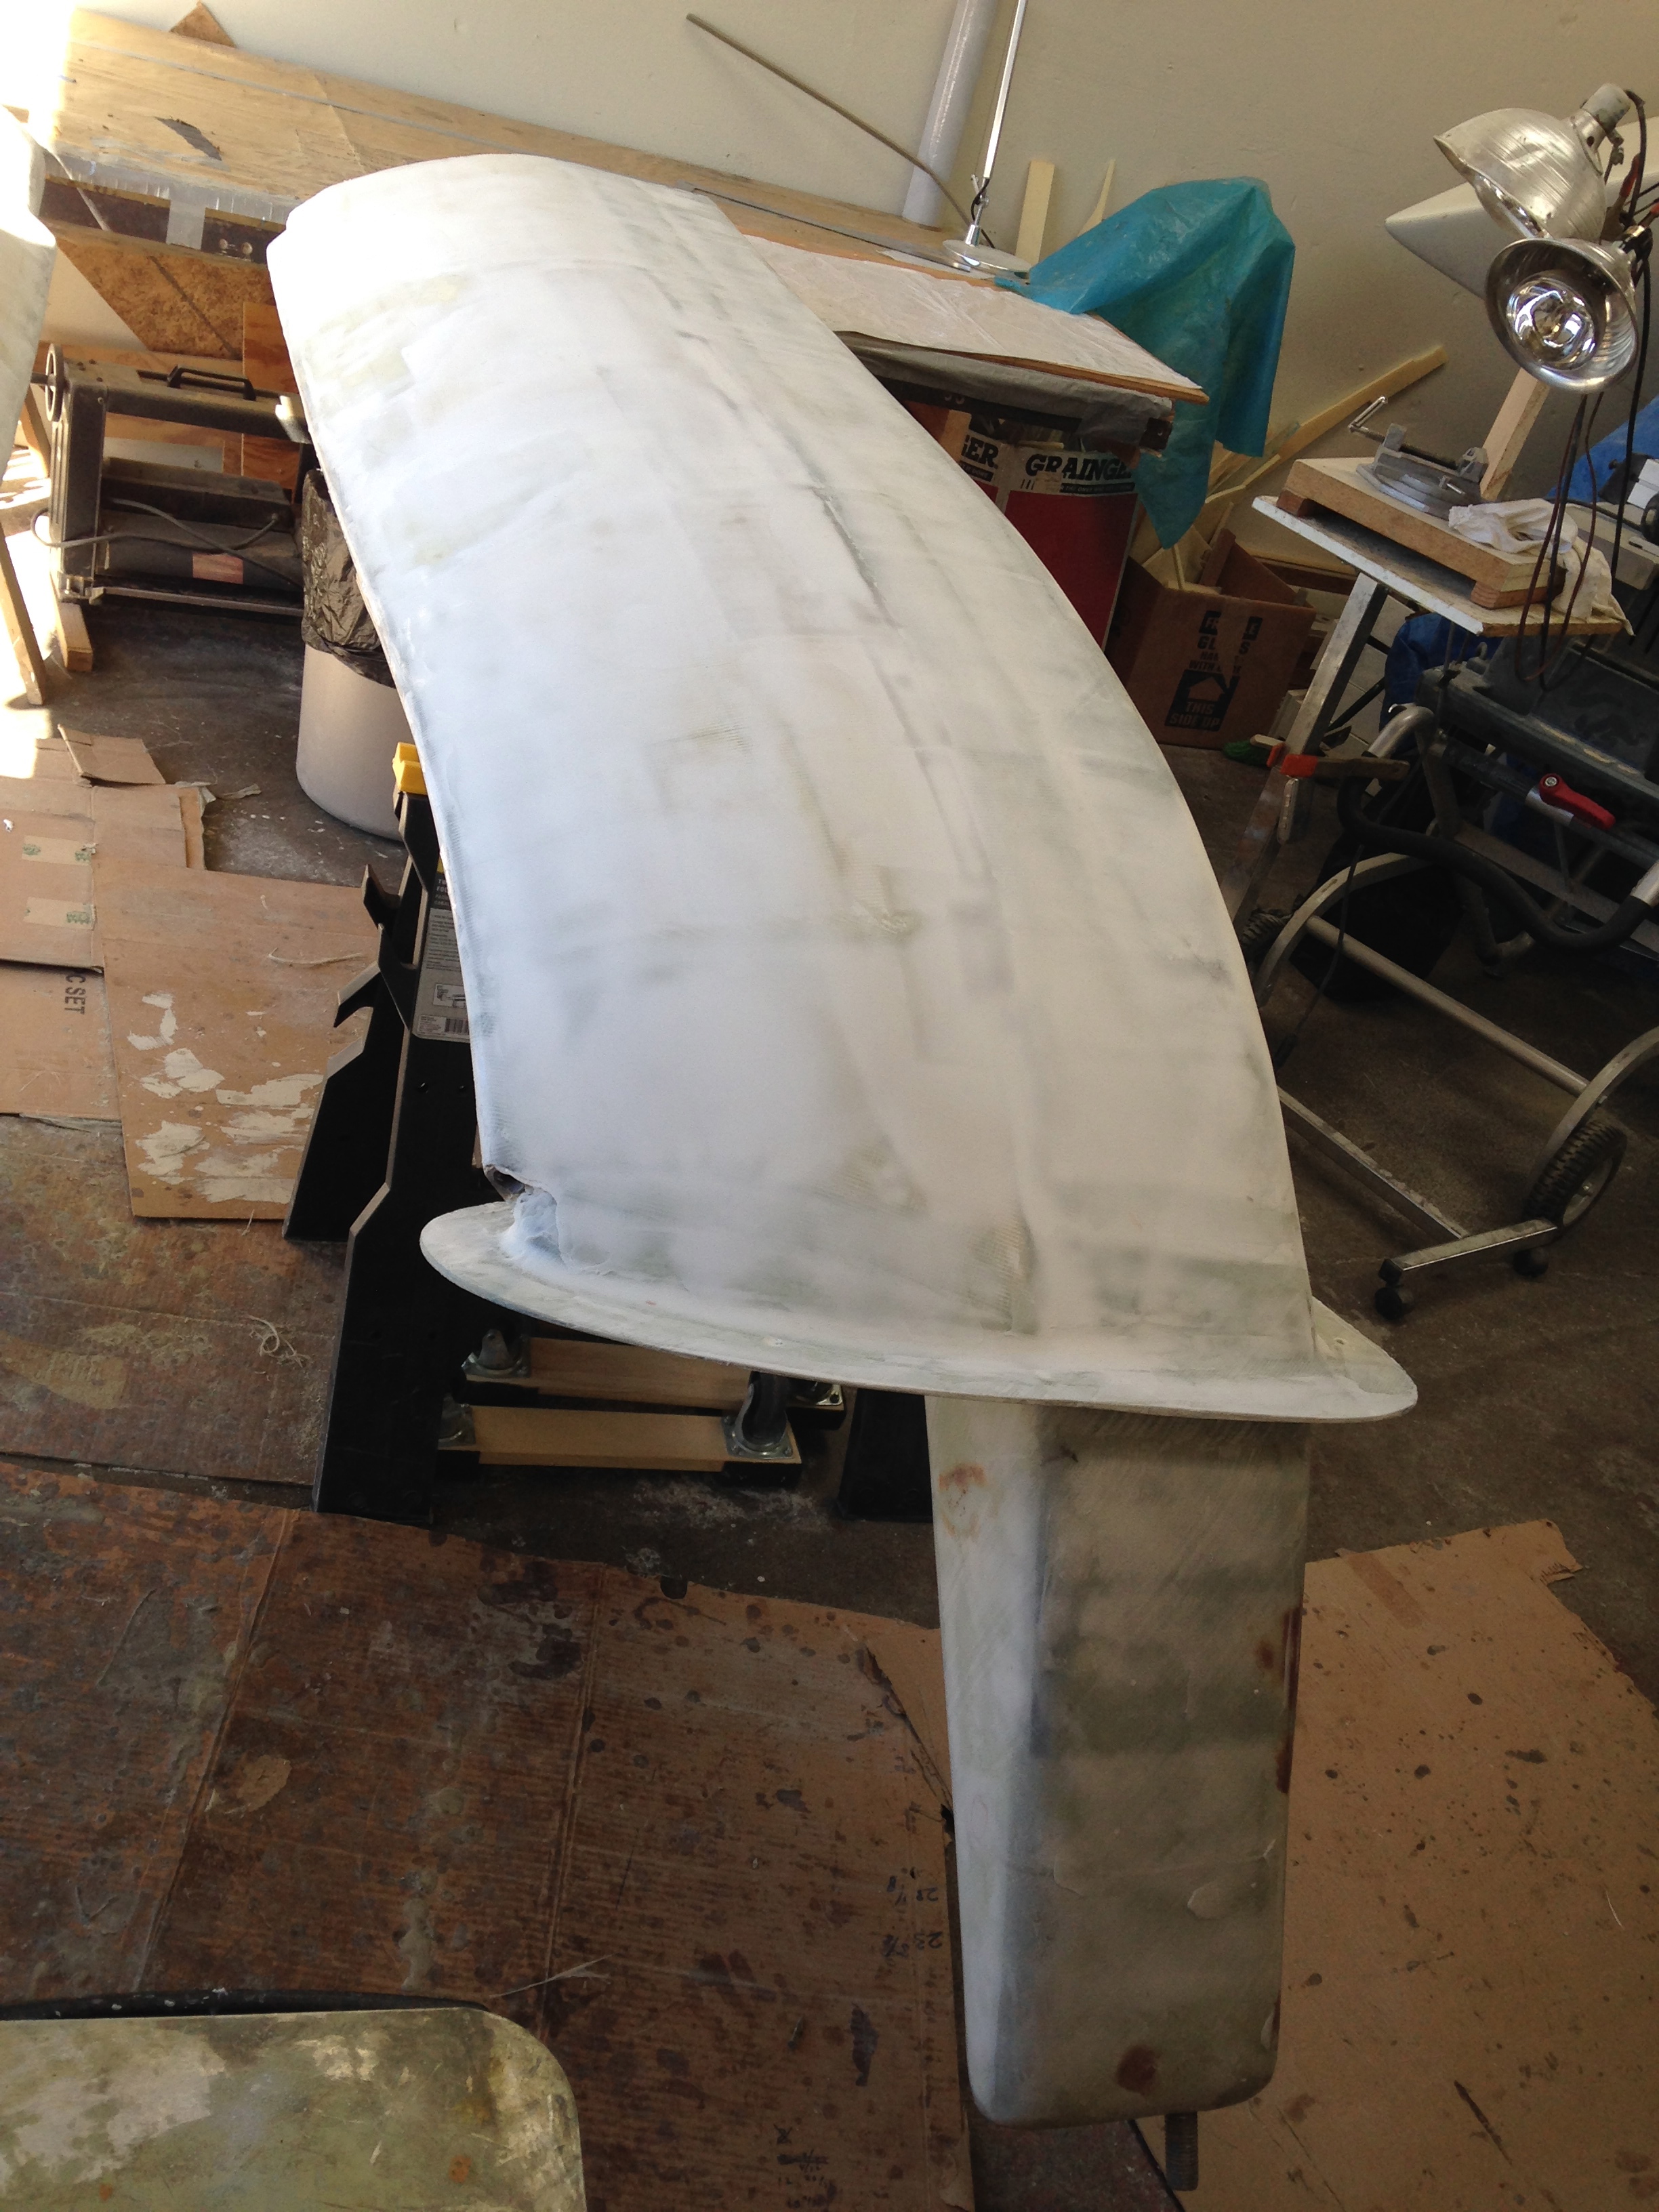
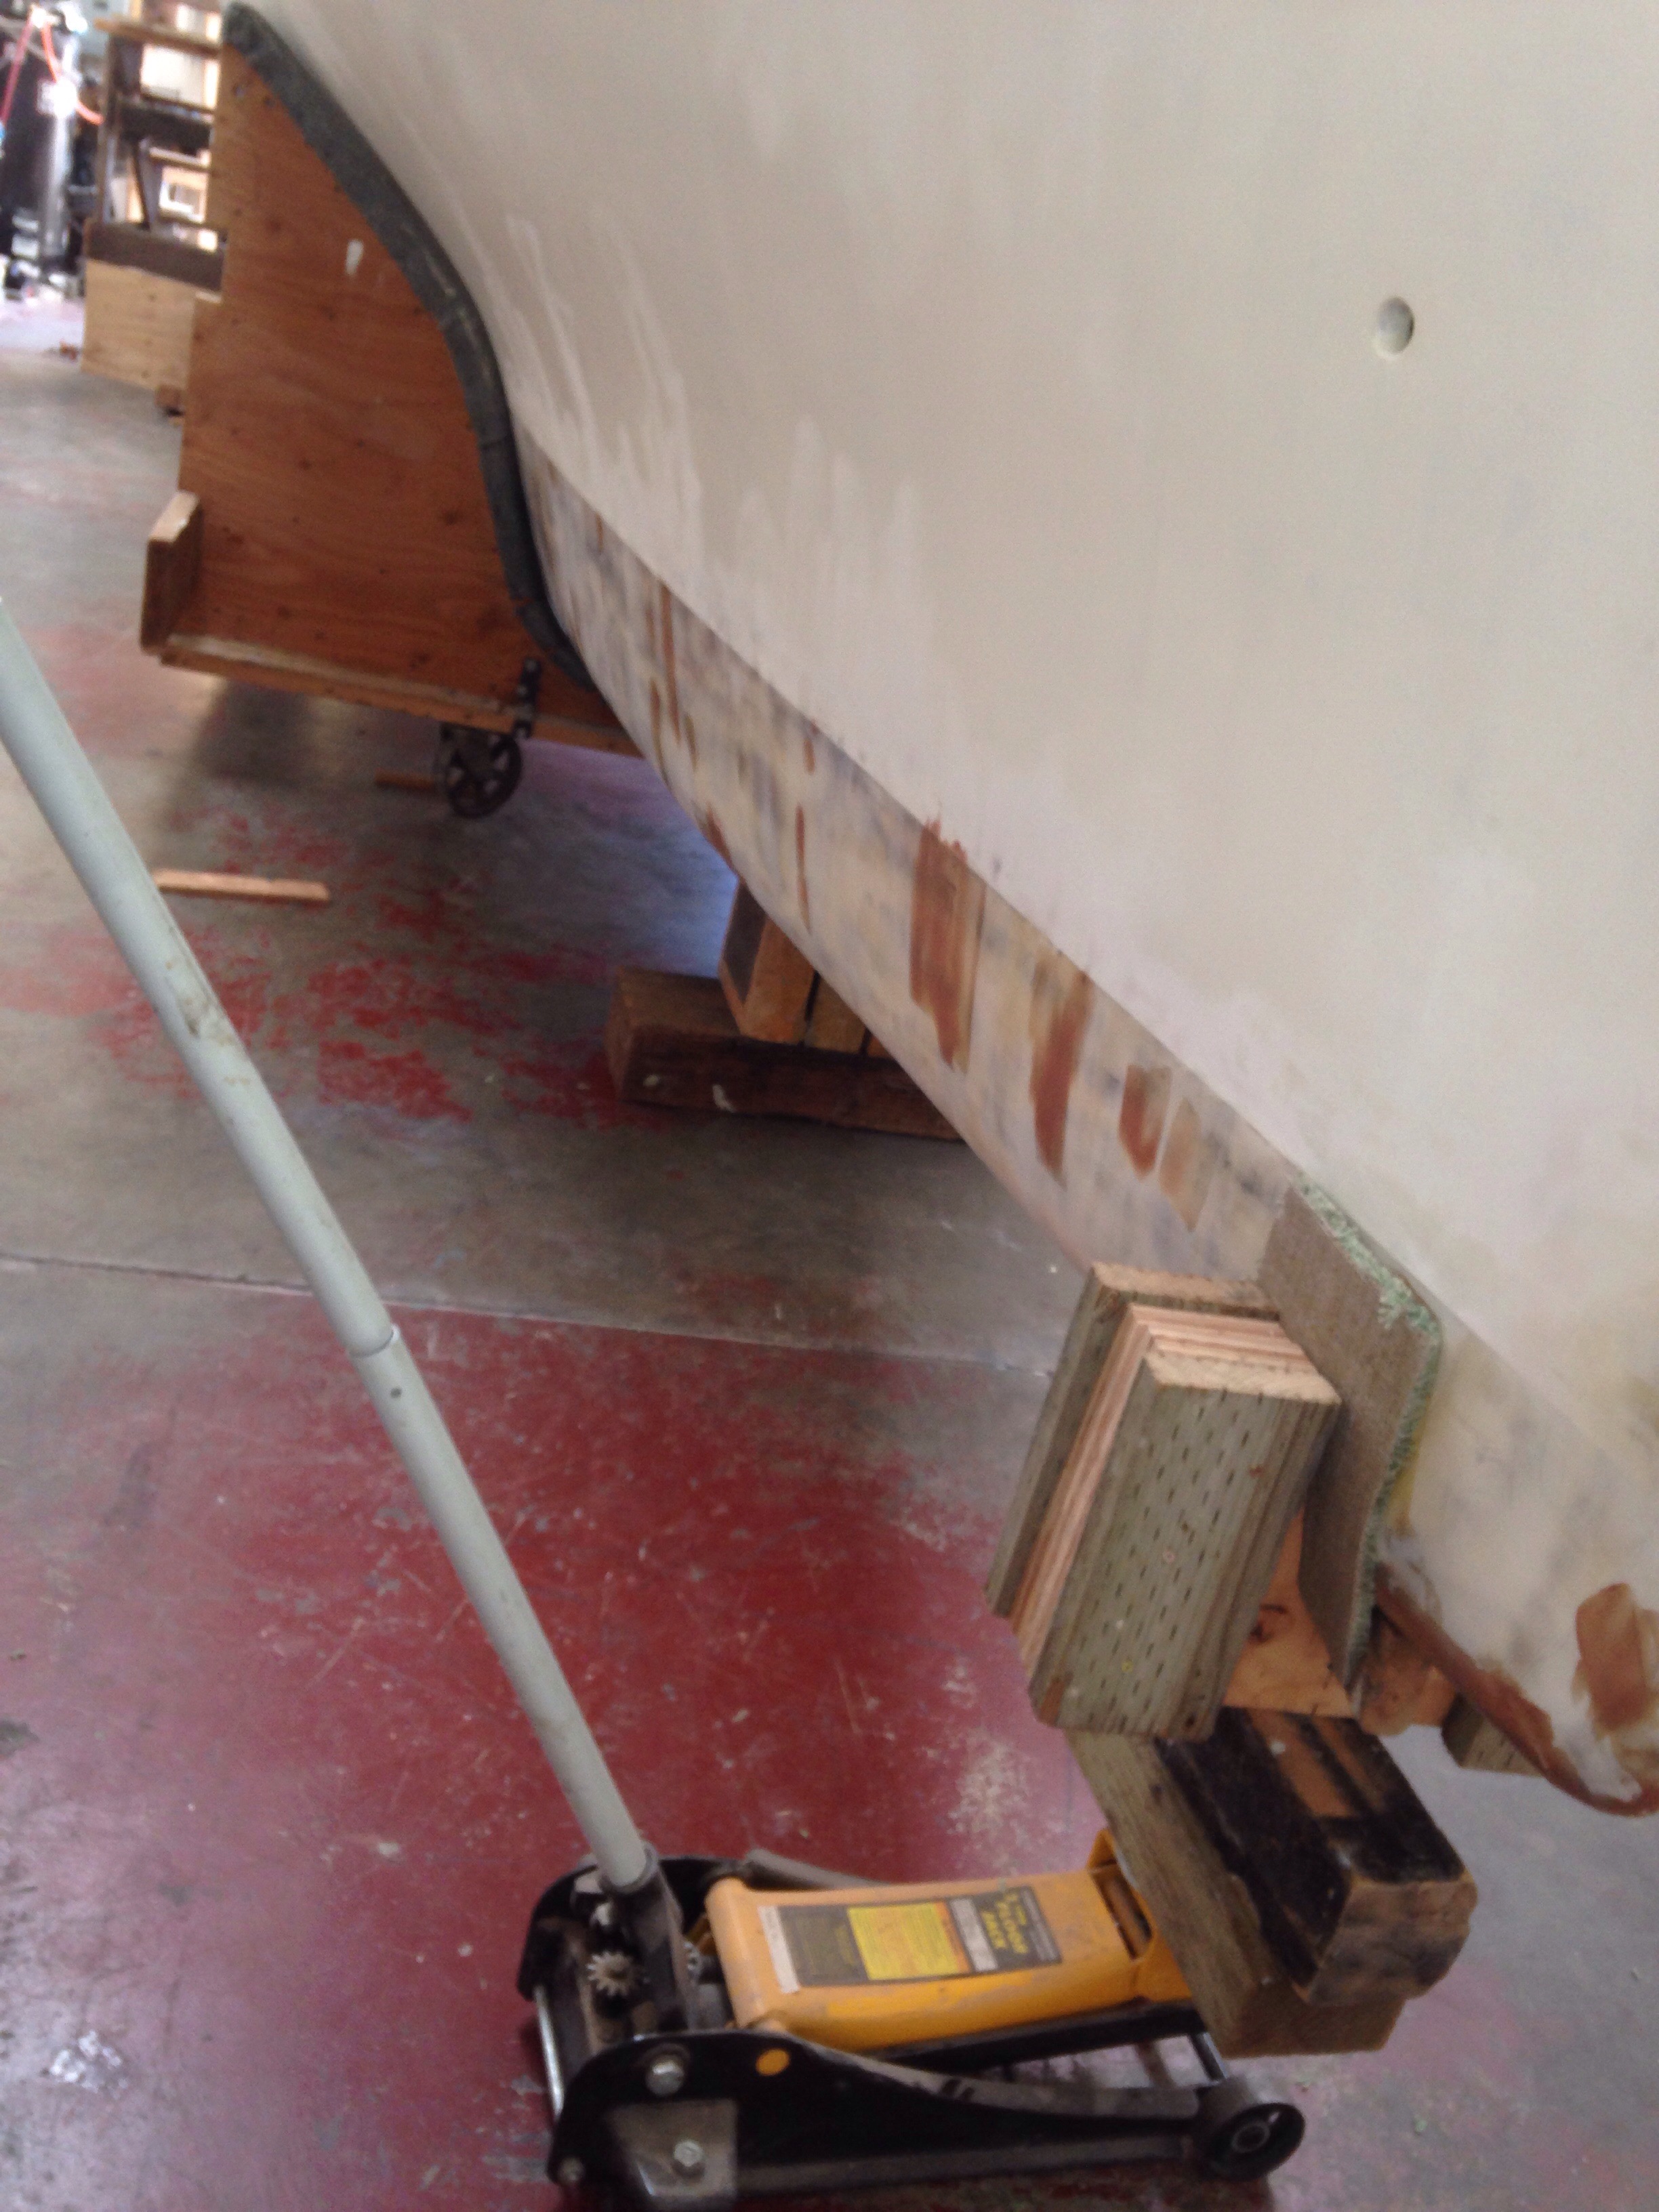
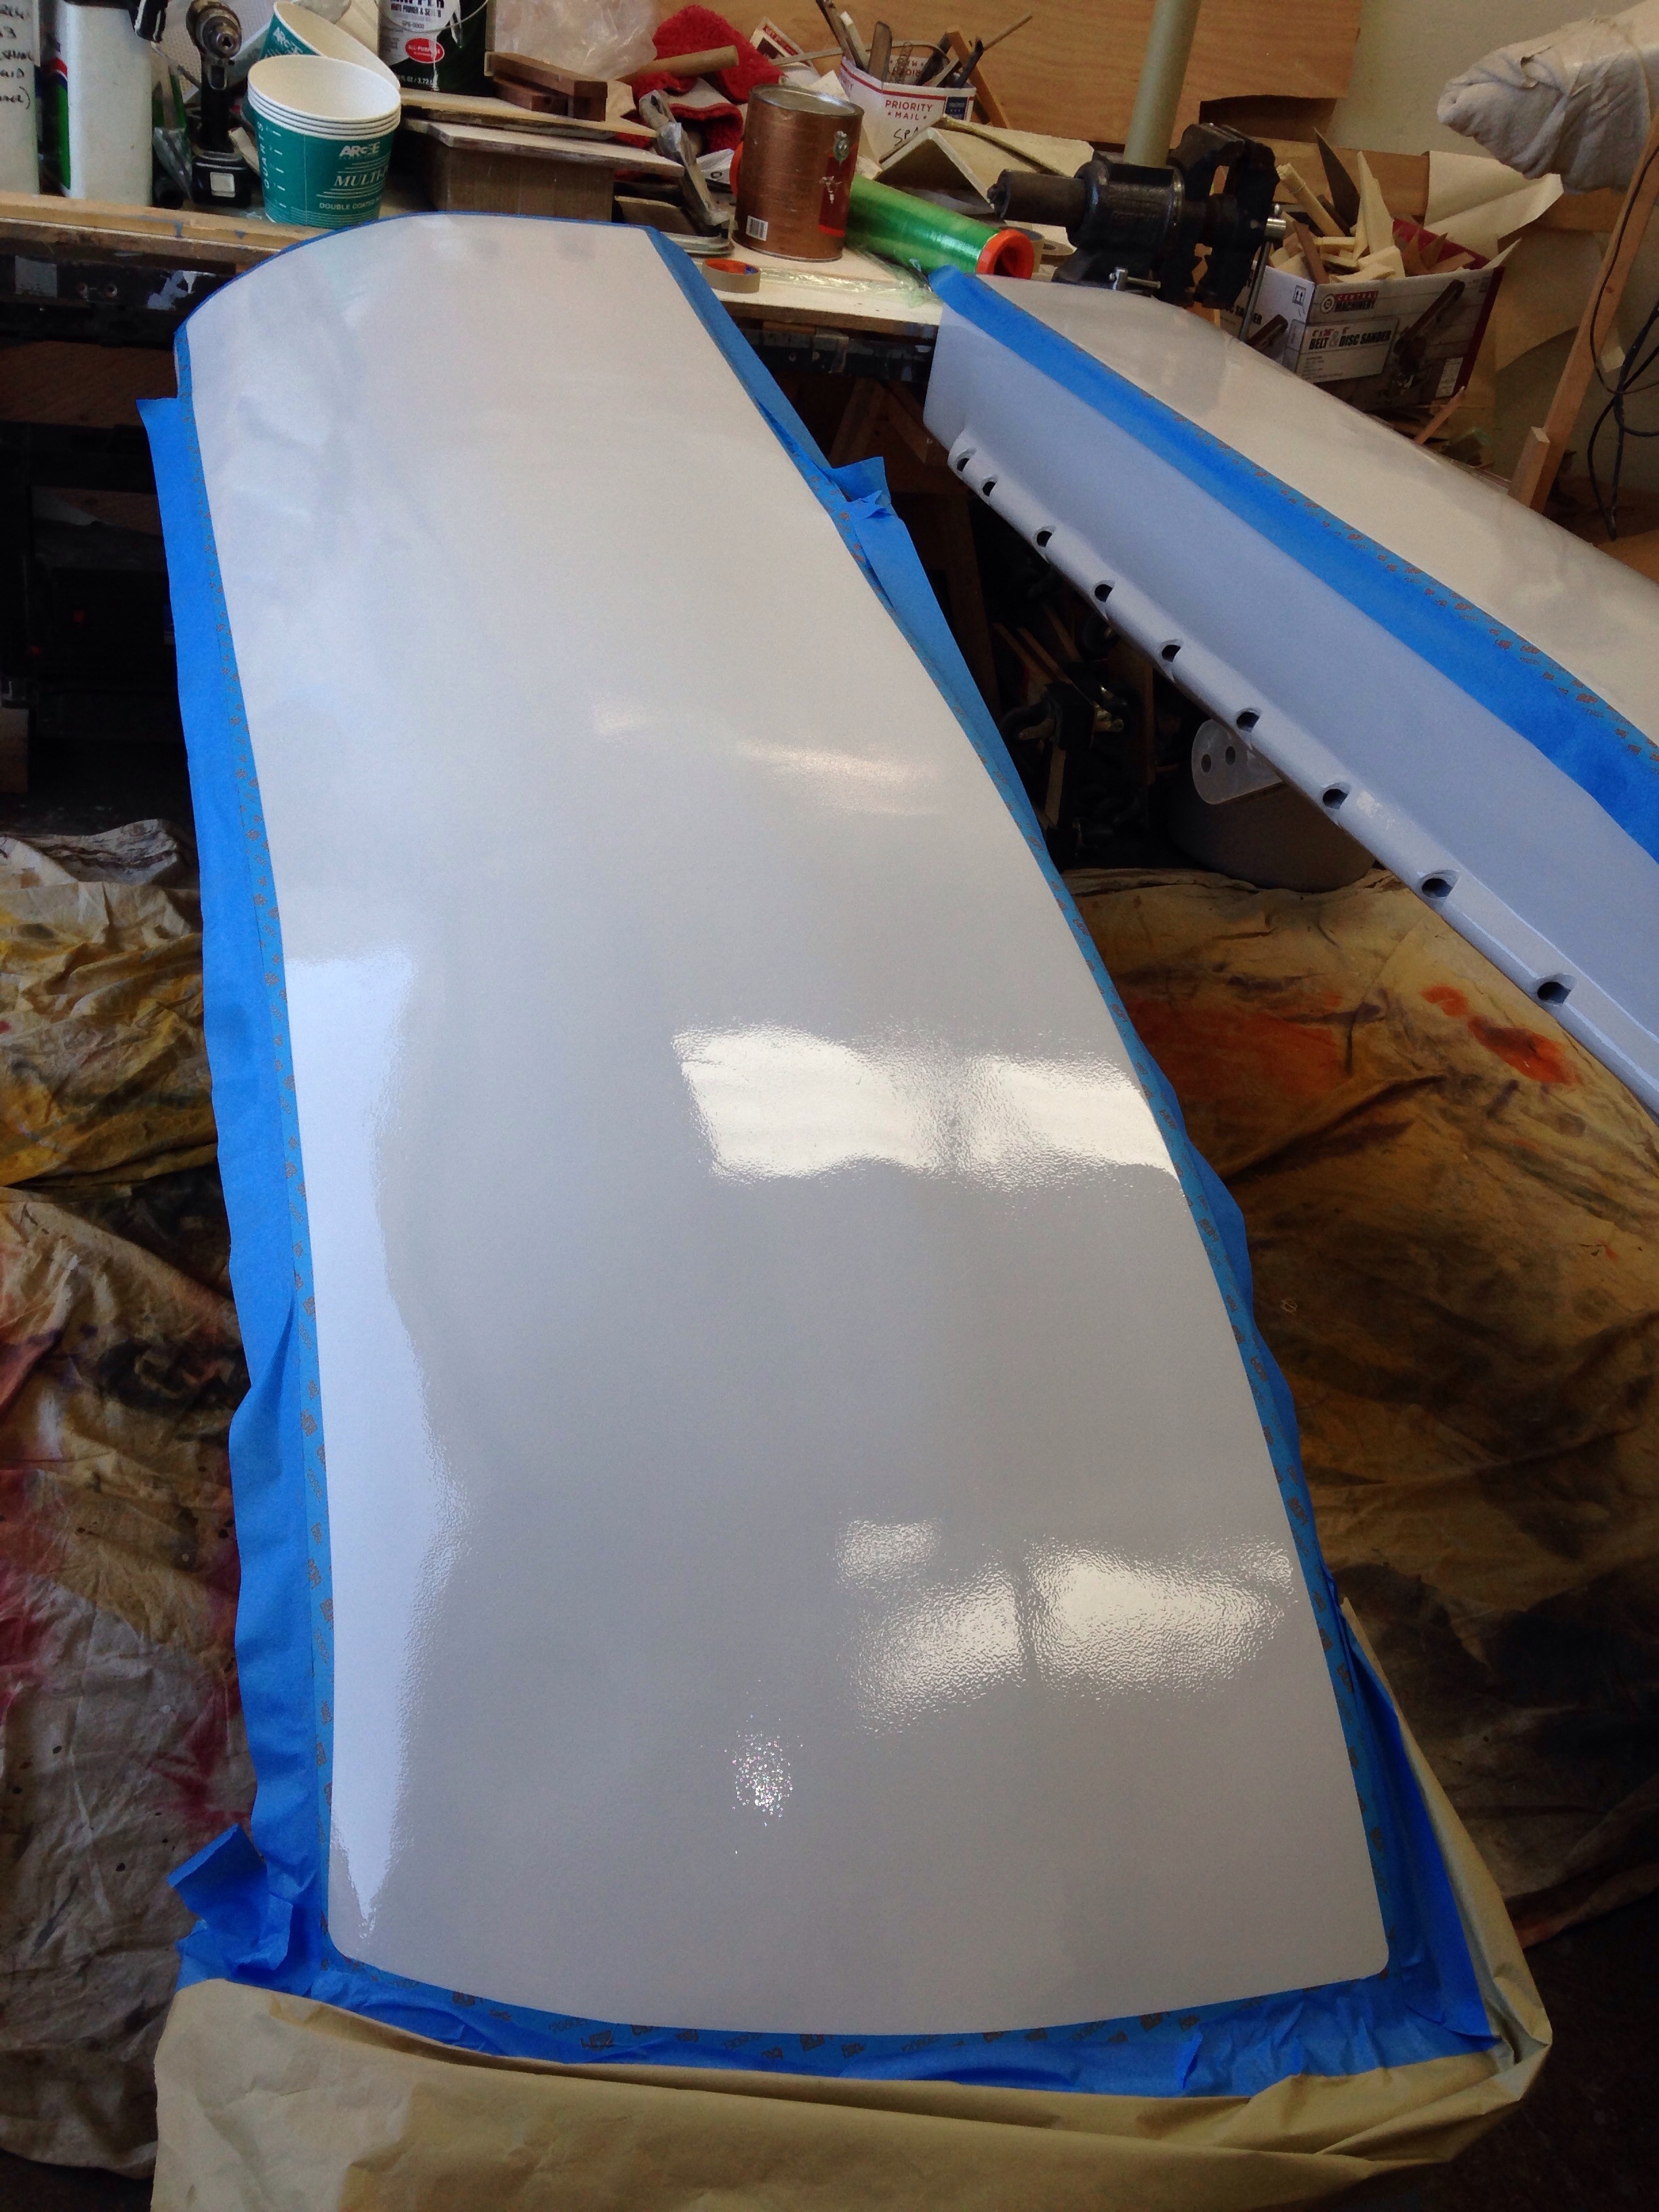
… But in a good way. The underwater portion of the hull is almost done with fairing. Each square foot done with the big sander this week is a completed step, and there’s just the last 8′ or so at the stern to finish up tonight. Very much looking forward to painting, instead of sanding, the bottom of the boat.

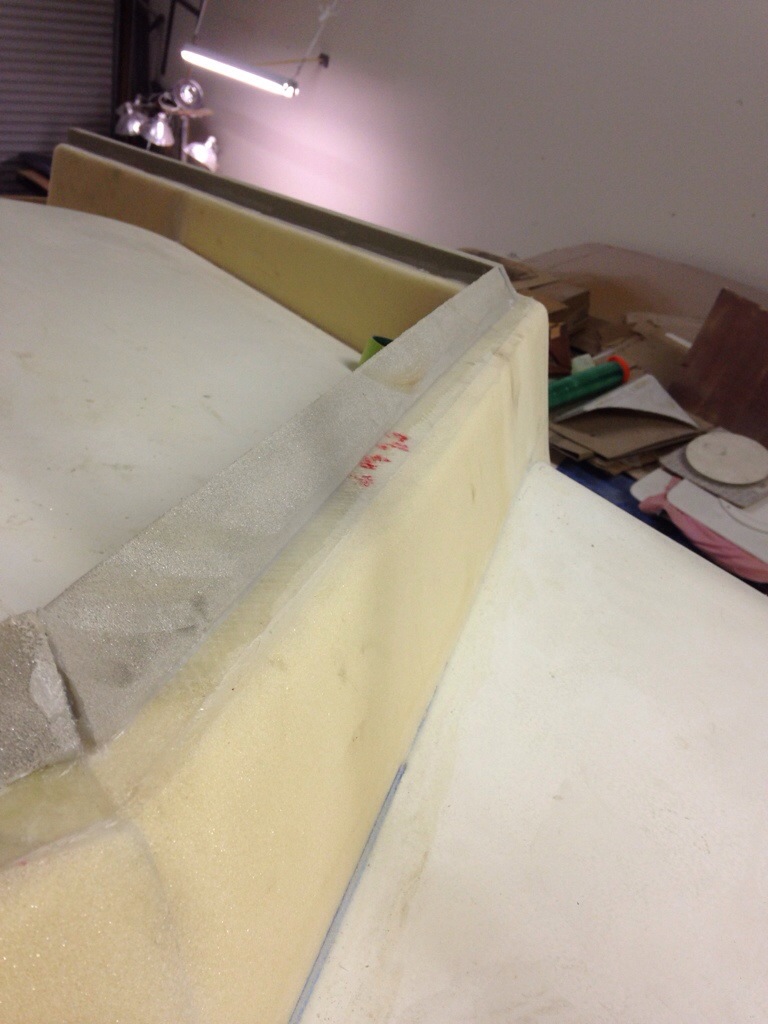
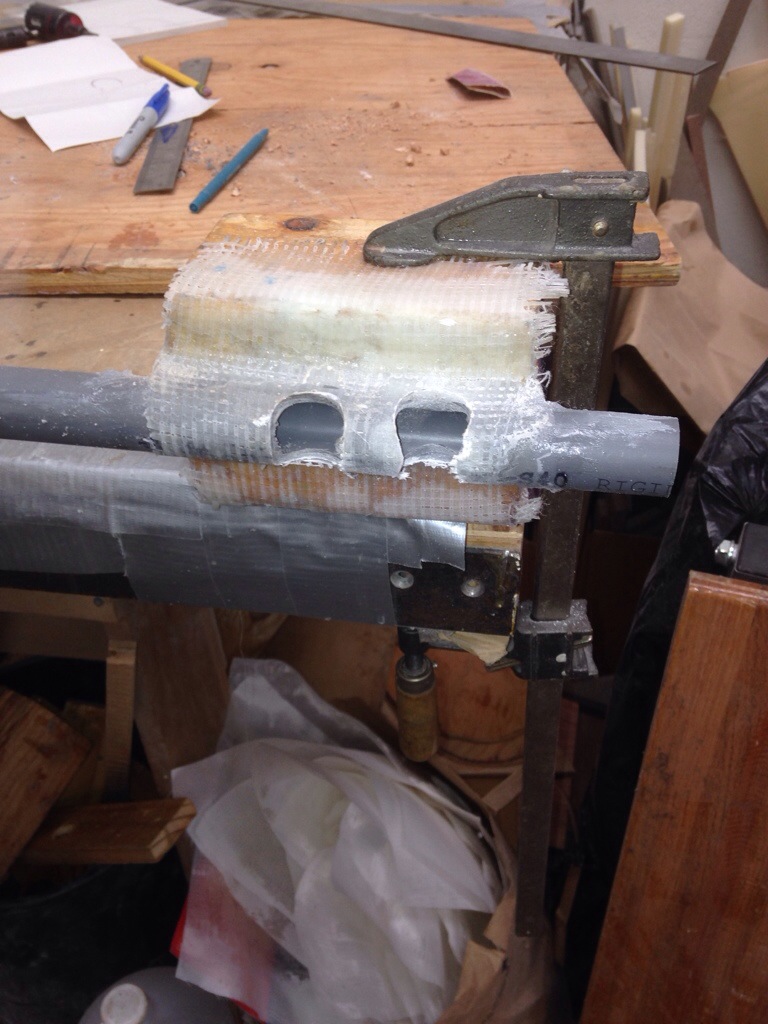
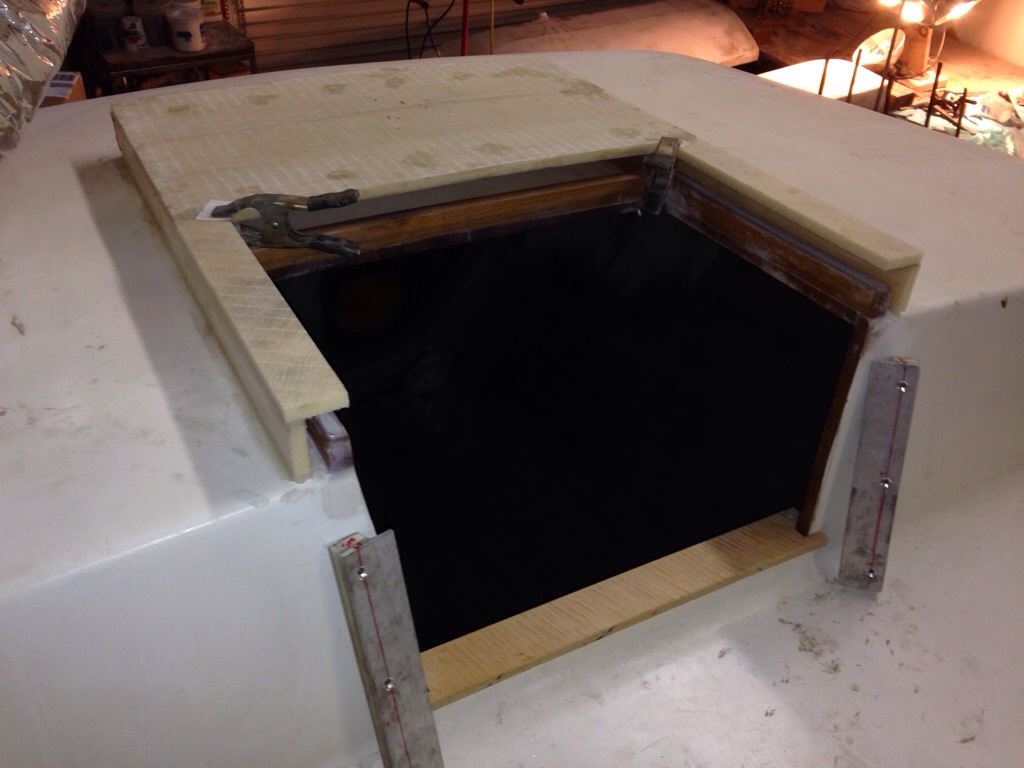
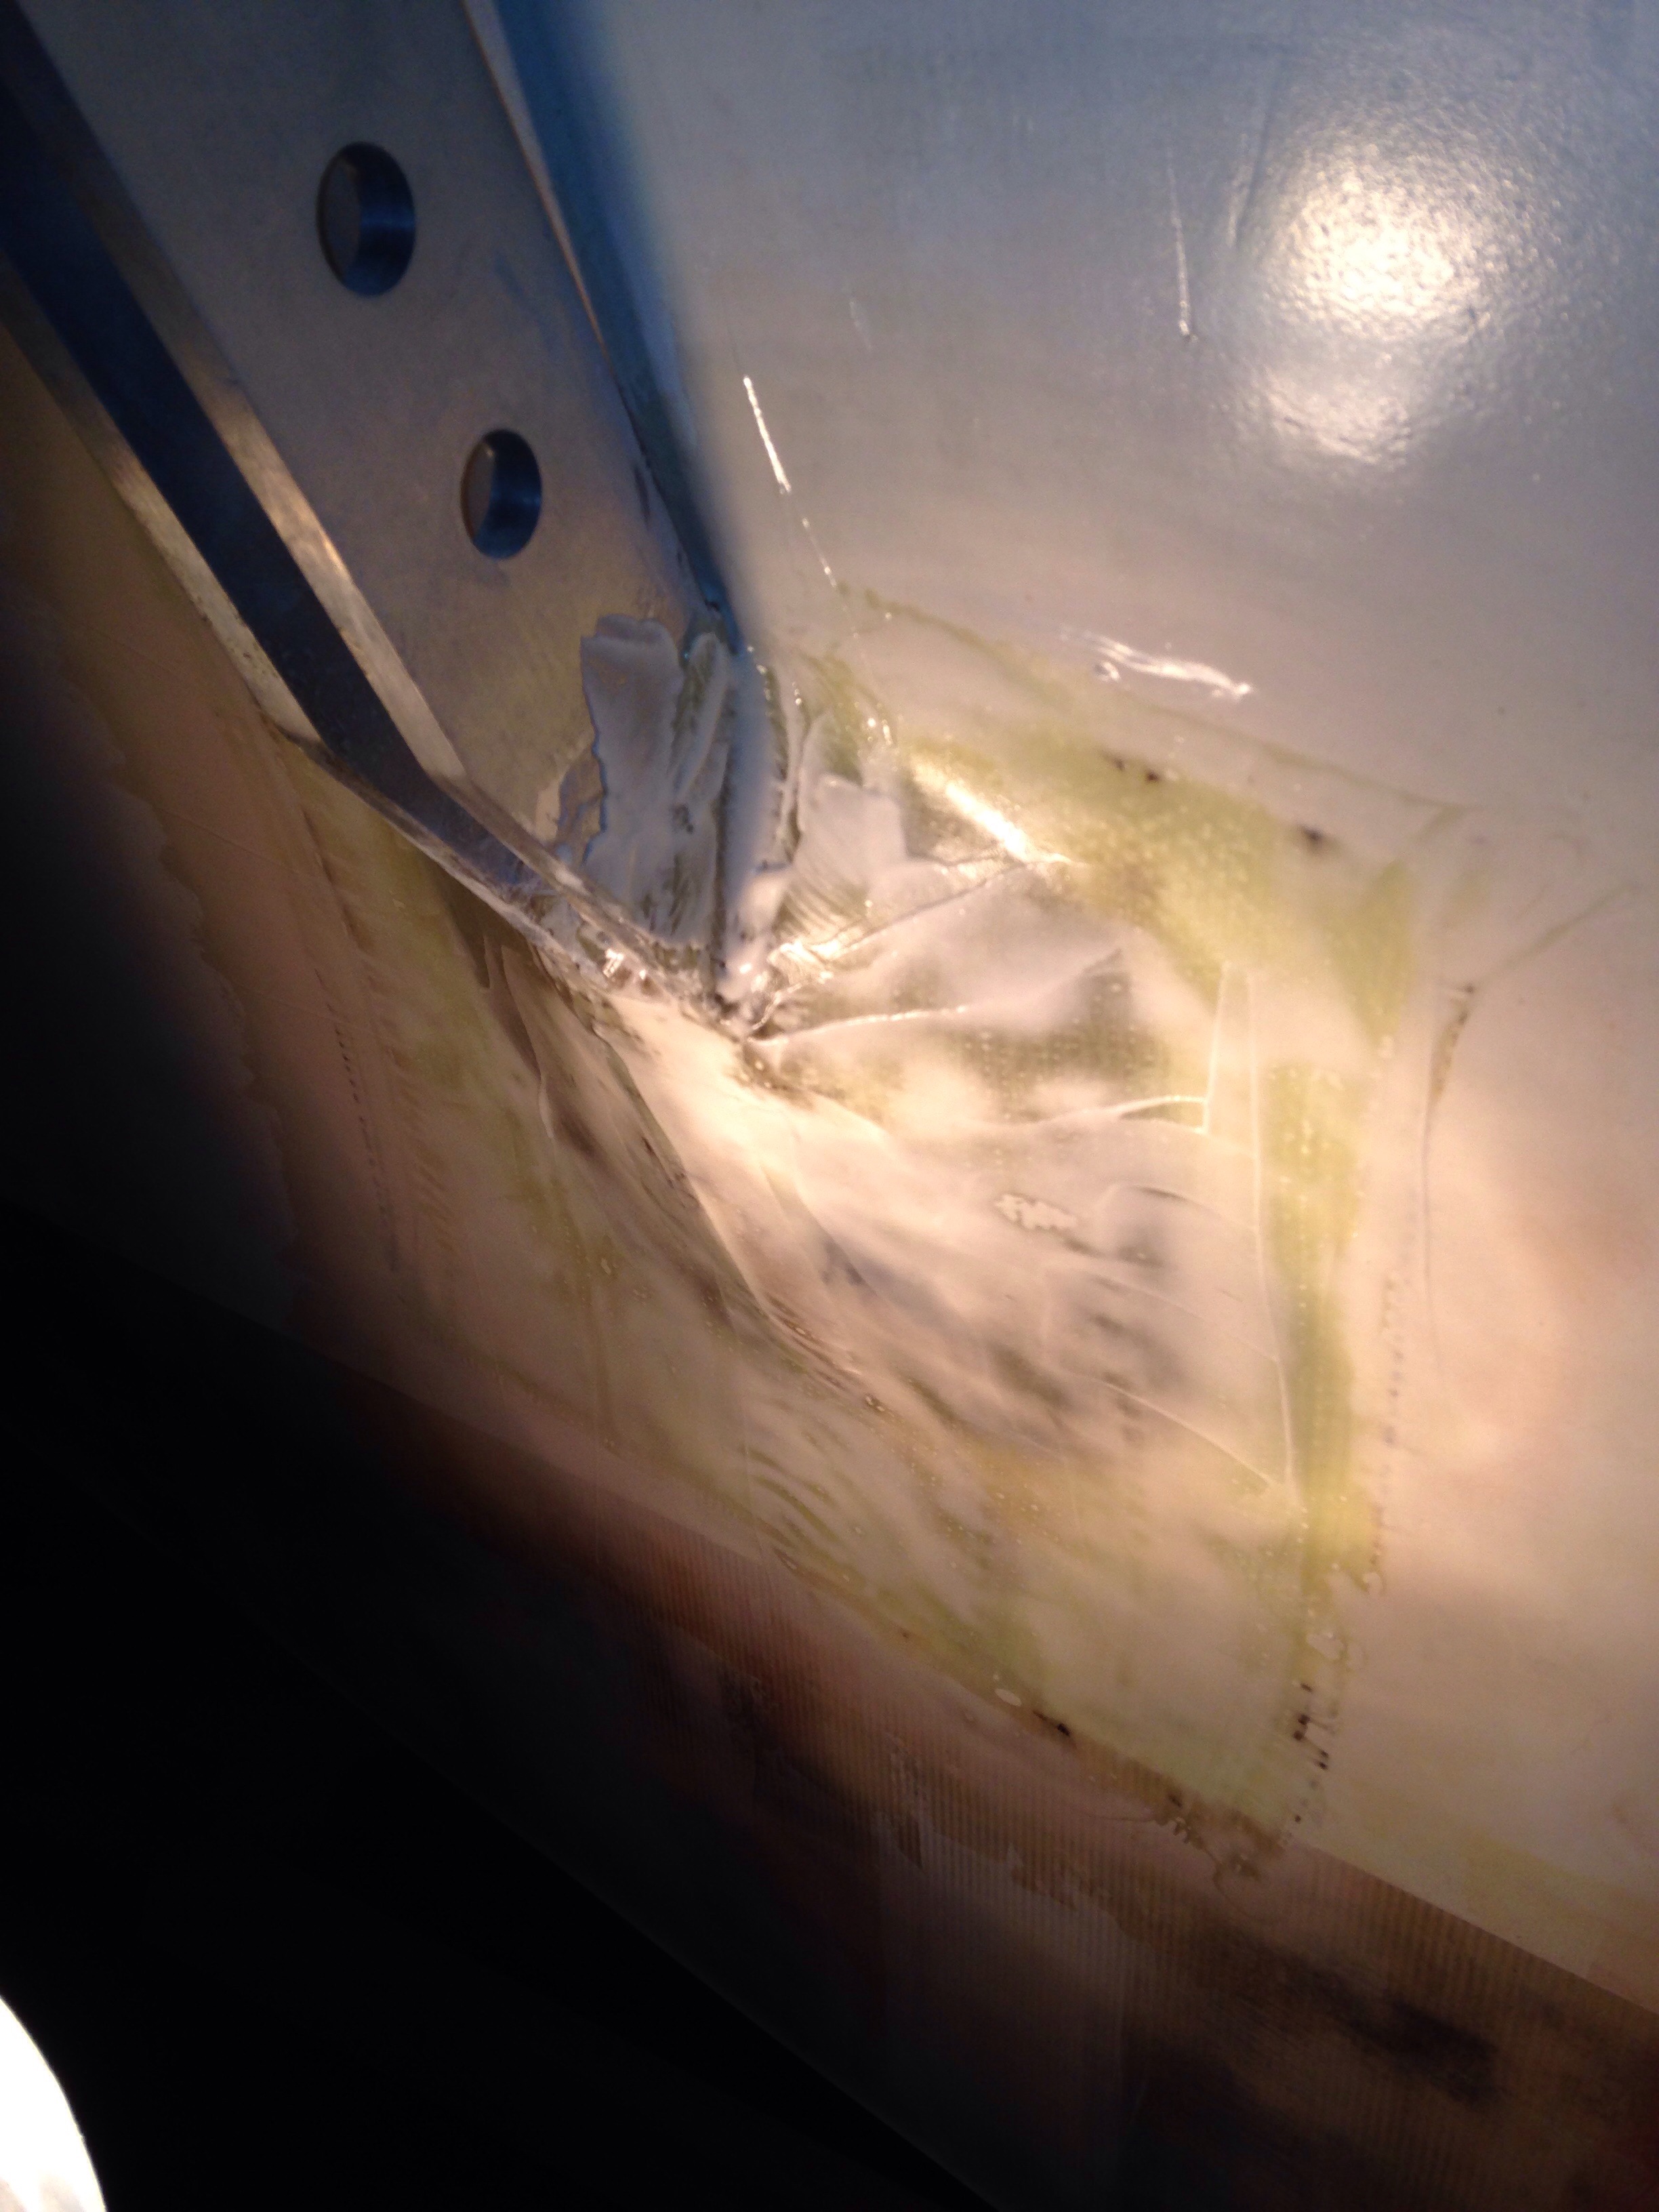
Just above the waterline we’re finishing up those beam brace tang fairings. The stack-and-glue foam was rough shaped with a wide blade on the multi tool.

20151221-193259.jpg
Then the flapper disk on the grinder, and finally a sander to smooth out the shape.

20151221-193409.jpg
The white ring on the sander is glue gun residue. That gummed up the sander quickly – could have done more spot-glueing instead of continuous beads to lessen the glue sanded.

20151221-193609.jpg

20151221-193631.jpg
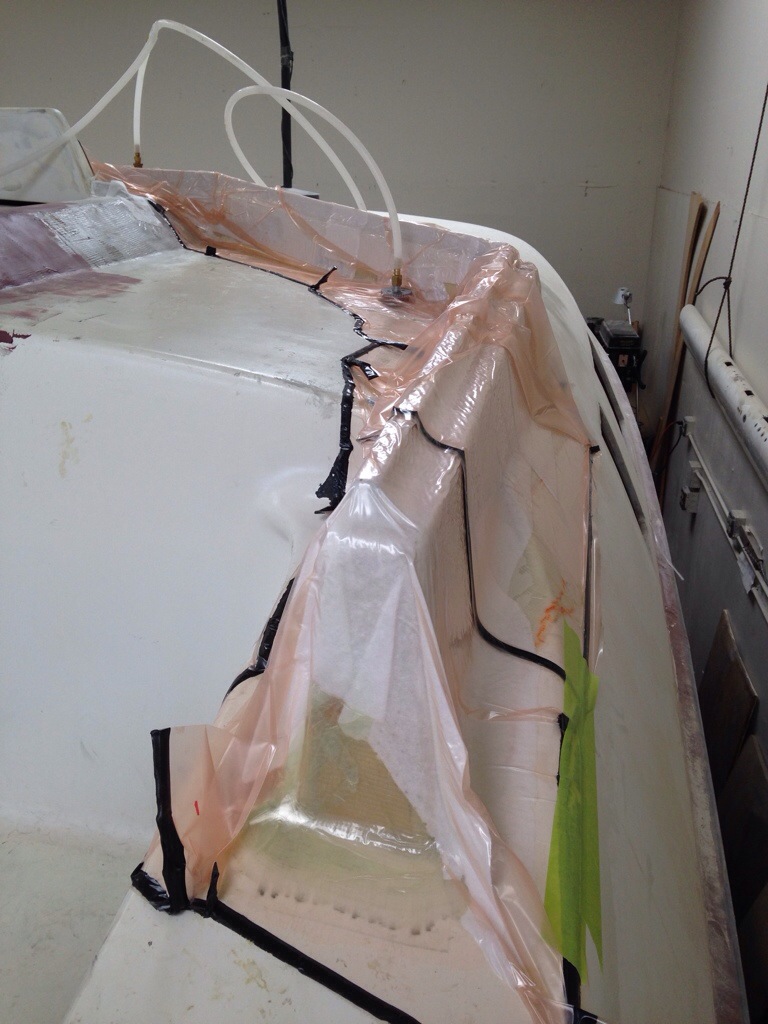
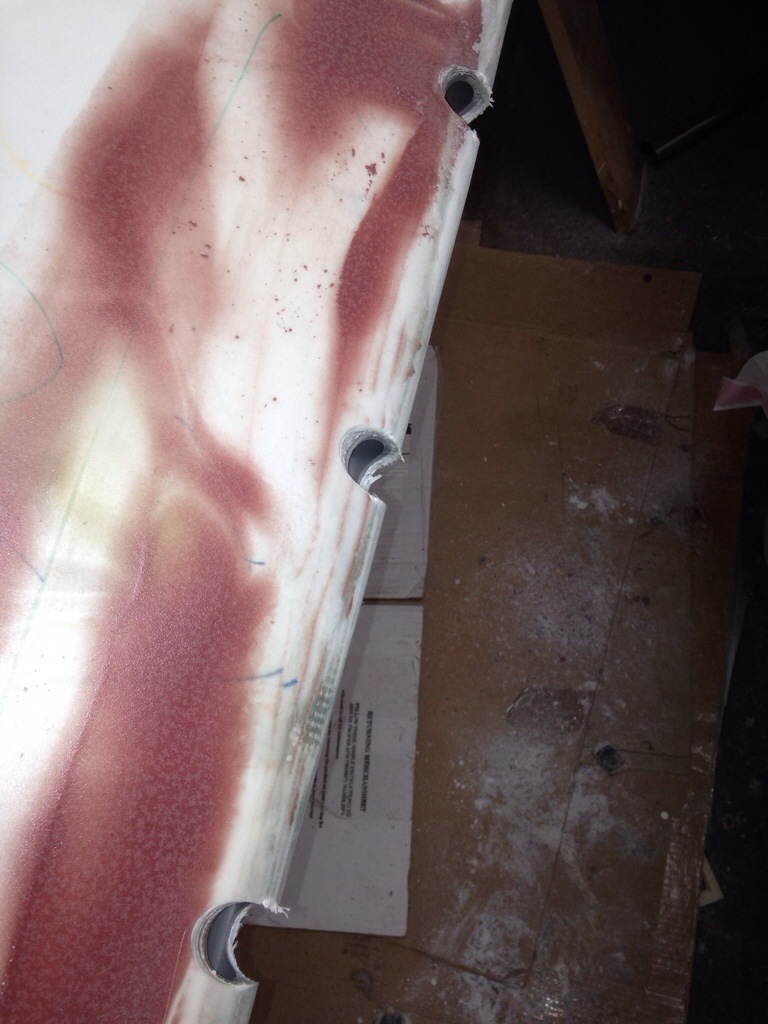
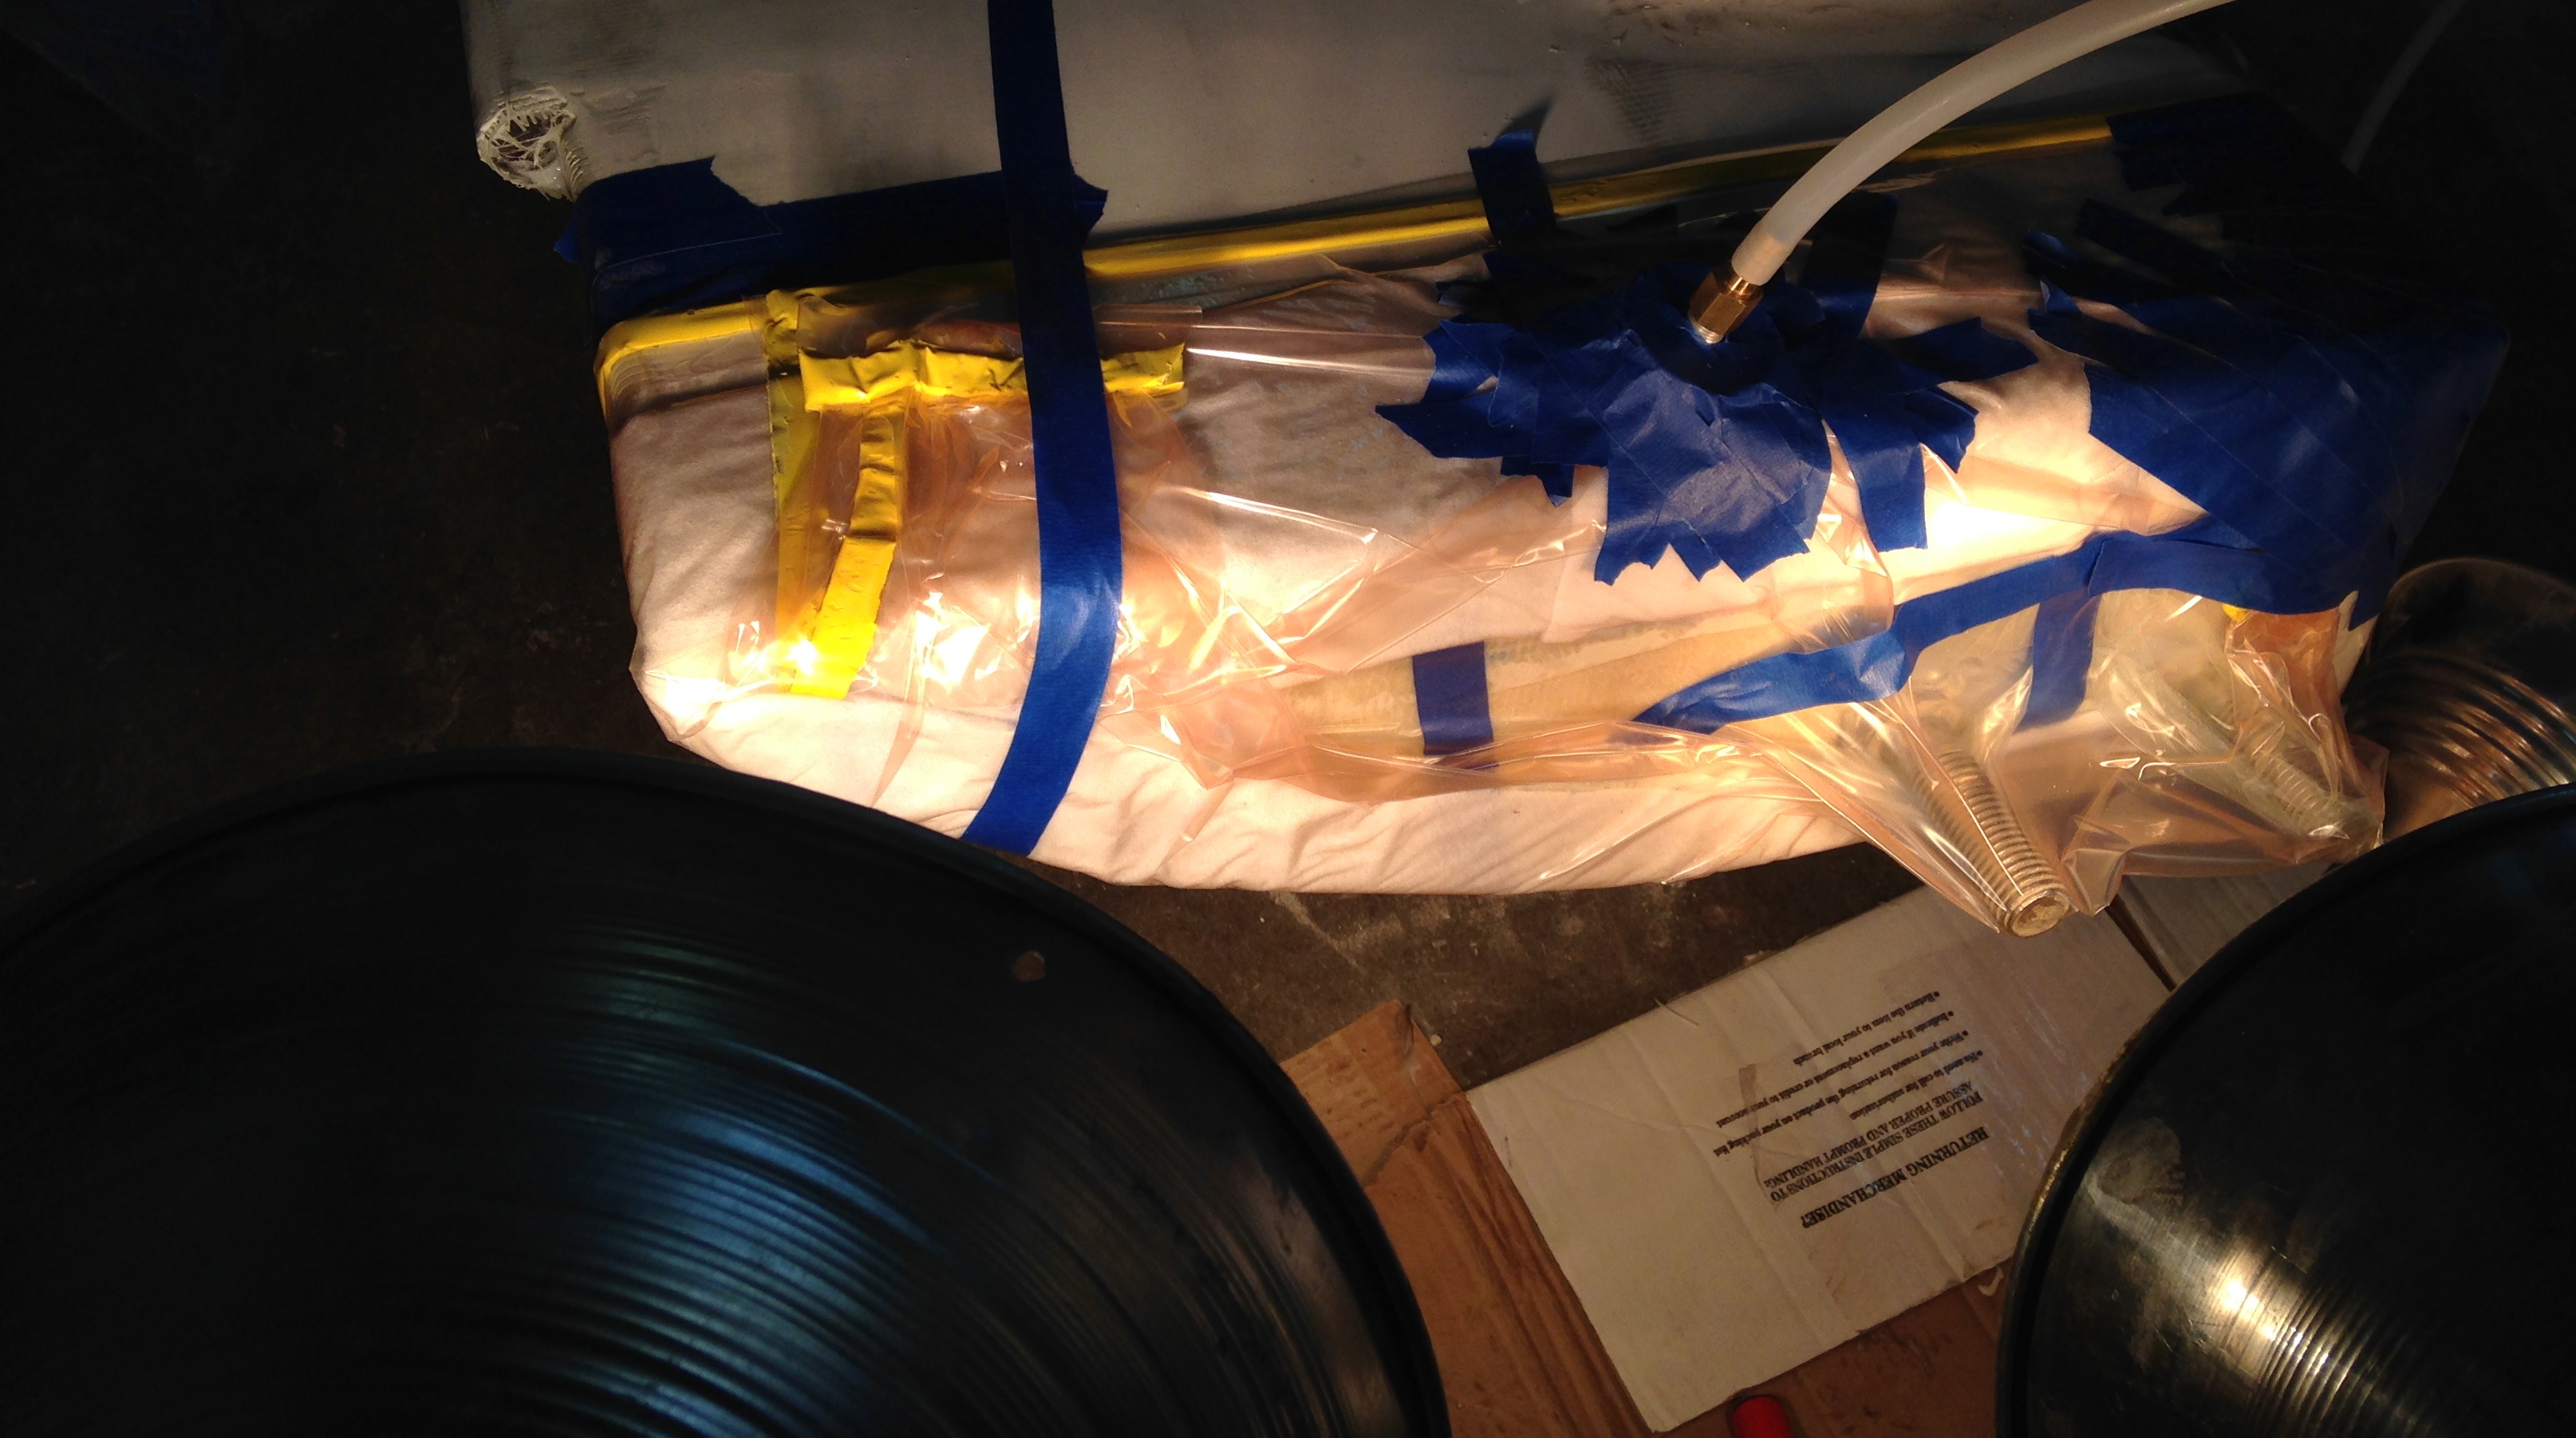
Here’s the outer fiberglass lamination. This process worked well: spread epoxy on the boat and let that get tacky while the fabrics are prepping. Lay out a transport plastic (an old bag here). Wet out the two layers of glass cloth and cover the outside face with peel ply. Carry the whole package to the hull and hold it in place, then reach behind and start pulling away the transport plastic. This way there’s actually no touching of the wet fabric, and no distortion.

20151221-194242.jpg

20151221-194308.jpg
We did the first one with a vacuum bag but found it wasn’t necessary – the other three worked just fine with plain hand layup.
Here we are with a first layer of fairing putty.

20151221-194542.jpg
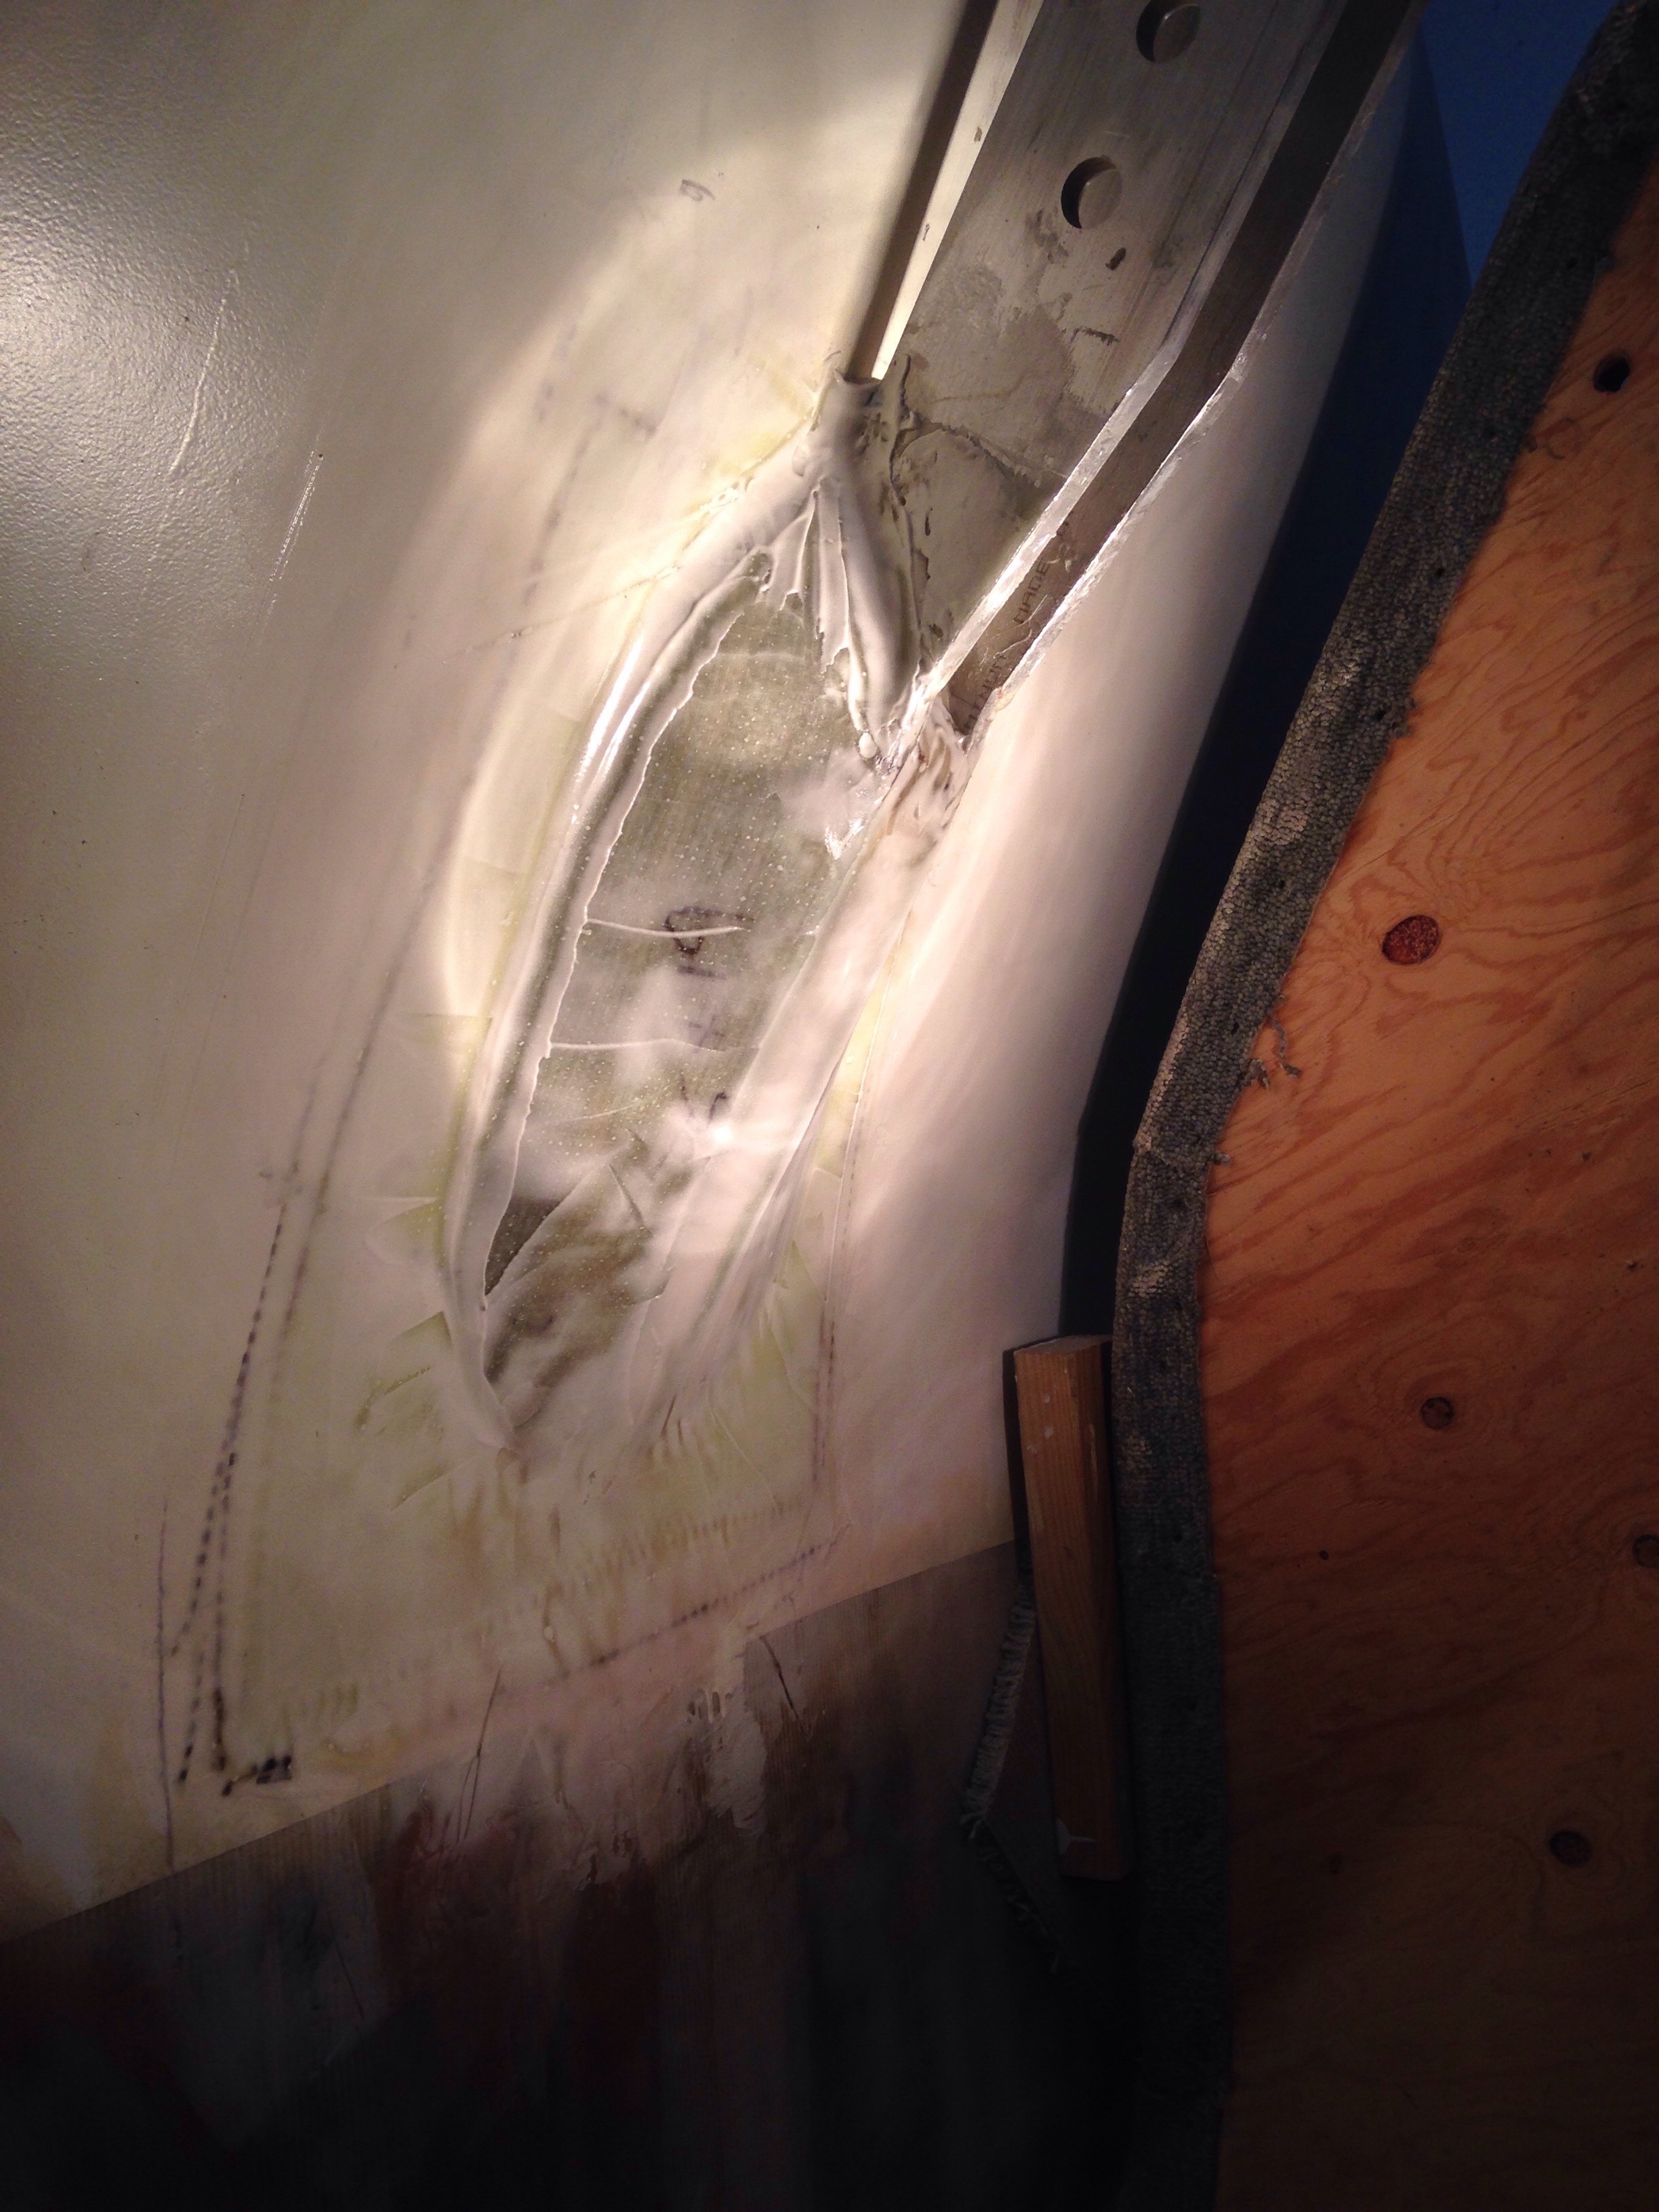
And here after a sanding pass and second coat added. These will get sanded again, and fairing touch ups tomorrow night if needed. With that, all the main hull fabrications will finally be DONE! Through the holidays we’ll do any more needed little fairing touch ups, and get the first of the primer started.

20151221-195454.jpg

Good to talk with you again.

Well as you probably noticed, the boat shop went dark for a month while the builder hit the road. First was a week in South Africa for business. These guys stood by the car on a quick visit to a city park in Pretoria…

20151218-173157.jpg
Right after that flight home we acquired a decent little used trailer and drove out to Colin’s place in Virginia for Thanksgiving. We are those weirdos on the freeway with the dogs and the cat standing on our laps.

20151218-173452.jpg

20151218-173513.jpg
New Mexico was a highlight; weather great for achy joints and a nice place for a boat shop some day…

20151218-173630.jpg

And so, we pick up the story with the last hull finishing project – sealing and strengthening the beam strut hull braces. For years they have been pressed up against the cradle, inaccessible for the necessary fiberglass work.

20151218-173853.jpg
It’s time to lift the hull and slide the cradle forward. First the bow –

20151218-173957.jpg
Then the stern, using the permanent plates which are the terminals for the aft beam horizontal braces. These posts sit atop bottle jacks.

20151218-174137.jpg
If you flip your computer over you see we get the clearance needed to slide the cradle. I think this is how we’ll transfer the finished hull to the boat trailer for transport to the launch Marina.

20151218-174310.jpg
Now we have clear access around the brace-to-hull joint, ready for finishing.

20151218-174418.jpg
First step is fillets on both sides and 1708DBM tape for strength.

20151218-174534.jpg
This evening structural foam was glue-gunned in and tomorrow all four of these pods will get shaped in to “fairings”. Will attack with little saws and the flapper disk on the angle grinder before a final sanding.
And yes, multiple ouches accidentally touching the hot glue!

20151218-174825.jpg

The neighbors are talking

On Sunday Rick Waltonsmith brought his 35′ heavy duty aluminum boat trailer up to Santa Rosa on loan to our project. We’ll use it first to store the completed floats and mast offsite. And it should be able to haul the main hull to the marina for the launch. This gives us much more flexibility than renting a semi truck flatbed. Seeing the big trailer at the shop Monday morning got the local business owners buzzing, “maybe he is actually going to finish that darn thing!” The best part is all their offers of help for the day we roll it out of the shop, use jacks to remove the cradle, and slide the big trailer under the boat. Hopefully in July …

Today was non-skid painting. I had heard a nice trick for masking rounded corners, so we gave that a try.

20150615-215328.jpg
Make the 45 degree corner then cut around a quarter with a sharp blade.

20150615-215542.jpg
And peel away the excess.

20150615-215646.jpg
It took about an hour to mask the four beams with all the corners.

20150615-215906.jpg</a
Griff and I went back after dinner, about two hours after the second coat, and pulled the masking. Very happy with the results.

20150615-220150.jpg

$2.1mil colors

During a lunch break from rolling out the first coat of finish paint, some web surfing turned up the newly launched Neel 65 tri. It’s width is our 39′ length and you can order it in the seven staterooms configuration.

20150614-071359.jpg
But what struck me is they’ve copied our color scheme; white cabin top and deck, silver topsides, white bottom paint, and white rig & sails. I wonder if they paid a color consultant in that $2.1mil price tag?

Our topsides paint is Interlux Perfection 2-part polyurethane in “platinum”. Here’s the first coat on the beams yesterday.

20150614-071736.jpg
Today will be a 400grit wet sand then the second coat. And non-skid tomorrow.

While exterior paint dries we go back inside to mess with the cabins. The galley is coming together nicely. The stainless steel is working out well.

20150614-072046.jpg

The forward wardrobe/dressing area gives a feel for how the wood trim looks against the paint. Long gone is the original thought of clear-coating the cedar-strips hull for a full wooden boat look, but adding back touches of hardwoods is only adding about 20lbs total to the boat and makes it feel much better than just paint and plastics.

20150614-072404.jpg
BTW, that hole above the clothes shelf is where one of the 1″ beam bolts comes thru. You can check the beam bolting integrity at sea while you sort thru your socks.

BEAM me up, Scotty!

The four big beams (that stretch between the three hulls) were set aside a year ago, knowing there was still some surface finishing to do. This week we pulled them out from under the boat and got to work.

20150609-232342.jpg
They’re big, over 8′ long, and weigh much more than one average person can lift. Each one got a cheap moving dolly so I can push them around the shop. This is the level of finish fairing we went for. Particularly the undersides – a decent job but not going nuts on an area that people won’t be looking at regularly.

20150609-232641.jpg
To help move them in to place for painting, and to load them for transport, we bought a $49 Harbor Freight chain hoist – wish this came a long time ago.

20150609-232938.jpg
The fairing process isn’t pretty, but after two coats of primer they suddenly come to life as finished boat parts.

20150609-233209.jpg
Building these from scratch was a huge undertaking, and this is one relieved smile.

20150609-233334.jpg
You can also see the shop is really crammed. A brainstorm hit – could we finish the beams and store them on our little utility trailer? So Charlie came over today and we put together a frame of 10′ bunks. The beams should fit across the trailer, all four loaded from front to back, and then we can roll out to the driveway or storage yard.

20150609-234026.jpg
The topsides paint is ordered and the next photo update should have fully complete beams for you.

As fabrication winds down and painting ramps up, we need to clean up. The pickup was 3/4 full from clearing Jeanne’s dad’s property, so the shop was target two. Letting go can be tough – see the original hull cutout for the main companionway; it’s the cedar strips piece Jeanne is reaching towards. Lots of “old” pieces of the boat are off to the recyclers :)
(And Jim might recognize Origami’s old blown out jib on the dump floor)

20150609-234709.jpg

While exterior fairing and paint rounds dry, interior trim-out continues. So far we’re using epoxy to bring out the wood’s colors and provide a permanent seal. It doesn’t leave a great finish, so now we’re experimenting with finish coats of polyurethane.

20150609-235113.jpg
Hopefully this stuff will sand nicely between coats and buff out beautifully. Stay tuned.

Yes, but it’s a DRY heat, dear

Well, the oven run from the last update got to about 115. So we upped the heat bulb count to 4 x 250 watt plus 5 x 125 for 1600+ watts to heat an 85 cubic foot box. Also added some R13 attic insulation around the box and a small circulation fan inside. With the afternoon sun beating down on the works, we hit and held 160 today, so beam #1 is officially post-cured. Just need three more warm sunny schedule free afternoons.

Started fairing the rudder and it looks way better quickly. Photos will come once the fairing is done and we’re in primer. Really need to get this done so the steering components can begin. For those following Fram’s build, with all Henny’s amazing engineering steps, you will see the polar opposite develop here. Simple, crude and hopefully just as effective as the great feeling of steering the F27.

Back to the windshield, the rope pass-thrus came out quite smartly. Here they are being cemented in place yesterday, and were cut off flush this morning.

20140319-003043.jpg
Next the center portion and the port side got 16oz glass and an awkward-shaped vacuum bag.

20140319-003154.jpg
The bagging is getting more proficient, but I still spend too much time chasing leaks probably because of improvising around weird shapes and surfaces once the glass is already wetted out. Two things I wish I had learned in advance: (this note is for new-to-bagging folk)
Attach all the sticky tape in advance to one side of the bag material, doing that work flat on your big table. Things like adding the sticky tape on one end after the glass application totally screwed things up.
Work a trial run with everything dry and plan out where extra baggy material is need to conform to staggered / stair step shapes. Otherwise it’s really frustrating to have a whole bagging set up but one big corner gets stretched to the point where there is no actual downward pressure on an inside curve or corner. This stuff sounds easy but it seems a real experienced art form to me. Tricky to get it right and I keep learning to make the bags bigger, although my inner tight-wad pushes back on materials (perceived) waste. Let’s see if tomorrow night’s port side windshield frame gets done more smoothly than today’s.

For Schildknecht

Yea! The rudder is complete and it’s very exciting to have this vital part of the boat here on the table instead of the plan diagrams not too many days ago. The last touch today was to wrap the leading edge in Kevlar – not in the plans but we decided that about 12 more ounces of weight to put a bullet proof vest-like protection on the front where crap hits a rudder seemed like a smart trade off. It’s the remnant fabric from the full hull length keel-line protective strip that went on the main hull 15 yrs ago.
Can you see the color scheme of the Pittsburg Steelers? (The rest of you can stare blankly while Bill S. laughs)

20140315-225455.jpg
And that foam blank to the left is another rudder to build – for Colin’s rehab Coronado 15 project. Figured we might as well do an airfoil shape too.

Stood the rudder up in position so you can see the difference from the similar shot of the foam cutout a couple weeks back. Makes more sense now!

20140315-225812.jpg

20140315-225848.jpg
In that last shot, see that the rudder will actually drop another 8 inches or so once the floor isn’t in the way.

Writing this tonight while trying not to stare at the curing oven thermometer. Space heaters didn’t work, and like others I’m on to trying heat lamps. Got to 115F with about 600 watts of lamps. Added another 540 watts tonight and we’re passing thru 105 as I type. The Applied Poleramic folks want their ER2 to post cure at 160 for two hours. They told me by phone that I could substitute some time for heat, like maybe 140 for four hours or so. If we don’t get far enough the shop neighbor has a friend at the car painter – we could haul all the beams, the rudder and other structural stuff over there for an evening bake off. Guessing he’d charge a few hundred and it’s a big pain in the rear to transport this stuff. Tonight’s red lamps should look quite familiar to Mom – remember keeping all your dogs warm in the shed on the freezing Sonoma nights?

20140315-230630.jpg

107 and still rising. Time to go cut out glass fabric for the windshield frame.

Baked Beams, anyone?

It got warm in Santa Rosa and my thoughts turned to summer BBQ – hot dogs, baked beans, cobs of corn…
But really we need to post-cure the epoxy in the beams and steering parts, so we need a big oven to reach and hold 160 degrees (F) for 2-3 hours per session. Made this from Sheetrock and ripped 2x4s, just big enough to house one forward beam resting on its furniture dolly.

20140313-234540.jpg
Pulled the top on, and it started working right away, but the fan-aided space heater hit a safety kill setting at about 95 degrees. So tomorrow we’ll follow Gordie Nash’s advice and find a cheap baseboard wall heater at Home Depot. And perhaps have to take some license pulling out any safety settings if it has a brain.

The rudder took shape nicely and has now gone thru the carbon lamination steps. Each side got a staggered 14 layers staring from the top down. There’s some extra wraps over the upper edges, and the outer skin of the second side went in the vac bag this evening.

20140313-235056.jpg
The last step will be adding a bit of Kevlar tomorrow to the leading edge, just to provide some impact resistance.

While the rudder was in a bagging step, we free handed an idea for strengthening the slot where halyards will pass thru the windshield back to the winches. Simply take 24″ of PVC pipe and tape it to some foam:

20140313-235441.jpg
After waxing the mold, we made three trips around with wet fiberglass and let dry overnight. Cut it in half the next day and pop out the molds from each 12″ piece (that’s the step in the photo). I need to take a winch to the shop and mock up all the exact positions for these line guides, then we can cut the windshield frame openings to match and glass these tunnels in.

20140313-235721.jpg

And here you can see the decision on how to affix the removable windshield to its base. Bolts will go in horizontally along this grey wedge that has been set at the proper angles desired for each window pane going around the frame.

20140313-235920.jpg
This windshield base is now ready for glassing this weekend. After a bike ride. :)

Do a little jig

Well, not exactly dancing in the workshop, but we did make a drilling jig today and got very nice results with the net lashing points on the beam edges. These slots cut in to the long tubes will allow us to loop small lashing line around a skinny rod inside the big tube, creating anchor points for the nets every seven inches along the beams, the float decks, and along the sides of the main hull.

First up was a practice piece to get the depth right. Cut on the left didn’t take enough of a bite…

20140210-231038.jpg
The drilling jig is simply some hardwood pieces screwed together and carefully drill pressed. It’s enough to get the pilot bit started on the actual work surface, then set the jig aside and finish each cut.

20140210-231624.jpg

These were cut using a one-inch hole saw (the wood-cutting version burned up quickly – needed to upgrade for metal-cut bits). The outer edges point in, following the circle, so another straight cut is needed next.

20140210-231919.jpg

Note the little paper pattern in this photo – that got marked on each hole with about 35 degree legs so the lashing line can run out at angles and not rub.

20140210-232235.jpg
Got both leading edges of the two being-worked beams done. Next is some fine-finish work around these cuts and two of the beams will finally be complete.

And while glue was drying – back to the hatches. Decided to beef up the locking area (it’s also the grab handle) with sturdy aluminum plates. That’s another pound or so added to the boat, but intruder security is the one place we don’t mind taking a small hit on performance wise. It’s a safe house before it’s a race boat.

20140210-232818.jpg

And the framing for the aft cabin hatch is coming along. Style is matching the main companionway area. This work allows procrastination on the hard dodger design decisions. :)

20140210-233104.jpg

Changing the sight lines

The windshield base is now complete, and it’s a little scary to be changing the look of the boat this much. We REALLY want a nice protective wind and wave screen, and it seems to make a lot of sense to have this with a removable top. Kind of like a little roadster car, where the winter hard top can be left home in the garage during the sunny weather.

IMG_0699

IMG_0700

But how do you design the side windows for a windshield that stays put and hard top that can be removed? I’d rather not have soft plastic side curtains, so maybe part of the windows will attach to the top?  As Drew quickly figured out, the Hallberg-Rassy boats got me thinking; one with windshield style…

HR43MkIIIpano2

and theirs with the permanent hardtop…

HR48MkIIsailing887RickTomlinson

If anyone has ideas on how to combine these two, let’s hear them!  (maybe split the side windows in to stacked triangles, the lower being part of the windshield, and the upper a part of the hardtop. And a hand-hold running along the joining seam?)

Back in fairing land, the first two beams are getting close. This thing actually looks like the right overall shape now. A skim-coat went on last night, so tomorrow’s sanding should be all about ‘finding final level’.

IMG_0697

With the other two beams down at floor level, I figured it was a good time to add the final two glass layers that tie the fairings to the inner end piece. After having just read Henny’s account of a very frustrating vacuum bag leak chasing on his major hull infusion job, I was feeling happy and smug about our ‘bagging’ success so far. Pride can be a nasty thing, as I was treated to a horrid Saturday evening of leak chasing! This little bag isn’t pretty, but the ridiculous part is all the blue tape… that’s operator error thinking he was hearing leaks along the yellow sticky tape line, and then the vacuum plug joint.

IMG_0701

There were actually two of these bags, set up with a t-fitting over to the pump. The pictured one would not get past -8 mercury inches, and the other one only -4 (-20 to -25 is my preference). After about an hour and a half of cursing and messing with tape, I came to the realization that air was probably being sucked thru the unfaired portion of the glass weave where the wave deflecting fairing joins the main square beam – if I had waited to do this operation until all the weave had been filled in, this would have likely been a 10 minute, ‘just fine’ operation. Argh. And of course after rolling around on the floor all that time, it was time to check the vacuum pump. Big problem there as many ounces of pump oil had blown out the exhaust hole. This new $400 pump has blown some oil on each of its first five runs, but it gets worse each time. Really hoping Fiberglass Supply will come thru with warranty support tomorrow. Time to take a Sunday break and go watch the Super Bowl commercials (and lick wounds over no 49ers).