It’s alive!

Honey, why are your hands so dry and scratchy?, she asked. Might have something to do with using this about two hundred times this week.

20160129-232818.jpg
So a few hours after burning the prints off one finger (don’t grab for the heat gun without looking Greg!) the last lamps and pumps were connected and it was time for the moment of wiring truth. But first we needed juice. A visit to the Winglet (travel trailer you saw here two months back) to borrow the battery and it’s ready to throw the main switch.

20160129-233334.jpg
And just like that, 50 or so hours of wiring paid off.

20160129-233429.jpg

20160129-233449.jpg

20160129-233512.jpg

20160129-233530.jpg
Everything works as it should, including the two ‘big ticket’ items currently installed, the refrigerator and the windlass. We’ll detail those with more pictures soon. It was very satisfying to stand in the cockpit by the remote switch and make the windlass go up and down! The boat is coming to life.

The wiring plan includes AWG 2 size conductor for the battery-to-panel runs and the windlass circuit. There’s a 100amp fuse between the battery and the panel. The windlass has its own 70amp breaker and a direct cable to the battery switch. All of the branch circuits from the panel, plus the direct-to-battery bilge pump circuit, are AWG 12. That’s a bit of overkill for some of the lower draw circuits but overall it’s safer and was easier to pull everything from one 500′ roll. There’s about a dozen feet left (the very rough calcs did the trick). The 12/2 cable presented a challenge, as most terminals for stringing small lights etc. don’t deal with that big wire. A new item in the Ancor electrics line became the mainstay of the lighting system.

20160129-234927.jpg
They are sized for one input wire and a pair out, so these allow pigtails, or highway off ramps, down to individual light fixtures. Not cheap at about $1.75 each, but it seems bulletproof for a long time.

20160129-235204.jpg

And for Cap’t Holway, I am eager to show you how EVERY wire on the boat is easily traceable and accessible beyond covers and dedicated chases.

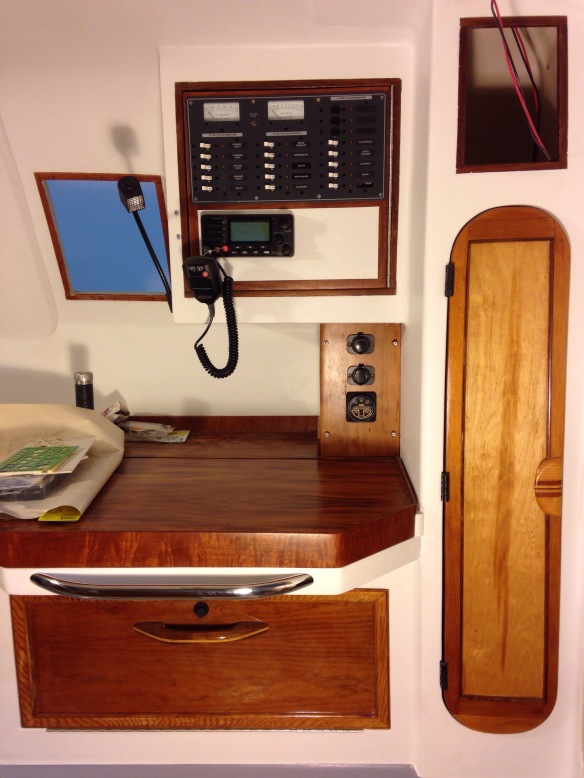
Here’s the back of the main panel now fully loaded. BlueSea’s product is great, although I made it all more challenging by mounting on a swinging door. It was tricky sizing each conductor to do a proper loop or bend for opening / closing. There were many hours fiddling around in here…

20160129-235640.jpg

20160129-235657.jpg
The small black box on the left is a sub / fuse panel just for the electronics branch circuit. The 15amp feed and return are the top and bottom wires that go to breaker #11 on the panel. Then this distribution box allows each electronic item to get its own size fuse. E.g. VHF has a 7amp, propane sniffer has a 0.5amp

Some people don’t like the LED lighting for a boat. But low power consumption, less generation worry and less battery weight is the goal for sailing fast. Tonight we switched on a bunch of the LEDs plus the radio – look at the ammeter in the panel barely registering an amp. A very good start!

20160130-000358.jpg

Best wishes for dry skies and crisp breeze to all our friends in tomorrow’s Three Bridge Fiasco. Looks like America’s biggest sailboat race has hit another entries high this year. Have fun guys!

Crimp my style

Throughout wiring the boat we’re guarding against voltage drop – the problem when too small of a wire gauge impedes the juice by excess resistance (heat, if bad). The anchor windlass has a big motor under heavy load pulling spikes of 50 amps so it needs a big thick cable run back to the batteries. BlueSea electrics, and many others, provide handy wire sizing charts based on electrical load and distance. Our windlass circuit is about 50′ out and back, times the 50 amps = 2500 ‘ampfeet’ on the chart, pointing to AWG 2 conductor wire. That’s also the appropriate size for the 15′ circuit from the batteries to the 100 amp main circuit breaker panel. So with about 35′ each of red and black AWG 2, we got busy cutting and crimping.

20160123-230230.jpg

20160123-230303.jpg
After fretting over who to bug for big lug crimpers, we finally remembered squirreling away these swaging clamps, and they do a great job with the cable lugs. These two 23′ cables for the windlass added another 7 or 8 lbs to the boat.

20160123-230738.jpg
Then we have a number of runs between batteries, ammeter shunt, main fuse, the panel, etc. Some of those in process:

20160123-230911.jpg

20160123-230935.jpg
Overall the wiring is clipping right along, except that back orders on the many sizes of various fittings are causing lots of stalls. All in good time I suppose. The nav station is coming together with the VHF, the propane controller, a USB port and a cig-lighter style port. The battery switch and windlass breaker got some of those big red jumper cables shown above.

20160123-231436.jpg

20160123-231455.jpg
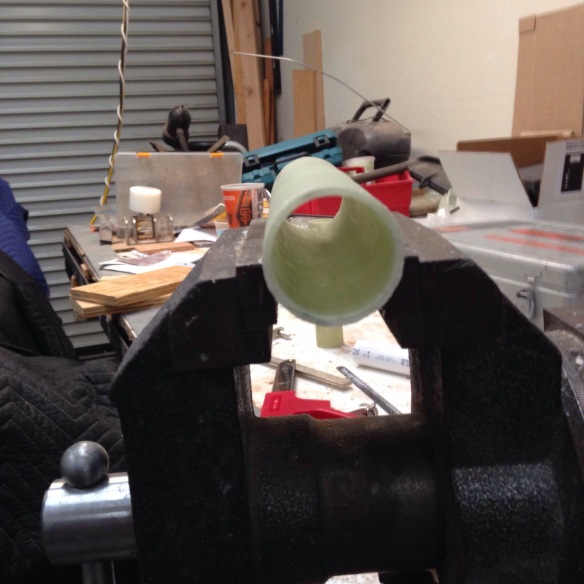
Up on the bow we trial fit the windlass foot switches, which have waterproof housings around their wires, protruding below deck. So they need a pass-thru. Bonding in tubes is a great way to go. These are cheap carbonfiber pieces from Tap Plastics. If the hole is for bolts, use G10 glass tubes for strength.

20160123-231826.jpg

20160123-231845.jpg

20160123-231902.jpg
We’ll show you the windlass switch wiring after the deck is painted and we come back for the final install.
Tomorrow we’ll continue with interior lighting.

Here are hundreds of cell phone lights behind Bruce Springsteen on Tuesday night in Chicago as he sang a tribute farewell to Glenn Fry. We were taking bets on what he’d pick. I won – ” Take It Easy”. Standin in a corner in Winslow Arizona, such a fine site to see, it’s a girl my Lord in a flatbed Ford, slowing down to take a look at me… (You can take it from there :)

20160123-232855.jpg

Reds and yellows

American Boat & Yacht Council (ABYC) electrical standards call for 12volt positive + feeds to use red cable and negative returns – to use yellow. That’s what’s inside the 500′ spool of 12AWG we saw a few posts back. With the right ‘terminators’ in hand (the rings MUST be sized to fit the bolts they slip over, and we have 5 different bolt sizes in the system!), we attacked the panel on Thursday night. Here is 7:30pm

20160116-075202.jpg
And 10:30pm…

20160116-075303.jpg
Then after another hour Friday eve of clipping the casings, adding zip ties and aligning the bundle for door swing

20160116-075506.jpg
The board glued inside that cabinet today will get a distributor block for all things in the nav station, plus the panel feed cable shunt (which provides the ammeter reading). Last night we also cut the big 2AWG battery cables to feed the panel and return to the batteries, service the main fuse and the windlass needs. Altogether it’s about two dozen lugs that need heavy duty crimpers which we’ll try to rent or borrow. We’ll show you all the primary feed wiring once those lugs are solved.

Returning from an East Bay business meeting, I was fortunate to catch Bay Area Multihull Association veteran Bill Roberts at his amazing new boat that just arrived in Richmond.

20160116-080415.jpg

20160116-080433.jpg
Bill has a great story finding this barely-used but INCREDIBLY outfitted luxury performance Dragonfly 1200 tri in Canada thru Gary Helm’s brokerage. The quality of the Quoring group’s fit and finish looks superb, and the Roberts family gets to enjoy high end carpentry, still-unused appliances and bunks, forced air furnace, etc. (did you catch the bow thruster?) Bill and the Bay Marine staff will hustle to step the 65′ (!!!) mast, lace the nets, and bring all systems out of winterized mode in time for Three Bridge Fiasco day. BAMA folks, it’ll be hard to miss this blue beauty out there. For me it’s fascinating to look at the different design approaches: this 1200 looks like it will power through any seas with authority, sailing fast and carrying a sense of beefy security (big Volvo 4cyl diesel, substantial SS fittings, etc). Our F36 is the same length and a bit wider, but only 40% of the total weight, “Spartanly” finished and a 15′ shorter rig. Should be very interesting to sail and cruise these two side by side.

Ok, back to the wiring tools for a rainy NorCal weekend.

Practice those fillets!

So I’m on my back, sprawled on the aft cabin bunk, reaching up installing lamp wires. Damn, that looks like crap up there! The memories come back from last summer – it was hot, the workspace was awkward and I was SICK of fairing work. There were some spots under the big wiring chase in that cabin with pock marks, uneven fillets and spreader-knife ridges. But “no one will ever see that and enough is enough!” And I had left in a PO’d state. So it was sort of funny two nights ago realizing I was working where future crew will lay heads on pillows and gaze up at the blotchy spots!

20160114-163733.jpg
OK, never mind it’s already painted and the cabin declared done. Go get the sanding and fairing tools and clean it up! We cast a critical eye around the whole interior and found a few more spots that needed a bit more. And all because we’re waiting for the electrical fittings (which just showed up, so it’s Christmas again tonight!)

The point is, for new boat builders, don’t do what I did. Don’t just read the pages in the Gougeon Bros book that make fillets look super easy, and declare yourself ready. They wrote that guide after making 100s of strong, lightweight, elegant joints. But as a rookie “finisher” contorting around the far reaches, working on acute/weird angles, it just doesn’t happen smoothly. I should have practiced! Out on the workbench, in the light, in the fresh air, with nice music on the radio, etc. Make the fillets along the floats bulkheads works of art that no one will see. Get the techniques down. So when the conditions suck inside your to-be-pretty cabin, you are actually very skilled and won’t do work that has to get done a second time.

There, end of soapbox.

We figured out how to light the wardrobe locker areas, which led to a couple more mounting bases needed, plus a nice face frame for the main battery switch. And more Birdseye trim over the galley to hide wiring in case the sink and freezer need additional lighting. That’s a few ounces of wood and glue to future-proof. Seemed worth it.

20160114-165142.jpg

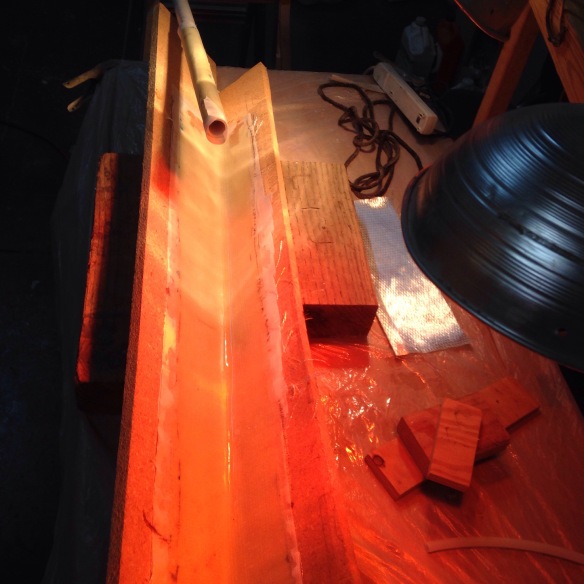
Also huddled under those heat lamps at the top of the photo is another glass tube build – wrapped around a 1.5″ PVC coupler, to line the hose-pass throughs for the toilet platform. That’s the one area inside the boat that needs finish work, so we attacked old problems with fresh eyes this week and get the head compartment ready for proper marine paint as soon as the shop warms up. Today you see your breath in there :(

Between the decks

So, we’ve reported on the hull exterior & deck being ‘done’, and you’ve seen the painted & trimmed interior. But there’s a bit more fabrication of ‘the spaces in between’. This weekend we tackled deck fills for water and diesel, through the cockpit coaming box and lazarette, to the equipment room. We’ll use flexible pipes between the deck fills and solid fiberglass tubes that bisect the tops and bottoms of lockers. The Forespar marelon deck fills are 1.5″ OD. 1″ sched 40 PVC wrapped about ten times in lightweight glass cloth gets to exactly 1.5″:

20160110-205255.jpg

20160110-205312.jpg

20160110-205330.jpg
The pipe was coated in good mold release wax, so a few hammer taps on a big screwdriver popped it out

20160110-205519.jpg

20160110-205543.jpg
The diesel and water deck pass throughs are on the left, and the grey curve is a trial fit of PVC conduit that will carry the 110v shore power to the inlet on the right.

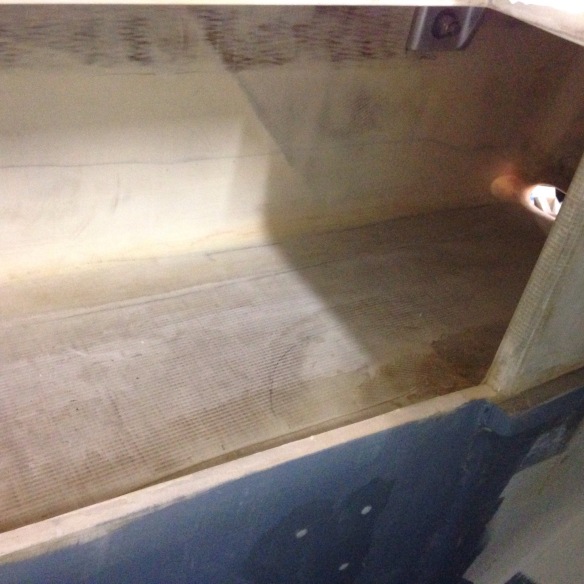
The lazarette currently has the main cockpit drain entering and exiting its aft edge.

20160110-205847.jpg

20160110-205909.jpg
That needs a dedicated drain tube, especially since the propane well was added in this compartment. And there’s already a second overboard drain for the lazarette on its forward hull edge. So here’s a simple 90degree form with non-stick tape and peel ply laid in before the glass channel is made.

20160111-223906.jpg

20160111-223929.jpg
And the new piece tabbed in place.

20160111-224027.jpg
It looks like the diesel Espar heater will exhaust through the hull up high in this area so we’ll wait in placing the second half of the diesel and water filler pipe pass through tubes until the exhaust pipe is in place.

Random segue over to wood finishes: we’re happy with the transparent non skid that was added to the sole (floorboard) panels a couple months back. But that was added to a floor-finishers polyurethane that came out too yellow. The companionway sills and steps needed non skid yet we don’t want to cover the woodwork with the standard tape. So here they are redone in Interlux Perfection topsides paint with zero pigment (labeled simply Clear) and a heavy dose of non skid powder.

20160111-224956.jpg

20160111-225010.jpg Very happy with the results.

And while we await that big box of electrical parts, we’ve finished up cable runs and installed most of the cabin lights. There are two halogen map lights, and everything else is LED. There’s a bit of angst about turning on all these lamps for the first time in place – really don’t want it to be the sterile, operating room blue-white look. The catalog copy and packaging has lots of “warm, soothing” descriptors but the old marketing hand here says “we’ll see”.

20160111-225619.jpg

20160111-225634.jpg
Hopefully usps will deliver and we’ll dive in to 100’s of crimps and heat shrinks over the next few evenings.

It all started when we looked at the map…

The F36 building plans are pretty succinct about wiring the boat for electrical service – get a qualified electrician. We bought time with a marine electronics planner to do overall schematic and equipment selection work. But in the spirit of truly knowing one’s own boat, like everything else so far it’s bear down, learn it and go for it. After numerous sketches and notes over months, a circuits plan got down on paper to match the 18-breakers slot BlueSea panel.

20160107-214038.jpg
The diagram has 14 twelve volt branch circuits from the 100amp panel, a 70amp dedicated service up to the windlass and a bilge pump circuit with 10amp fuse wired to the battery switch. Additional cabling runs handle the remote windlass switch, the propane danger sniffer, VHF antenna, radar cables and sailing instruments. Primary wiring chases are on the starboard side of the boat.
Detail hounds will note the mast isn’t even mentioned; Keith will be happy to hear all wiring was stripped during the mast refit. VHF and anchor light and deck lights are on the stern tower. Steaming light will be near the bow.

The 110volt system will be completely separate, with its panel in the equipment room and cabling along the port side of the hull. We’ll see that next week.

First up was preparing spaces. All bulkhead pass throughs got PVC liners. These helped the cables slide thru like little greased pigs!

20160107-215030.jpg

20160107-215108.jpg</a
Then a scramble when we realized the electric cabinet face hadn't quite been finished before the holidays:

20160107-215230.jpg
Then uncover dusty boxes to bring up on deck the goodies we’d stashed under work tables. That’s a 500′ spool of 12AWG cable. (How could the boat possibly take 500′?! Hold that thought…)

20160107-215722.jpg
We set the spool up on a spinning pole in the cockpit and started pulling. Probably the smartest trick done on the boat in 2015 was writing directly on the cable cover with an ink pen every 3′ as it came off the spool which circuit number we were snaking through the boat. The entire afternoon of laying in 18 cable runs had zero confusion about what was what as you can see the branch circuit numbers everywhere. Here’s 1a, the forward running lights on their way.

20160107-220226.jpg
And this is about four hours later

20160107-220307.jpg

20160107-220345.jpg
Late on Sunday we had run out of large-bore PVC bulkhead liners and decided to keep wiring anyway. So a few days later some backtracking pulled that bundle of cables backwards and through the piece that still had to get cemented in place.

20160107-220917.jpg
The panel slid home nicely, up above the chart desk.

20160107-221240.jpg
Not going to show the panel back yet because the cables aren’t connected; there’s a big box of many sizes needed of various cable end terminators / connectors coming from Defender. That’ll be weekend fun. Meanwhile there are lots of components that need installation now that we can see placements dictated by sensible cable routes. Here are the main battery switch and windlass circuit breaker / cutoff placed under the sea berth just forward of the chart table.

20160107-221857.jpg
While we wait for that box of 300-ish various connectors we’re doing similar prep work on plumbing. And watching the skies for signs of painting season. Still too much rain for that now…

By the way, 450′ of that spool have been swallowed up.