What do you call the remote office?

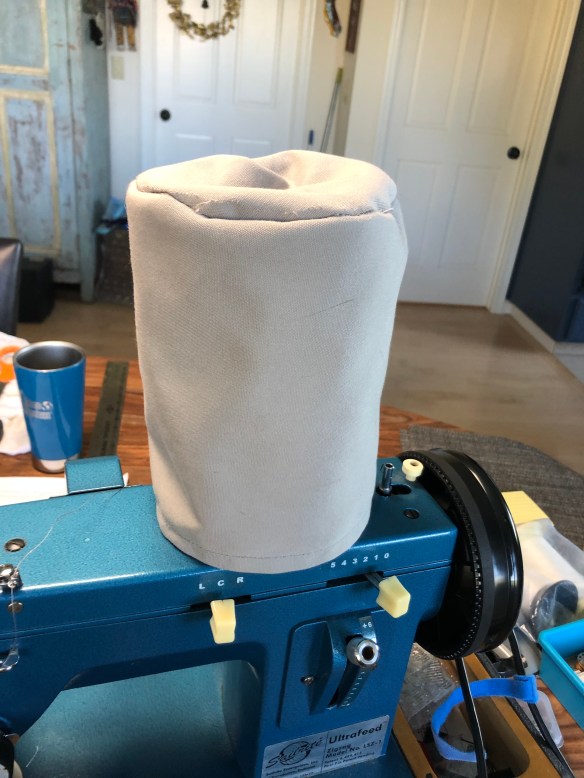
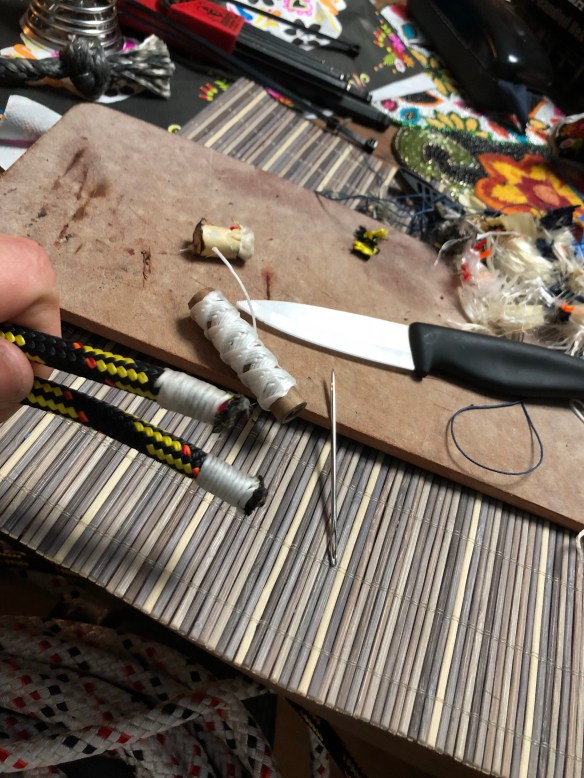
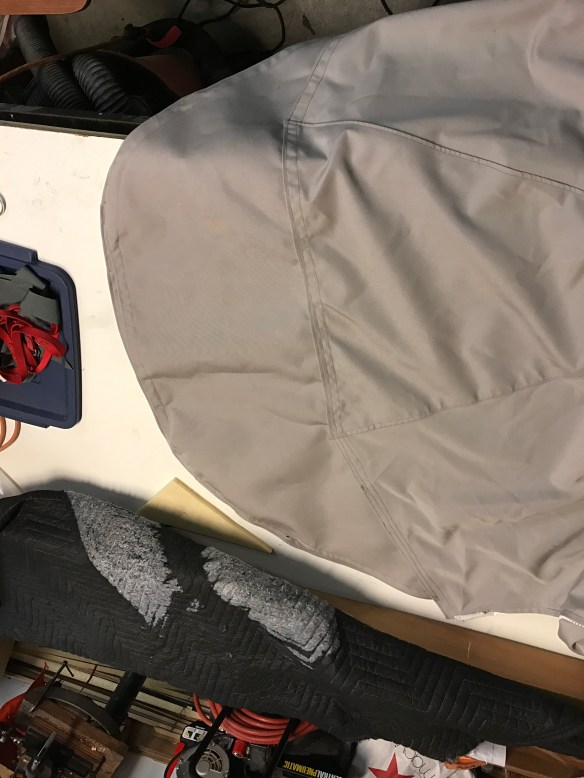
Working from home? Virtual desk? We’ve realized it also means working on your boat at your house but your boat’s in LA. The final pre-Mexico punch list includes time on the sewing machine. Recall last month leaving the Golden Gate, the Pacific ripped away our Lifesling bag. Too stubborn to spend $100 for another bag that will just degrade in the sun, we watched the Sailrite how-to video. Came out pretty good. At least making it custom allowed for a better attachment technique. It will now be secured over a stern lifeline.

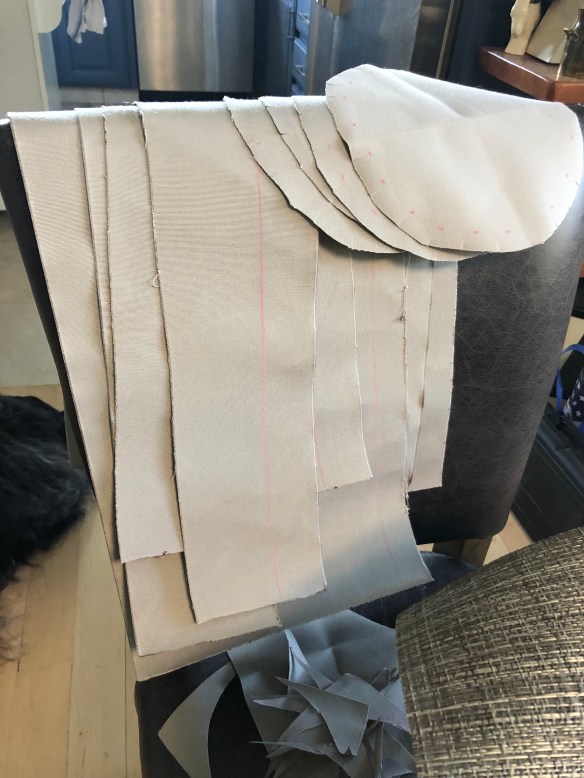
The forward V-berth has a nice foam mattress but it’s been a total pain to try making it up with normal bedsheets. Step one is a set of proper cushion covers. The co-owner had earmarked a roll of upholstery fabric for giveaway. It was the perfect amount!

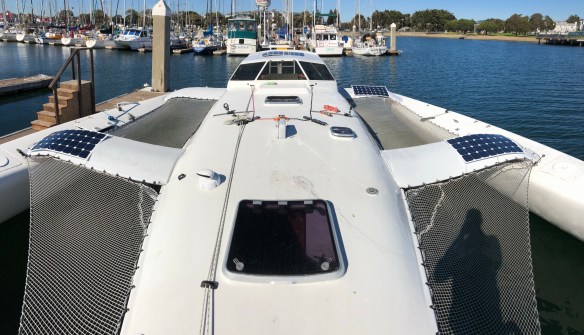
The pile of stuff to take to Ravenswing grows. Doing our darndest to cancel anything truly unnecessary. But things like the water filter, dinghy lock, smoke detector, new solar panels and the Iridium satellite comms fixed antenna gotta come along.

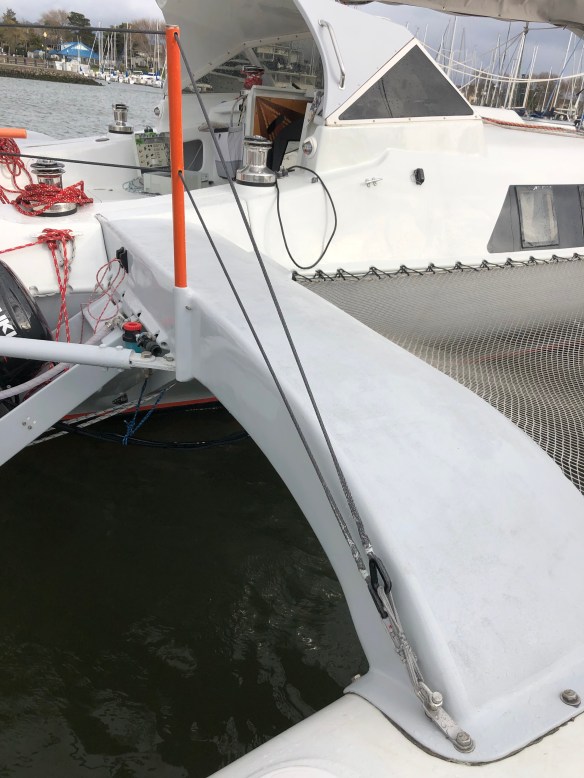
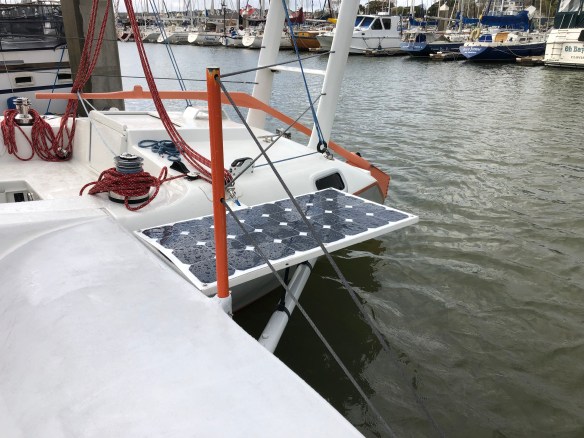
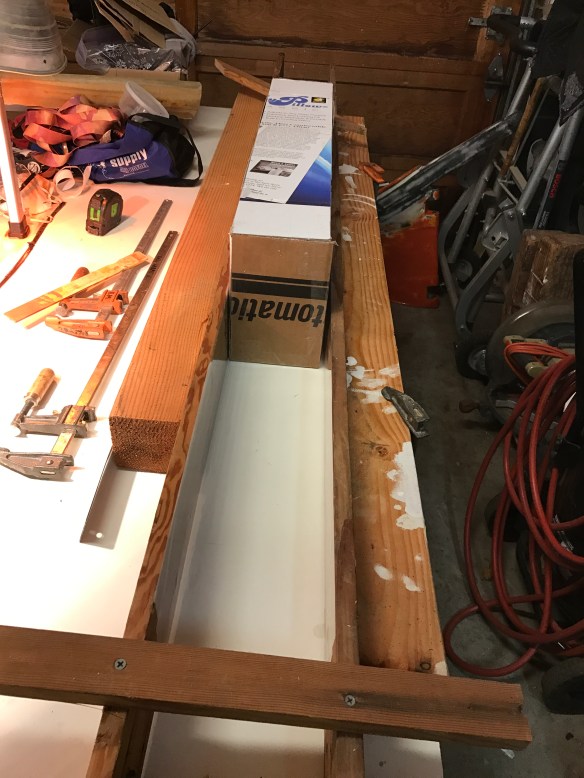
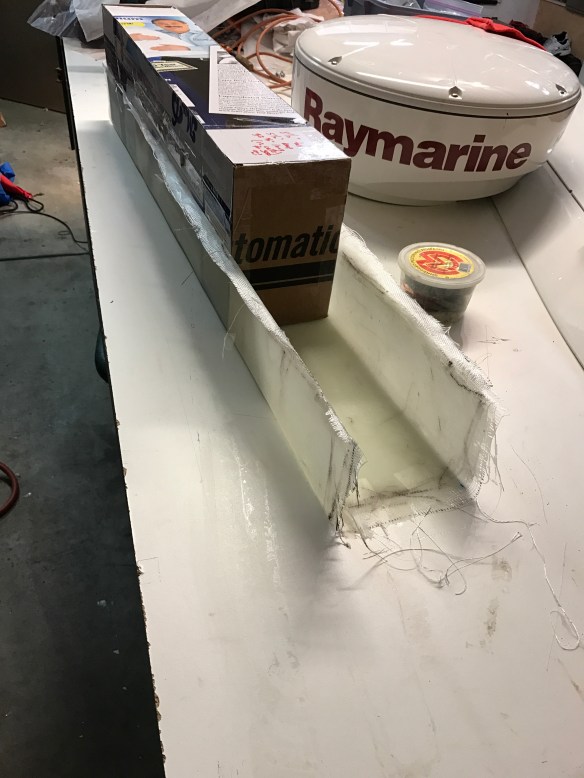
The prior post left you wondering how the upgraded solar panel mounting would turn out. That went well, although it did take a couple more days. Here’s that “trough” of glass/carbon cloth put to use:

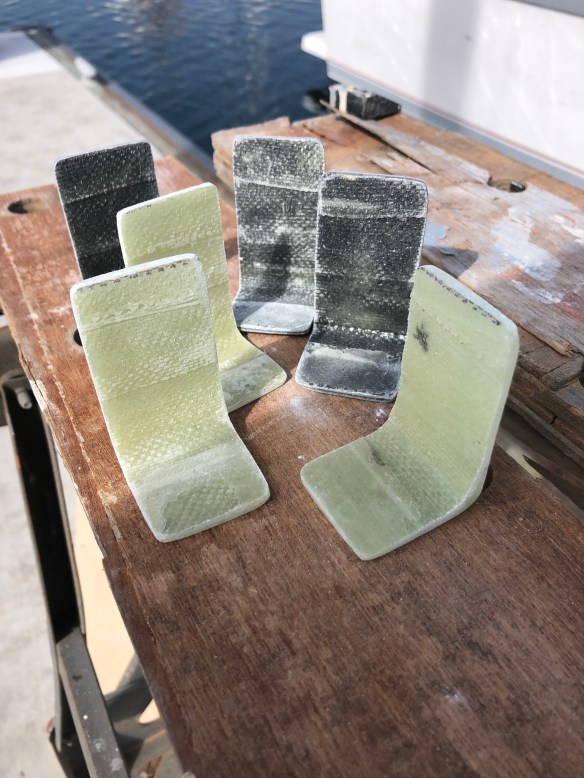
That’s 24 little feet, 6 per panel. It all seems quite secure now.

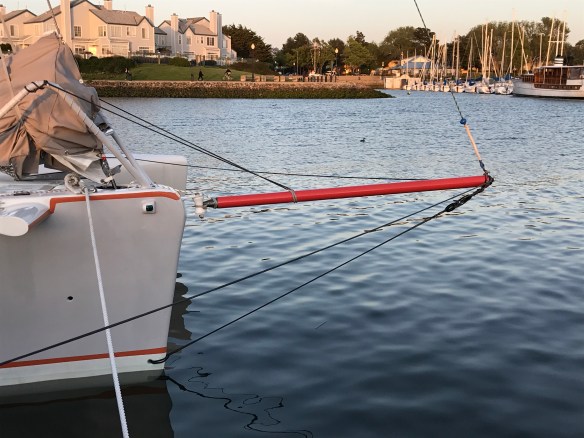
That work session also included marking the entire 340′ anchor rode in 20′ increments with bright yellow spray paint, and setting up the anchor bridle semi-permanently for easy, frequent deployment. Quite happy with all that now.

The cut, fair, paint job to remove the old steering bracket got finished. Looks like it was never there. 
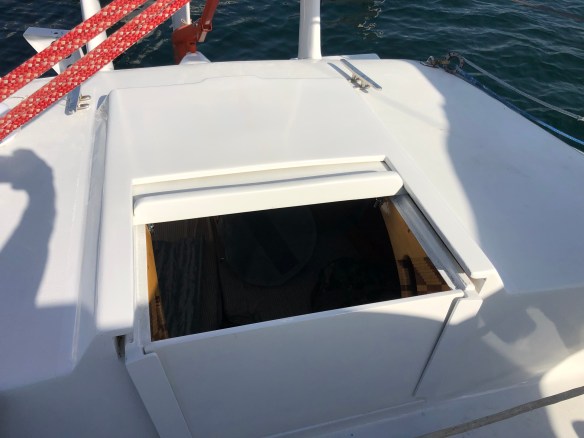
The cockpit sole got a sanding and repaint. That was really bugging me. Happy now. Also finally painted the emergency escape hatch, and added more neoprene rubber to stop the little bit of super-annoying leak.

Also in that photo note the solar shower heating up. Thank you Drew for the tip on a better, bigger one. Hung from the boom and with an extended supply line, this provides an excellent hot water flow thru the ventilation hatch overhead of our shower stall. I actually had to wait until the evening to use it because it got warm. Around 105F, like almost too hot to bear hot tub. This will do just fine until the boat goes to cold weather places.

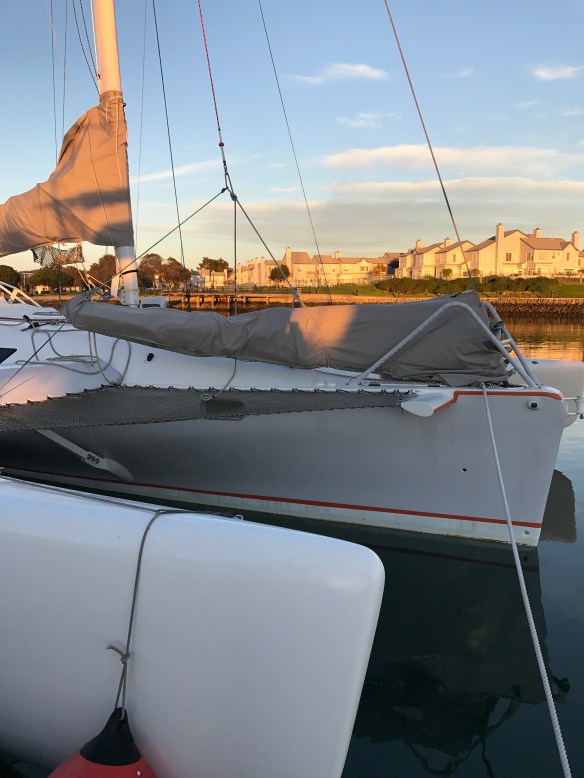
An earlier sewing job had been a cover for the Bimini. That fit fine and looks much better than the beach towel we used on the Cal coast sail. 

Here’s one for Dan, who valiantly tried to reboard the boat from the water in Catalina. That’s when we realized a proper ladder was urgent. That came out less than a pound, and it’s not going to rust / corrode.

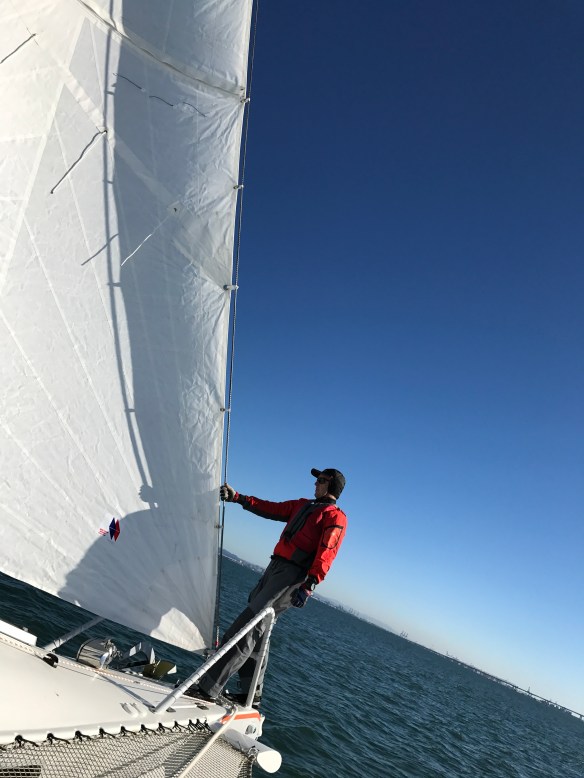
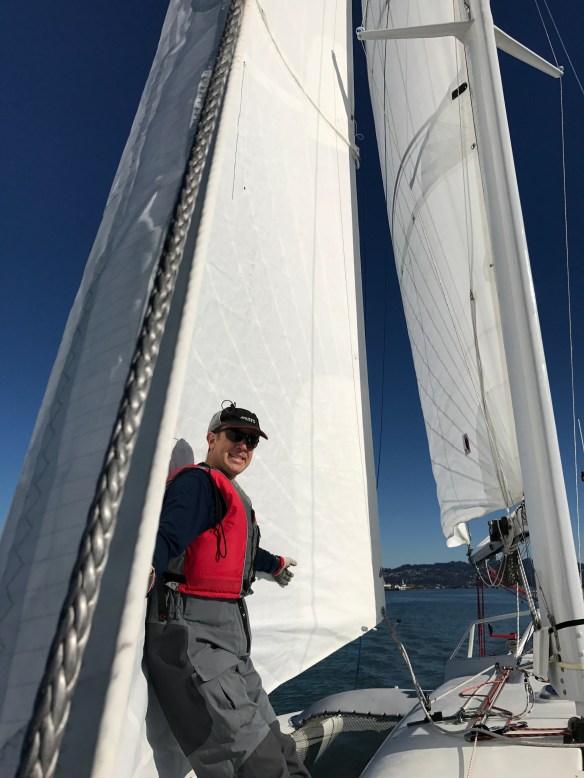
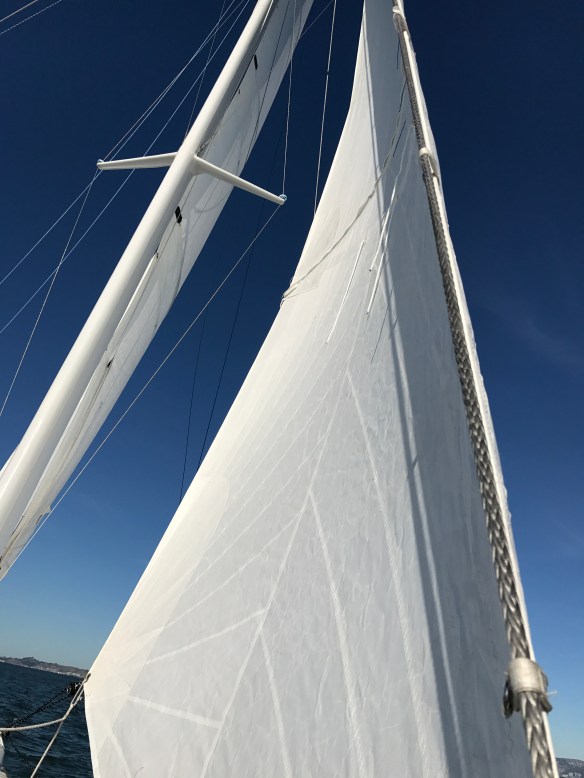
And we finally got to hoisting the tiny (storm) jib. Although it was only with zip ties as hanks, I think this thing could work well above 30kts, so we’ll make up the needed 8 soft shackles and keep it aboard. 
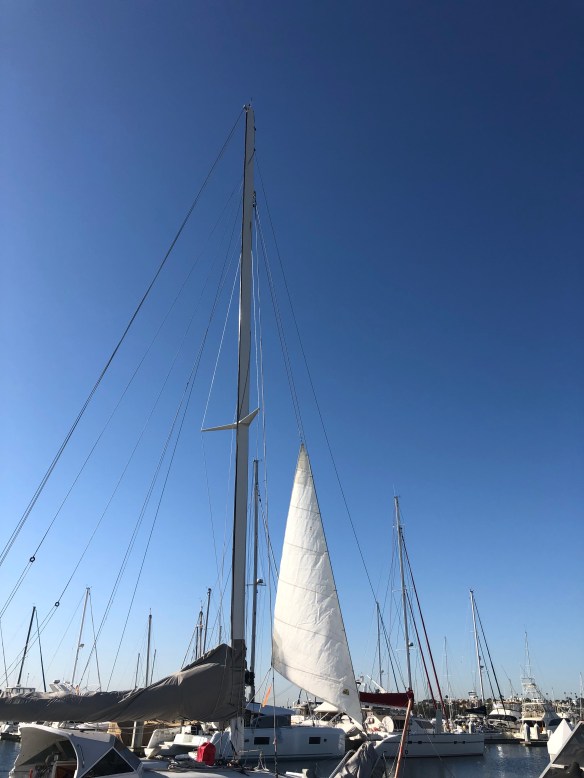
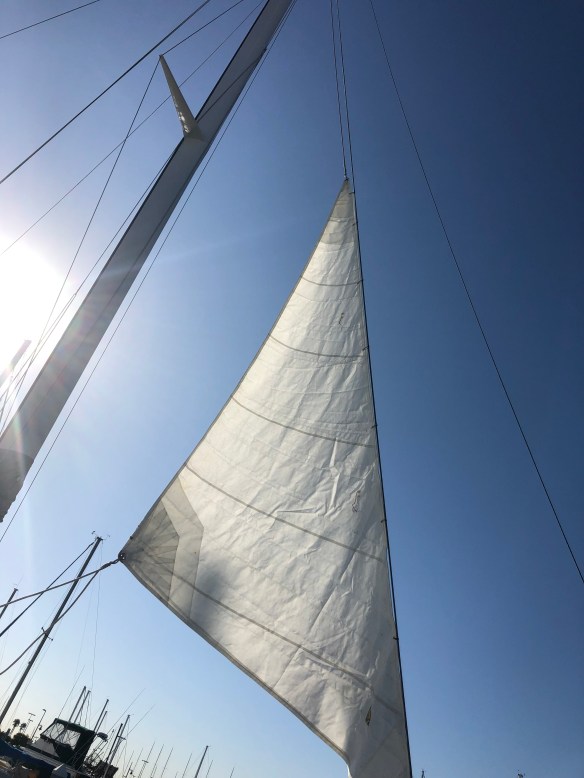
Keith, I’m rigging up a 4′ long pennant, putting the tack of this thing a foot above the bagged primary jib. But looking again at these photos, maybe it needs to come lower for the right sheeting angle? Hmmm. Overall, it’s about half the size of the primary jib’s reefed deployment. So I’m thinking it’s for steering during basically bare-poles kind of days.

RickH, thank you again for the generous repurposing of your folding bicycle. It is VERY happy in its new place. It’s very light, yet rides close to a real bike. Fantastic for getting around San Pedro during the week spent working down there. I think it’ll be great to have in Mexico. We’ll do our best to fight off rust!

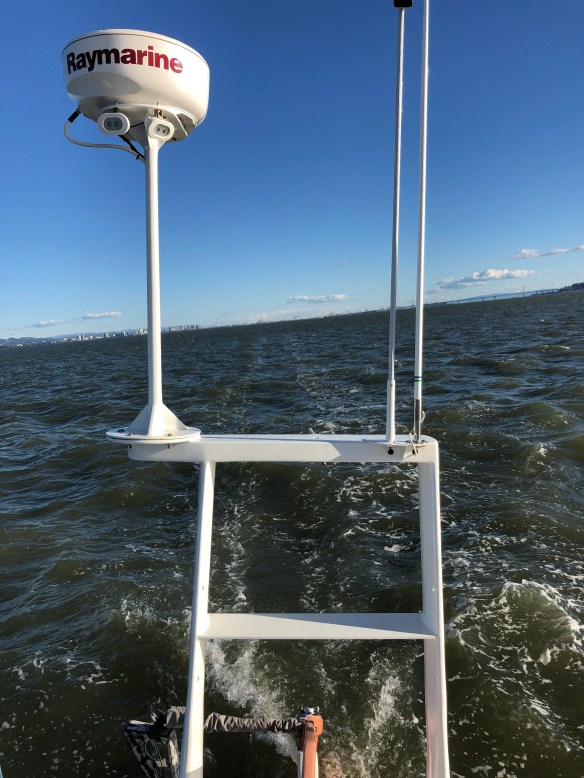
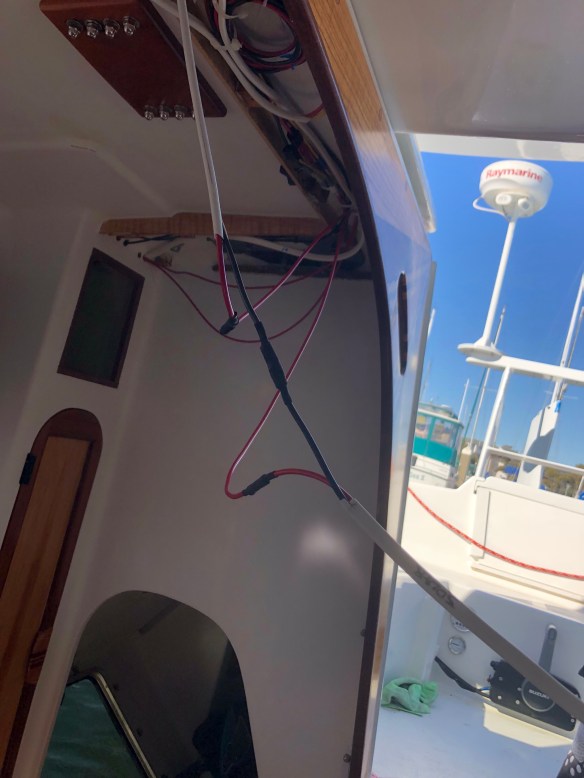
Right now we’re many hours in to setting up the Iridium Go satellite communicator. This stuff is expensive and confusing, but once it’s working we’ll have telephone, texting and basic email service anywhere. We’ve purchased through PredictWind so that weather forecasts will come to the boat wherever we are. This is a really exciting development. We’ll try hard to have the tracker system running for those who want to follow Ravenswing progress southbound. Stay tuned.

In between work days we hitched up the land yacht and got up the Mendocino coast. What a peaceful place. 
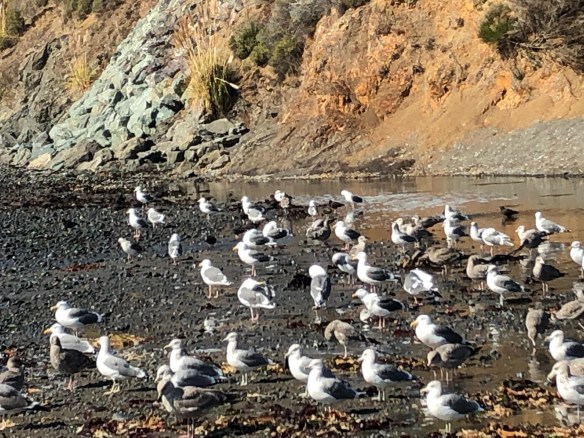
This girl was diggin’ the picking at Ft Bragg’s Glass Beach. 
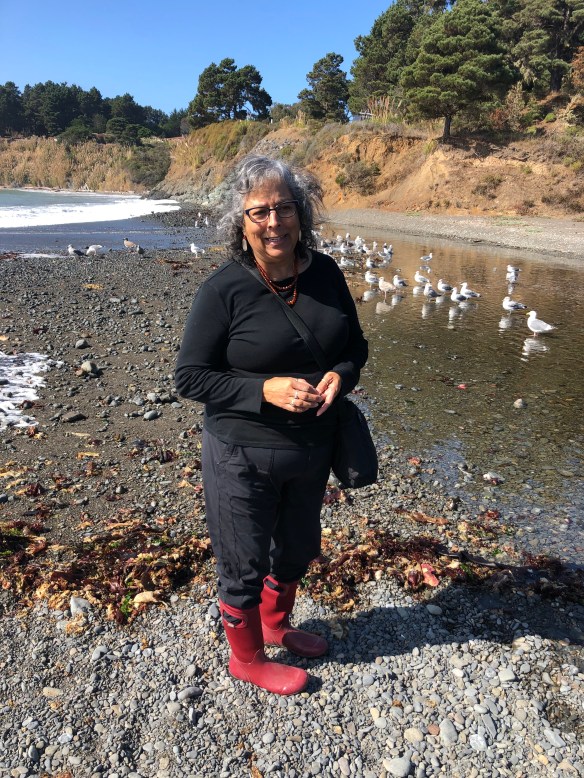
That’s a little silver lining to everybody throwing their trash in the ocean 50 years ago. Yep, they just dumped it over the cliff for a very long time.

June boat work

Our attention is back on Ravenswing here in June. I still owe you a post on the F36 Hecla delivery trip, but the teaser is that near Cuba we had to turn back due to rudder problems, and Jeff’s boat is in Florida getting some repairs / upgrades. No Belize this time.

Back home we had the start of the inaugural California 500 race to San Diego, with three 70′ tris going at it. Maserati spent her dock time at our Marina Bay Harbor, so we got a look up close on Memorial Day. 
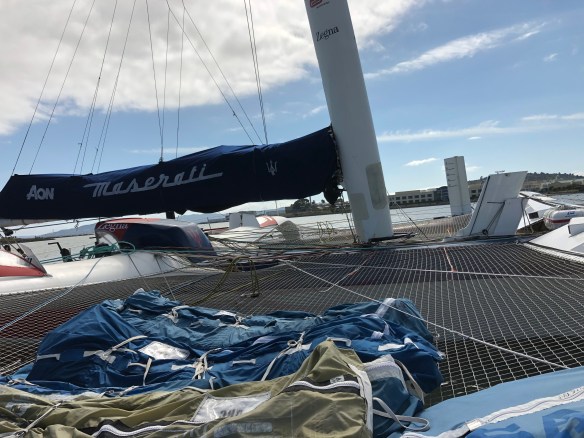
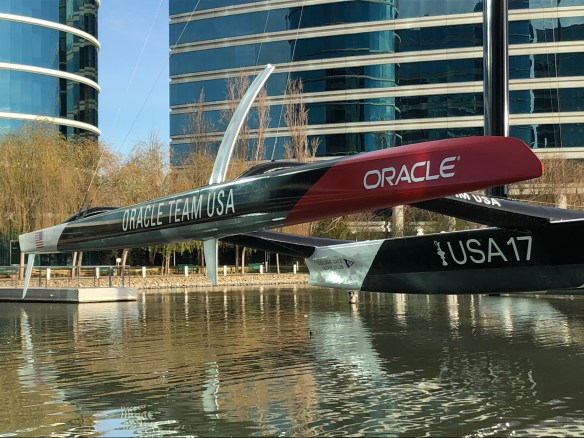
Very interesting to look at the retrofit foiling gear on this ocean-crossing racer.

That day was a treat because of hosting nephew Westley’s first boat ride. 
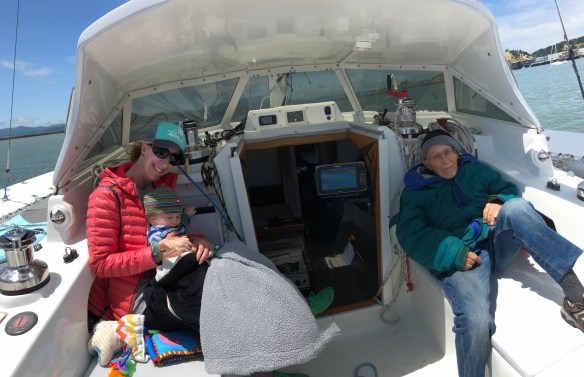
Reefed main, no jib, Autopilot and a light breeze made for the perfect mellow day for granddad/grandkid. The siblings enjoyed catching up too. Some day, Westley, I’m sure you’ll be shaking out the reefs and calling for the big Ravenswing spinnaker!

The boat is getting ready for a run up the Delta this week. It’s hot, so getting the Bimini sorted out was this weekend’s first task. We bought a used one and the blue canvas is being experimentally cut/sewn to find the right pattern for a new one. 
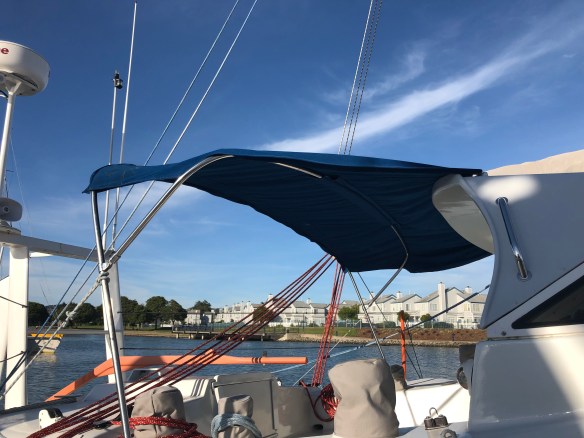
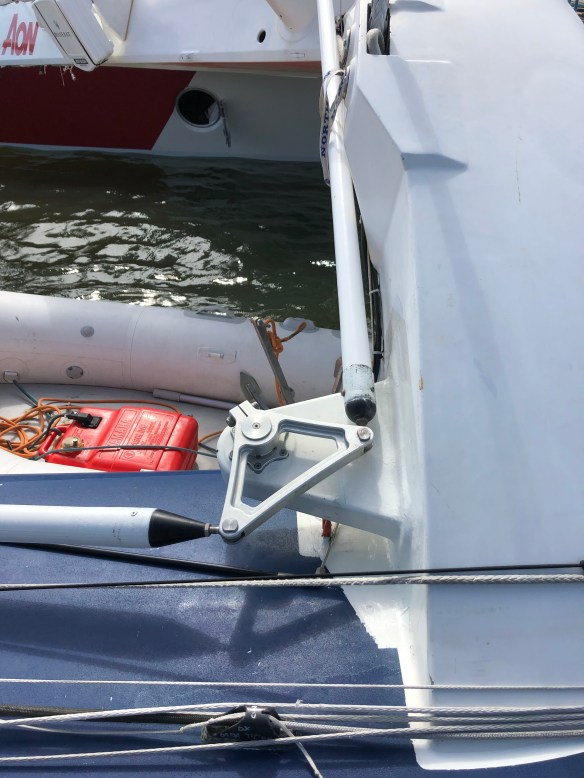
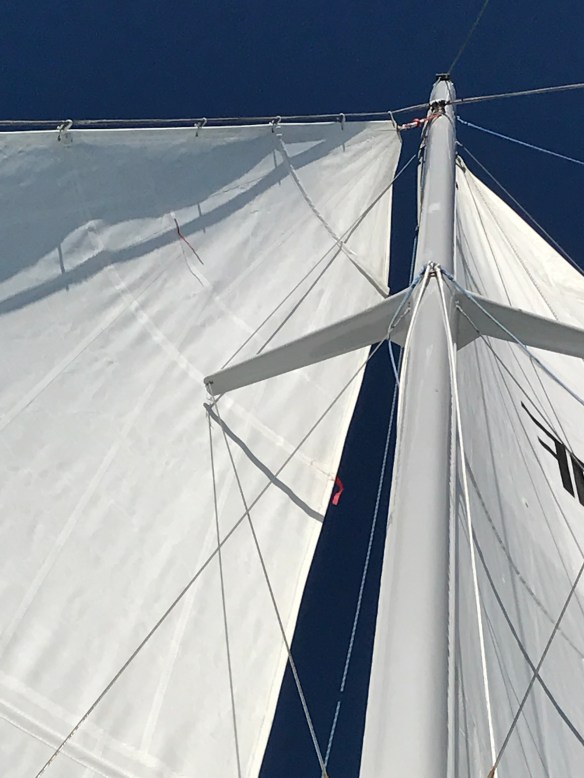
We’ll sail it this way to see if the boom clearance will work.

Finally got the dedicated running-backstay winches installed today. This already feels like a great addition. The windward side will handle the backstay, and the leeward stands ready for barberhaulers or any sheeting duty. This also got rid of the slightly awkward trade off with the mainsheet tails.

Also notice in a couple of those shots the snazzy grey winch covers. The big sewing machine needed a tune up mid project (back in April) and we celebrated its return finally finishing

the 5+ year old Sailrite kit. Eventually I’ll get all these details done!!!

The long rainy season here had me rethinking how to keep the float hulls dry, and cross ventilation through the watertight interior bulkheads is a challenge. Decided to make breathing ports via 2″ pvc, to be left uncapped during storage, but plugged up underway. It does add a pre-sail item to the boat prep list, but this is an easy one; just hand screw in the plugs.

Another milestone was finally powering up the fridge/freezer cold plate system for the first time since it was installed three years ago. It’s been on a week and the solar panels are easily staying 100% ahead of it (with no other power use sitting at the dock). There’s an ice tray in there this evening and I’m excited to get back to hopefully find cubes ?!

Some visitors to the boat have frowned about the forward beam mounted solar panels. Well I didn’t really like it either, so we compromised some hull deck space and moved them out here (on both sides of the boat). This is way better.

So that means the four 100watt panels are (2) on aft float decks, (1) port float forward deck, and (1) on the hard dodger. We’ll monitor and report on solar generation during the Delta trip.

Sights are now set on the September departure in time for the MultiMarine Summer Splash event to Catalina Island, Sept 13. I’m sure time will fly as we move towards Mexico!

Find those ships!

We’ve been finishing various fiddly little wiring bits. The outside public address & foghorn speaker is plenty loud to annoy the Marina neighbors. That’s a good safety device. Perhaps even better is getting the ship-identifying AIS data from the VHF radio on to the chart plotter. I know Jim wishes we had this the night Origami sailed from Catalina to Santa Barbara!
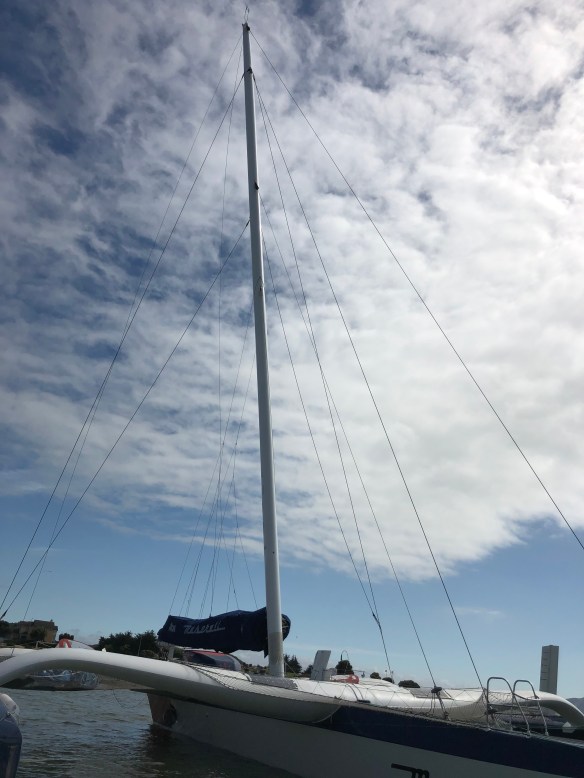
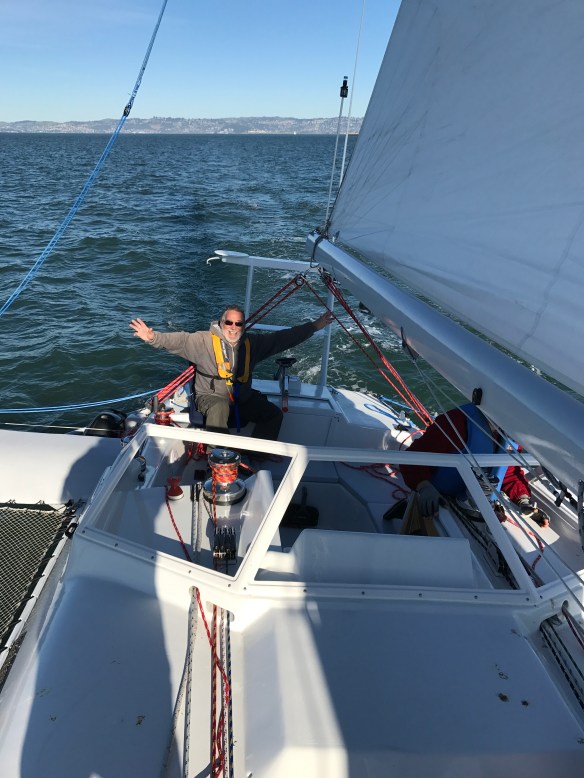
A week back four of us sailed out the Gate and up to Duxbury Reef in light wind. It was great just to have a mellow, mindless sail. But by 4pm the wind died way down for our slow cruise home. It was the first time docking in the dark, and yea, we didn’t quite catch the dock cleat on the first pass :)

That shot shows how moving the mast rotator arm forward has put the port line right over the shower vent hatch. I think adding a cheek block just inside that hatch to bend the line will be the right solve.

And that shot shows the stern lifelines holding the lifesaver ring and recovery bag. We’re liking the lifeline solution a lot.

Next up is getting our PHRF racing rating from the Bay Area Multihull Assoc. so we can enter Ravenswing in her first event. We’re looking at schedules to see what fits. And sitting here very curious to see how the ratings committee thinks we should compare with other boat models around here…

Almost out of winter

It’s cold and raining again here in NorCal, but we can hear the lure of warm Mexican waters calling Ravenswing soon. Gotta get all these sea-going projects done!

The autopilot got an hour or so under sail on its second day. It was tested a little by the messy chop of a big ebb current and an out-of-balance sail plan with full main and no jib. So far, so good – this thing is making singlehanding the boat reasonable.

Note the nice straight track in the wake.

Sharp eyes will ask why the Raymarine logo on the radar is facing forward. Wouldn’t they want to advertise out to the sides? Seems the boat builder wanted the cord to exit the side of the tower, and the radar is round anyway, right? A month ago Charlie, Anton and Don wondered why the Bonita Channel buoy was on the wrong side of the radar screen. I Finally downloaded the Raymarine manual and the plug is supposed to face aft. Oops. That got rotated, and we installed the public address hailer / foghorn that day.

Today we finished a couple of very satisfying projects. First up is securing the cockpit area with stern lifelines. It’s all synthetics, and the two orange stanchions used to be the original steering connecting rod. That thing was overbuilt, and was the perfect diameter to fit the stanchion bases made years ago.

We needed just one piece of metal to anchor the lifelines at the beam/float hull joint. The stainless steel tabs that were the lower diamond wire connectors on the broken mast got a date with the drill press, cutoff wheel and grinder.

Then it was time for 8 dyneema loop splices done in place, dodging the rain.

Project 2 is a line-handling solution at the very busy cabin top winches stations. Now that the first and second mainsail reefing tacks and clews come back, there are about ten lines of each side sharing a single winch. I pondered a bank of clutches or jammers or cleats, but had fun going old-school instead. Belay-pins, but sitting in a carbon rack!
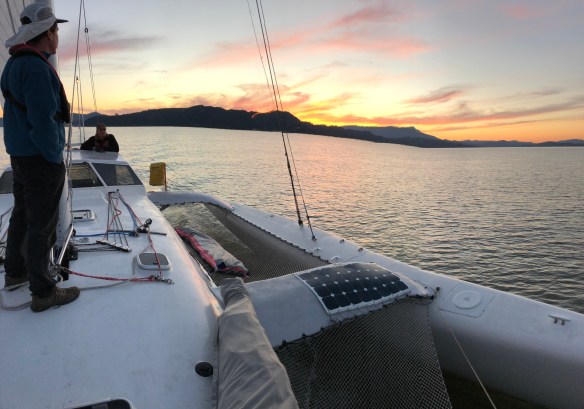
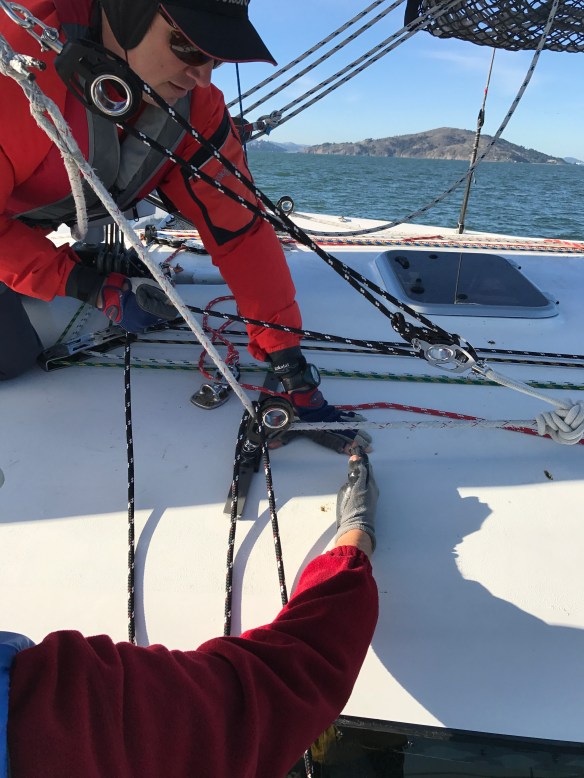
It was supposed to be sexy exposed carbon weave, but the square tube shape was tricky to mold and there were various little wrinkles and gaps, so they needed fairing then paint like everything else. This all got started last June visiting Skateaway when Keith impressed on me the problems with leaving heavily loaded halyards in the teeth of rope clutches during ocean passages. So now the sails will be raised and trimmed with the help of the clutches, but once underway the lines get cleated on these new pins then the clutches eased off.

When the rain is falling we go in the cabin and pick up the electrical tools. Last time you saw the little lithium battery balancing boards. Now we have the CellLog which measures the voltage of each 400amp hour 3.5volt cell grouping.

This monitor is fed by the little red wires (yes Anton I fused each one) strapped along the battery-holder braces.
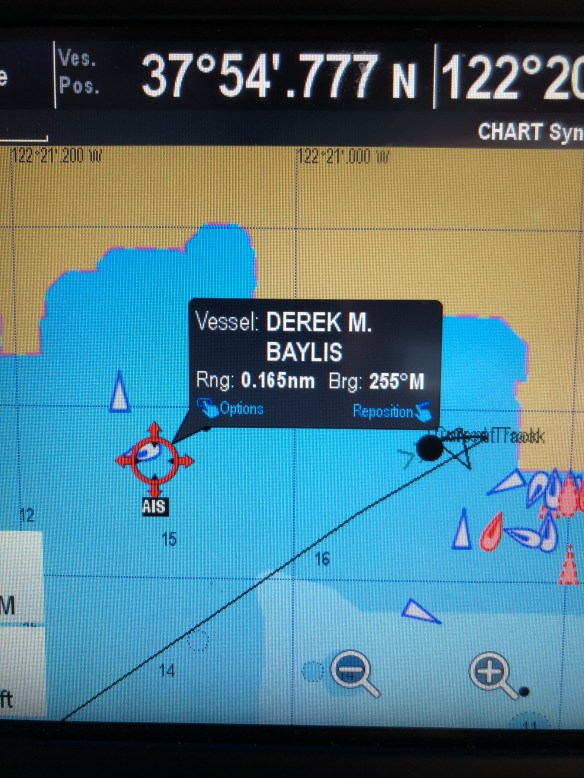
We bought this fancy chartplotter system and I’m old enough to freak out that it didn’t come with a manual. The online version didn’t make it clear that the charts seem to require the microSD card to stay in the unit in order to be used. So again, to those of you who sailed with this thing, I figured out today we DID have the detailed charts in there. Just needed to switch the viewing source. I think we’ll step up to the Navionics charts that we’ve come to really like on the iPad/phone.

So, Mexico is on the mind because Jim is sailing the Banderas Bay Regatta today, and I had a great recon trip last week to visit his Puerto Vallarta house and check out where we intend to sail the boat about 11 months from now. Here’s the view from their front patio. We visited all the primary guest marinas, and I’m leaning towards the vibe at LaCruz / Punta Mita. There’s also a very good free anchorage with easy town access. Ravenswing got ‘cleared’ to enter the MexOrc races next March. Hopefully in a different class from the MOD70 tris!We even made time to visit the embroidery shop, and they did a great job translating the boat’s graphics to crew-wear.

OK, we can see the finish line in Mexico, but we’re going to have a great spring here…

RickH, if you’re home next week let’s get out the Gate late in the week. Anyone else wanting to join, give me a holler.

Future Crew

Say hello, sailing world, to Westley. Born perfectly yesterday, 10lbs, giving our sis / his Mom a run for her money. His Dad Joe is a sailing captain, mom owns a Santa Cruz 50, Aunt & Uncle with Ravenswing; well let’s just say he has some sea miles ahead of him.

Westley doesn’t need it yet, but the rest of the crew wants the toilet back. Work proceeds.

Second coat of paint went down today, and all the new hose routings were cut to fit. 
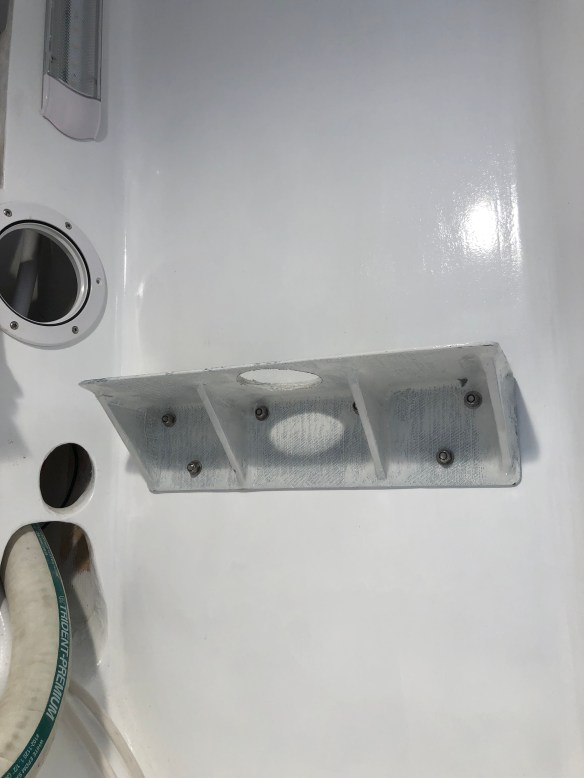
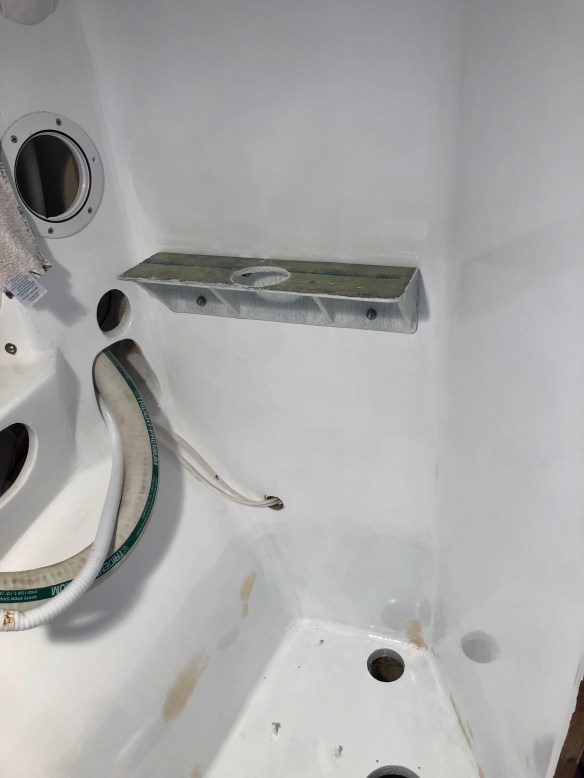
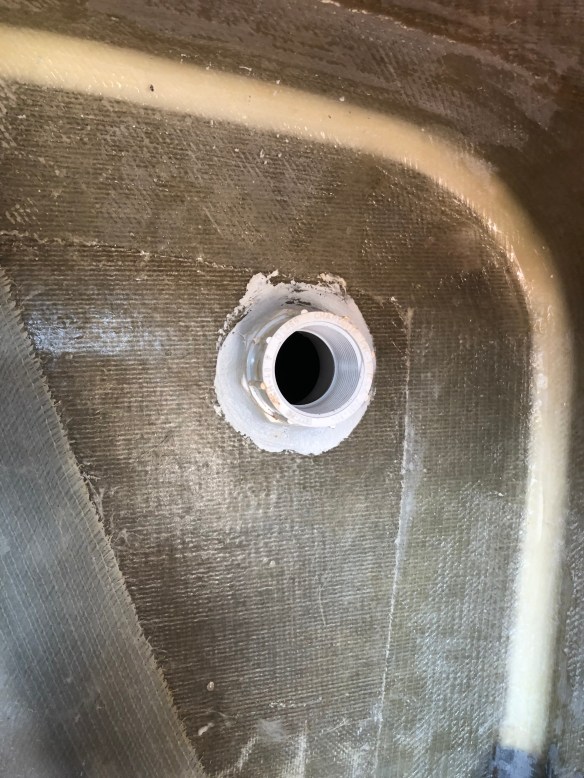
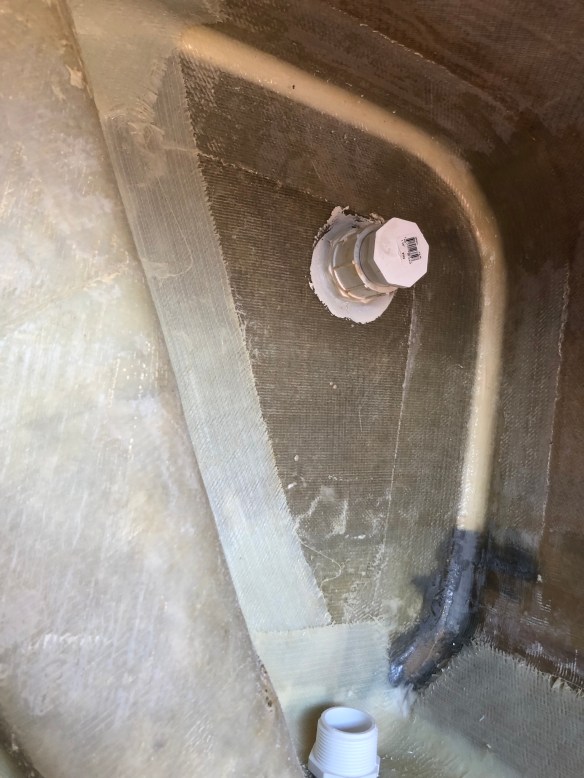
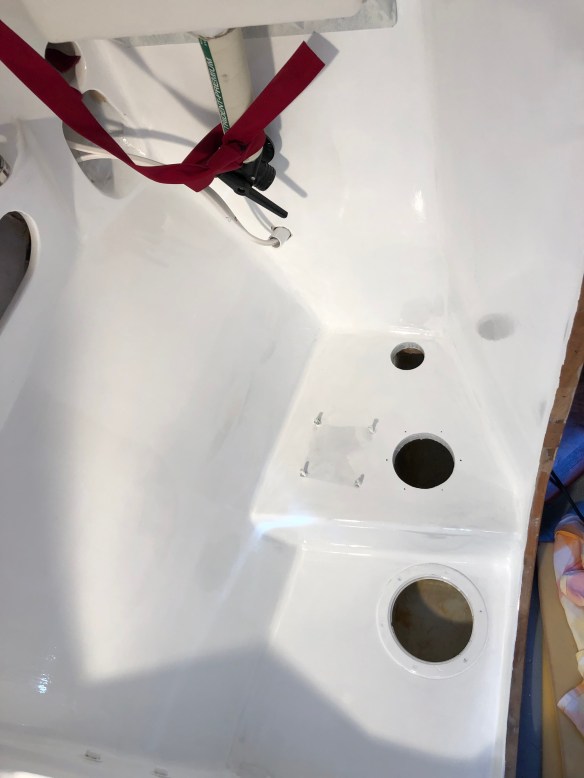
One more paint coat and the plumbing reinstall this weekend will put the head back in business.

Highly-credentialed multi-huller Jeff visited with his soldering iron during a road trip this week. He donated these resistor boards to the lithium battery cause, and did expert wire connections. 
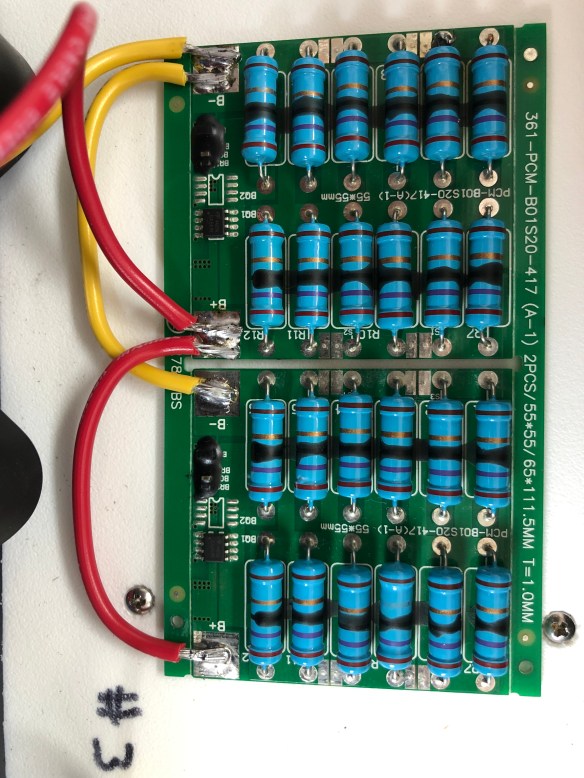
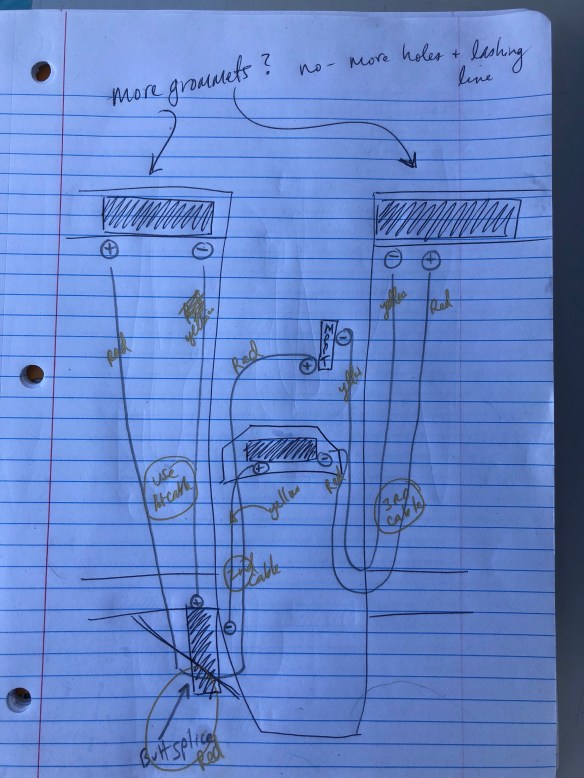
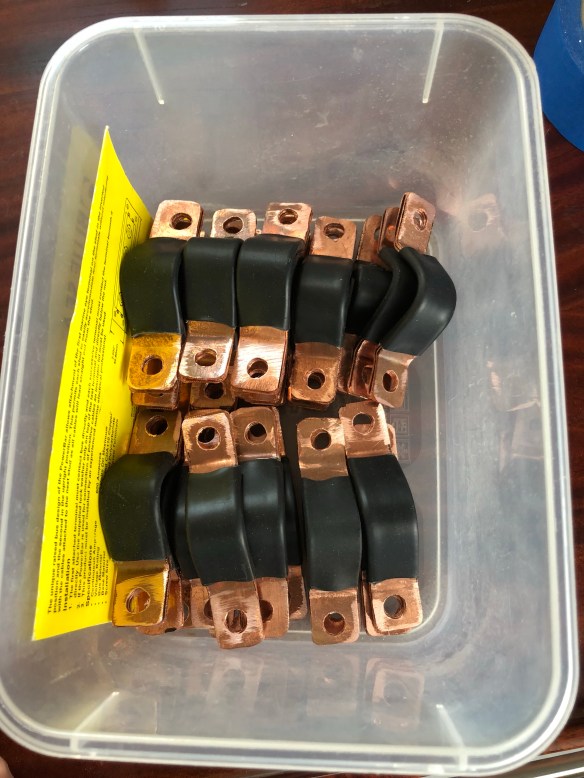
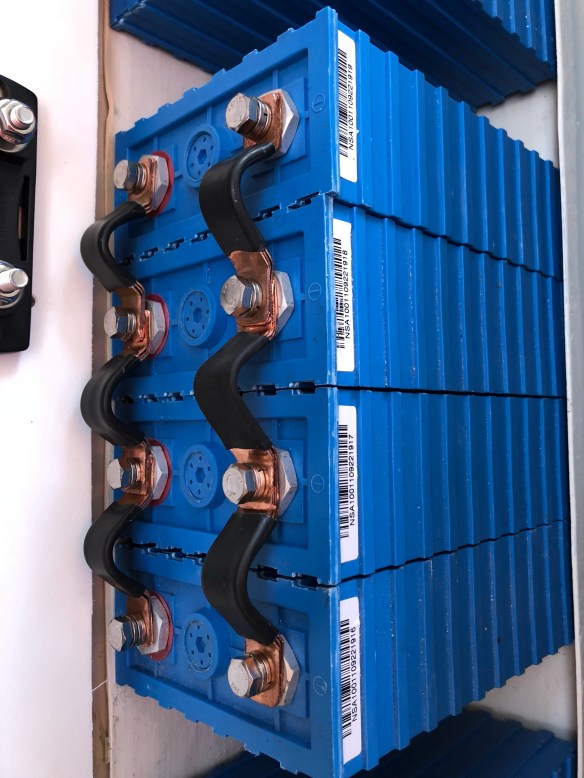
what you’re looking at (the green circuit boards mounted above the batteries) are charge balancing modules to regulate the pace at which the four “cells” of this battery bank rise in charge voltage. The risk in an LiFePO4 bank is the cells getting out of voltage balance from their neighbors, and potentially ruining sections with out-of-range values. With these little control boards, when one cell reaches 3.6volts (its full charge), the incoming voltage is converted to heat in those blue resistors. That cell is effectively bypassed from further charging while the others catch up. That’s as simple as I can say it, but there’s more going on with the numbers. It’s a crude version of a Battery Management System, and we’re judging it sufficient for our solar-only gentle charging regimen. Coming up soon we’ll install the CellLog that monitors and alarms each of the four cell voltages that get out of range. That will complete our safety installation.

We found some time to get back to the navigation system. Today was the first time to fire up the radar dome since purchasing it from a San Juan Islands f-31 about five years ago. Anxious moments when we hit the power button on the chart plotter…

And with zero operating knowledge or adjustments, up came…YESSSSSS! As soon as the autopilot install is done, we’ll get out and test/tweak/learn all this gear.

Final carbon work on the autopilot mount:
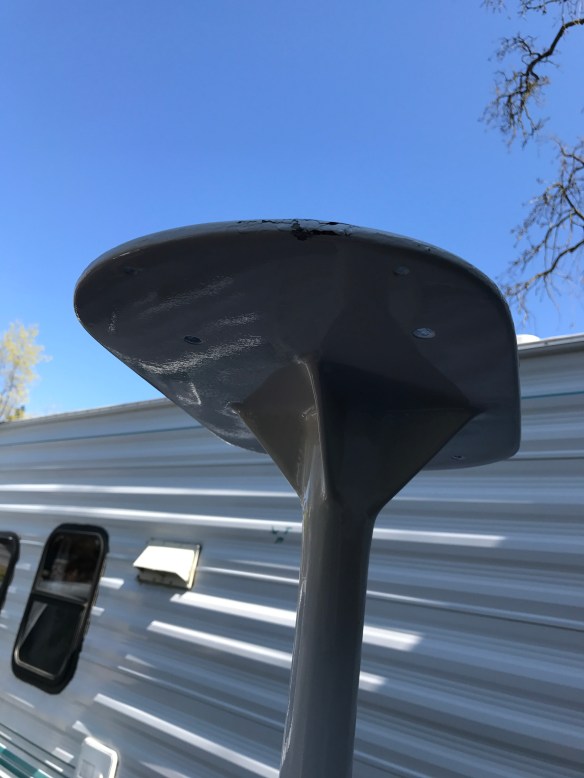
it’s bonded together now, faired and primed. Paint coat tomorrow if this rain departs for points east.

Last Sunday Dad and I were on the Bayshore freeway and I thought I spotted a huge mast. On the way home, we exited towards the Oracle campus, on the hunt for Dogzilla. Visitors to our Santa Rosa build shop might remember I had this boat’s photo on the door for inspiration those years.

We all know what it took to build our new 54′ mast. This one is 223′, got used for one regatta, and now serves as a statue. Now that’s rich-guy extravagance.

Whip it good

“Crack that whip. Step on a crack- break your …”. Yea, you’d get Devo stuck in your head too if you did 20 or so of these tonight.

All the halyards, new lazy jacks and reefing lines got various splices and end treatments, and are now ready for the mast next week.

The truck was loaded in Massachusetts on Monday. Things got a bit behind so our delivery has moved to next Tuesday.

Stepping the mast might also be contingent upon a couple of hardware items that haven’t shown up yet. Always something!

We accomplished all the solar wiring and the MPPT controller is in “bulk charge” mode working to bring the lithium battery bank up from its 8+ year hibernation since the cells were manufactured. As the sun was setting today, with one full day on the four 100 watt panels, the system was up from 13.15 volts to 13.40. A long way to go, but we don’t have a proper 110v charger yet so I’m thinking the solar approach is ok. 
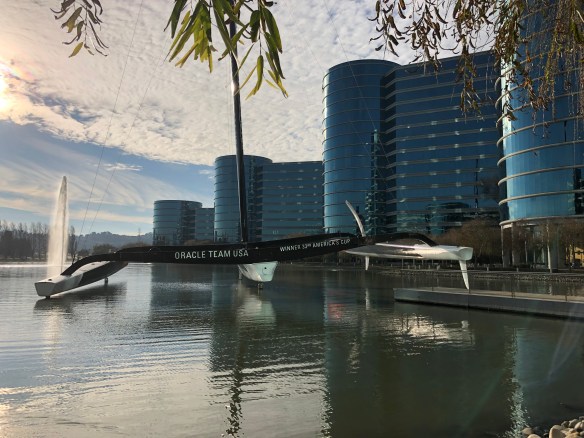
these two were no help that day, except for occasional scaring away of seagulls

We’re marching through smaller jobs, getting it all ready for next Tuesday.

And if you need a friend, this guy is waiting at the candy store in Old Town Sacramento…

13 volts and a nice big crane

Ravenswing is up and running on lithium batteries. We came back the next morning and found all four “parallel 4 packs” had balanced out to 3.28volts. Anton caught my tired typo the whole the other night; the parallel wiring of four cells of course kept the voltage in each new 400 amp hour battery at the 3.5volt level. All 16 cells had been hand-leveled at 3.28volts about four months ago, so I was happy they had not changed at all while waiting for this week. So we then proceeded with wiring them in series, to get up to a 400amp hour, 12v battery.

13.18v is pretty low, so we hooked up an old car battery charger rated at 10amps, which struggled to get the pack up to 13.31v after a couple hours. We’re ok leaving it there until the charging sources are hooked up.

There are three serial ‘jumpers’ between the four 3.5v groups. Note the one in the middle goes through a 150amp fuse; this is the first line of defense safety for a bad short circuit situation.

The previously installed 12v distribution panel matches the digital meter, and is a good at-a-glance basic tool.

But JoeS, a Bay Area Multihull veteran ocean cruiser, wants more details! Here goes, Joe…

I’m thinking of a max charge limit of 14volts (Joe does 13.8).

Lower limit discharge voltage is still up for debate. I need to read up on my CALB cells again, and ask the supplier EV.tv for their reco.

We’re installing a CellMon to monitor the voltage of each 3.5v 4-cell grouping. I’m judging that our usage and our charge pattern will be non-stressful duty for this bank, and thus it’s not necessary to monitor all 16 cells individually. I haven’t decided about installing any battery temperature sensors.

The CellMon will signal out to a loudspeaker alarm when a high or low limit has hit. I believe a second signal can be created at another voltage value, which we can send to the battery protection cutoff to shut down the power immediately. That device is planned to be the Victron BP-100. It is Bluetooth enabled and gets programmed from a phone / iPad app.

Primary battery monitoring is a Victron BMV712. This is also Bluetooth driven by an app. We mounted it at the nav / comms desk but it isn’t wired to the battery yet. Pretty sure it handles battery temp, if so we’ll get that sensor.

All three charging sources will be brought in to a common bus setup, then routed to a smaller Victron battery protector – BP65. This will be set with a lower limit than the BP100’s master cutoff, so all charging sources will be cut off from the battery before the battery gets “too full”.

The one decision not made yet is how to control the four 100watt solar panels. I’m leaning towards four separate circuits, each using a Genasun 140 Lithium profile MPPT controller. This will be the best at dealing with shade management (because the panels are in four different places around the boat). The alternative is bringing all four solar panels into a Victron MPPT controller (150/30 model I think). I like the idea of all-Victron because their stuff works well together. But does anyone know if the single controller can do differing shade per panel management well? Arlene and Glen, have you dealt with this?

Joe, the BMV712 is lithium-programmable. You tell it your ‘tank is full’ setting (e.g. 13.8v) and it does all the math from there, providing % of capacity left, and all kinds of other info. I’m excited to have it on the boat’s iPad.

All of this battery management stuff won’t happen until after the mast build journey, so we’ll stop talking batteries for now.

Early today we motored from Richmond to San Rafael Yacht Harbor. It’s not talked about much, but perfect for us with a big crane and it’s a DIY-only yard. You can’t hire them to work on your boat, but there are contractors swarming the place. And some funky toothless guys. (And gals). The yard crew is very competent with 30-45′ boats.

They swung the boat just a few feet above some late model cars – yikes!

Farrier’s design does look pretty swanky once you can get a few steps back. I love this angle…

Labor Day Yard day 1 was all about the dagger trunk. It was much more involved than I planned, as I realized hull-builder Howard had wrapped the Kevlar keel-line protection up into the trunk about three inches, and that buildup at the very bottom of the trunk was really screwing up the dagger fit. It was arm and back burning work to reach up past the foil block and rasp & shurform & grind as needed. I also had to rip out all the shims I installed during last November’s haul out. Argh for me, and at one point I wanted to punch Howard in the face. But by 7pm tonight the board goes up and down, fits snugly and the exit slot is re-epoxied. Keen followers will remember a few months back I sliced off 1.5″ from the aft edge of the board. Next time we’ll talk about the crash bumper that’s replacing that cutout. Stay tuned.

LiFePo4 batteries, at last

What do you call the stage between bleeding edge and early adopter? I don’t know, but we spent the day there… after buying 16 lithium battery cells two years ago, their installation got started today. There’s been a lot of learning, planning and fretting for months. Anton has built electric vehicles and complex land battery systems, so we listened carefully to his practical advice and I thank him greatly for the encouragement to tackle building a lithium system from scratch. This morning he told me to wrap the lug wrench handle in electrical tape to avoid any mistaken arcing. Let’s not make any short circuits with a 400 amp hour system!

A few months back we made these straps from a sheet of copper. That took longer than expected but at least saved some $ for quality (lowest resistance) balanced power across the cells.

The battery tray was built back in Santa Rosa. Today we built out component mounting spaces around it.

After mapping out parts locations it was time to make all the custom length cables. No fancy hydraulic crimpers here; just old school compression.

Here’s a progress view as the parts go in.

You’re looking at the 16 three-volt cells that have been made in to 4 twelve volt batteries (via parallel strapping). They are resting as separate groups overnight so that the individual cells within each of the four batteries balance among each other. Tomorrow hopefully we’ll find that the four groups have very close voltages to each other (ideally about 13.2volts based on how they were stored). If not we’ll balance them manually with a charger.

Ravenswing is coming out of the water this weekend so we can trim the daggerboard exit slot at the bottom of the hull to match the new daggerboard shape. I thought we could get away with not having to adjust down there, but when the v.2 dagger was slid home last month, it didn’t make it out the bottom. Oh well. Silver lining is the opportunity to finally get some artwork on the float hulls.  Hope you like it next week.

Who really ever finishes, anyway?

Dad, Joe and I stood on the Federal dock in Sausalito, joining thousands of fans watching the launch of the Matthew Turner. IMG_4319

Pretty sure we showed you this build in progress a couple years back, and it was truly amazing to see the community coming together to create a tall ship the old fashioned way. They recorded something nuts like 150,000+ hours of volunteer labor. We visited the build shed many times, but I always had to sit on my hands and not pick up a tool, because if I had, Ravenswing would have taken ANOTHER few years. So it became a quiet little footrace in my head instead. Gotta Launch Before the Turner. And it turns out to be another example of best intentions, but we put our boats in the water before they’re really done. Something about that expensive shop rent generally creeps in…

The Call of the Sea Foundation will have an incredible flagship soon, with the Matthew Turner as a working classroom. Check out this organization, what an amazing way to spend some vacation days.

IMG_4315IMG_4318

We used the rainy season to tackle the ‘bolt-on’ things that needed finishing and painting. Our damaged, empty house has become a paint studio. First we splattered orange highlight all over, and most recently it’s been grey and white for the interior redo of our little Nash travel trailer. The tree fell on the house exactly FOUR MONTHS ago and reconstruction has still not begun. Damn you, State Farm, for dragging the builders through a painful bidding process. But, complaining aside, decent looking boat parts have finally emerged for installation. First up tonight is the bow sprit.

IMG_4353

That’s the extreme forward end, with Keith’s beautifully machined and anodized aluminum doughnut. The spinnaker tack is exiting from inside the pole, and the ridge surrounding it holds the two whisker stays and bobstay.   Here’s the to-the-boat end:

IMG_4354

Spin. tack exits the pole and runs along the deck. The little blue line wraps around the delrin receiver at the bow. Drew was right, this small line did not hold up to the windstorm last week, and was replaced today with a bigger piece of dyneema. Finally installed this afternoon:

IMG_4365IMG_4366

Keith, the bobstay is perfect – thank you! I like the luggage-tag bottom end, and we’ll keep an eye on it for chafe against the bow stem. The delrin receiver at the bow definitely needs to be pinned to stop unwanted rotating; need to do that before we hoist the sail. I’m very concerned about how we’re going to get the reacher furler installed and removed underway. Farrier’s plans call for this pole to swing to the side, but it’s unlikely the setup will reach far enough for handling the extreme end. Eager to test this soon. Thinking of adding a centerline bow cleat dedicated to the two adjustable whisker stays, so we can easily move the pole tip side to side while standing on the bow. There’s a built in backing plate just above the captain’s forward berth, itching to be used.

Mrs. Carter called the ball on the hard top paint, and the orange highlight rocks!

IMG_4361IMG_4368IMG_4363

Sharp eyes saw six little dyneema loops sticking out of the orange top. Those are attachment points for a solar panel. No bolt holes needed now. The bits of rope were pulled through drill holes then flared out on the underside, and epoxy sealed.

If you go back to the February picture of us driving bundled up, you see the original height of the radar. Which would have sent microwaves into our brains. So thanks again to Sewell Mt. Bob for the windsurfer mast offcut that became a radar tower extension. Got it all painted and delivered to the marina. I set it down on the pavement while getting other things out of the pickup, and a little zephyr knocked it over. Nasty ding in the foam core and fancy paint:

IMG_4304
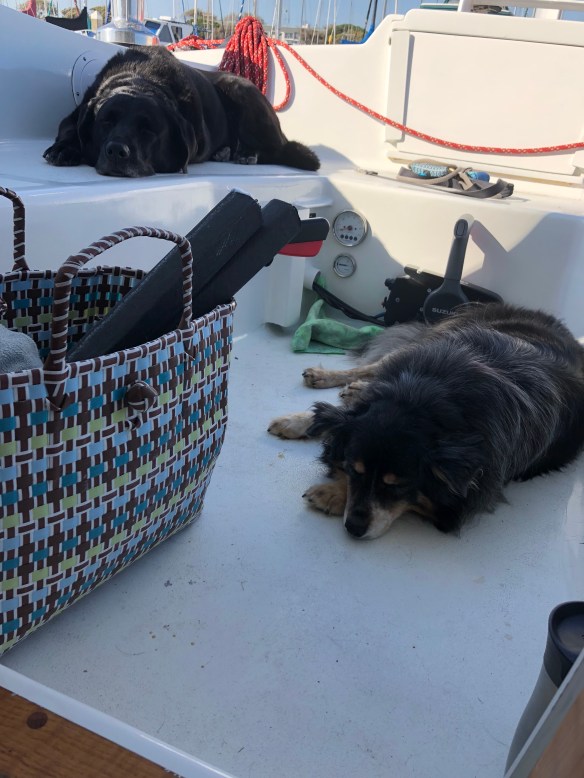
That photo is the next day, back at home for touch up, interrupting work on the Nash (aka tinyhouse). A few days later, it was back to the boat, this time carried carefully.

IMG_4362

Just under the radar we’ve mounted two LED deck lights, which really flood the place with great work illumination. They can also be pointed up at the sail for visual signaling at sea.  It’s a lot of light for small power burn.

IMG_4370

Seeing the engine gauges reminds me we figured out how to change the motor oil with the outboard leg lowered down into the dinghy and a bucket. But suzuki does NOT make it owner-serviceable to change the oil filter. Argh. going to need to research that one, as I couldn’t find it poking around the various powerhead components (20hp 4 stroke EFI).

The steering is officially finished with the simplification project. Just a big ‘ol orange tiller now, with molded in receiver for the extension handle.

IMG_4369

The helm is extremely responsive and direct-feel. Time will tell if we’ve made the right choice, compared to all of the elegant, elaborate steering systems on the other F36/39’s.

For the note-to-self file, our new orange color (steering, bowsprit, dodger) is equal parts of these two Interlux colors. The Brightside one part is much softer and will wear out faster than two part Perfection, so next time we’ll look to see if the better paint comes in red and yellow.

IMG_4306

For my friends out there who will still be building F36/39 float hulls, perhaps you can make your center compartment soles early in your process. There have been many painful sessions doing various jobs finishing the floats, painful because of squashing ones feet and legs into the sharply pointed float bottoms. We have now built proper floors, and will enjoy them for a long time. I just wish we had done it BEFORE the big chainplates, beam sockets, hardware prep, etc. jobs.

We had to clamp up a 2×4 extension to the 8′ lamination table in order to make 99″ x 16″ floor sections. IMG_4305

Then in the hulls we ripped some of the leftover original cedar planking for 35-degree flooring sills. Puttied and taped those down and let them cure for an afternoon. IMG_4359

Note how they’re asymmetric to the hull shape. If we had done this job back in the build shop, we probably would have made it all parallel. But in the floating boat, we realized, hey, let’s make the soles level for user-comfort! We’re not going to permanently install these big boards. They’ll just rest on the stringers so things can be easily cleaned underneath, or even removed if we’re crazy about racing weight someday. And yes, we took a little more time to make bilge-access panels (that still need some primer).IMG_4360

Unfortunately, you’re seeing some mold spots on the right side of that photo. The floats get excessive condensation buildup, so we’ll add some solar-powered vent fans to the hatch covers this summer.

OK, that’s the update. Hopefully we’ll get back to more frequent posts including more sailing action reports. Congrats to Drew for driving his F27 Papillon to WINNING the Doublehanded Farallons 2017 multihull fleet. After hearing his great story, he suggested this year’s Delta Ditch be Raveneswing’s racing debut.  That’s a fine idea, Mr. Scott! Time to apply for that PHRF rating…

I know I promised the lithium battery system description – stay tuned, as Anton edited my schematic today and it’s not quite ready for prime time. Getting close.

Locals, let’s go sailing next week, once the rainstorm clears out. Maybe Thursday afternoon. Let me know if you can make it.

Look Ma, no hands!

As kids in Sonoma, we’d try riding bikes with no hands on the bars all the way down Denmark street. It helped if the tires were pumped up firm and your core was tuned up (from pulling weeds). Fast forward a few decades, and Charlie’s demonstrating what we finally got right with the rudder balancing! We’ll do some by-millimeters shim adjustments on the water this weekend to bring back just a touch of weather helm, then take the cassette home one more time for bonding in the new part. Phew.

img_3864

Also in that photo note the radar is missing. The stern tower is working out great, but the radar was too low. Joe the electronics guy immediately scoffed, noting the radar beams that would hit us in the cockpit. So it’s getting a 4′ extension pole made from VA Bob’s windsurfer mast offcut he kindly sent over. img_3870

That’s the top plate, sitting on the table a few evenings back. Tonight we bonded on the lower disk that will bolt on the tower where the radar used to mount. The top plate has an extra lip on the front to mount a couple of LED deck lights.

The jib deck bag got it’s final sewing job; recall that it didn’t quite button up around the forestay because someone (the builder) didn’t allow for enough sail bulk up there. So it got these earflap looking things:

img_3837

and now it’s fine. We’re happy with the open mesh bottom, especially now that it’s been raining and this is free to drain.

img_3868

Electricity supply in the boat is still the tiny lawnmower battery, but we’ve finally called-the-ball to begin the Lithium Iron Phosphate battery pack build. The order went to EVtv.com, an electric-car conversion company in MO. This topic is extensive, and a lot of people are interested in just this, so we’ll do some dedicated posts coming up on the battery system install. For now, it’s the physical challenge of mounting the 16 cells in a spot that was originally built for just a couple of car batteries. This tray mold was done based on dimensions provided by the battery dealer, before the crate arrived.

img_3834img_3838

And yesterday just before closing time, UPS Freight called to say our crate had arrived at their dock. Y’all can guess what Greg got for Christmas this year!

img_3871img_3872

Took two of these blue cells and the tray to the boat last night, and it’s not going to fit standing up as planned – just not enough clearance on top for the wiring. But it’ll work with the tray tilted back about 40 degrees, with the battery back edges resting against the curve of the hull. So tonight was also some surgery to trim away the front of the tray and add height to the back side for this new mounting configuration. That’s enough to whet your appetite on LiFePo4…

Now, back to that sail the other day with Charlie smiling. After five months in the water, I FINALLY got an actual performance sail-tuning, get to know the rig day! Carlos was aboard, and it was a joy to get F27 Papillon captain Drew Scott out for the first time. Drew is a talented racing sailor with an intense eye for sail trim, and I really needed to get him aboard to help assess this new boat, new mast, new sails combo. we’re all in love with this big, powerful, easily adjusted main (and so far the Leneman Vee mainsheet / no traveler hardware ROCKS!)  The Hydranet fabric (spectra & dacron weave) is holding shape like a fixed wing.

img_3856

The jib had been sailed reefed through the summer and fall because of high winds and the mast & steering issues we were sorting out. So here was it’s first real use day. We’ll start with Inspector Scott checking things out.

img_3859

The sail appears to be cut to allow for a big full belly in light winds.

img_3848

I’m concerned the transverse mounted cars aren’t far enough aft for this size sail. Here are the light wind shots (around 5 kts as we were leaving the Richmond breakwater area)

img_3850img_3851img_3853

In the third photo, as we start to point higher, the sail is rubbing on the upper diamond wire. A half hour later we’re out in the main bay, with wind up in the 10-12kt range.

img_3863img_3865

The headstay tension is light and it’s bending off to leeward, which helped keep the sail off the diamond wire, but that’s not a real solution. The second shot shows the effect of the jib car placement – the sail is not balanced top to bottom in terms of airflow. So we tried various temporary sheeting angles to get the sail drawing equally at each set of telltales. img_3866img_3867 
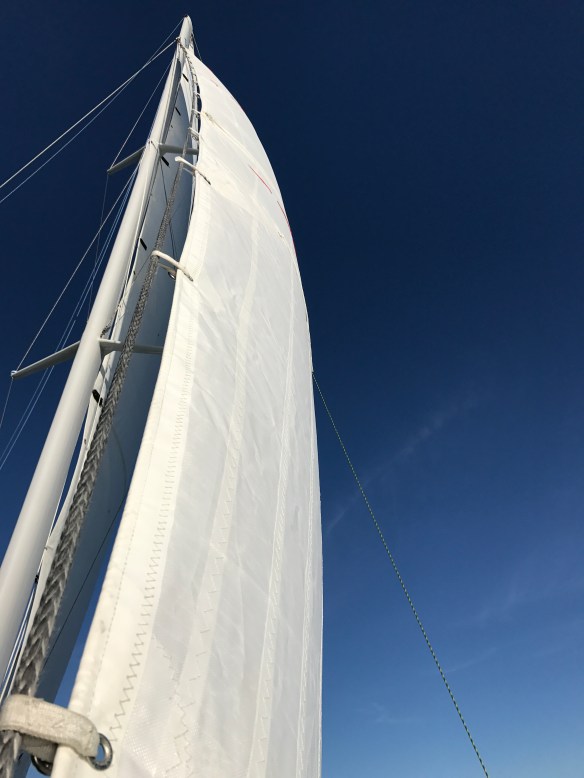
In retrospect, I’ve realized there’s more overlap of the mast with this sail than I had wanted, and we have to solve for the diamond wire interference. Hopefully we’ll be able to solve this with local support, rather than the jib having to travel cross country again. Stay tuned.

CALL FOR CREW = local folks, would you like to sail Ravenswing this Sunday?  Weather forecast is down to 20% chance of rain, and 10kts of wind from the west. We’ll aim for a late morning start. Please call, text or reply back here if interested. 707.486.3954

You wanna be like this guy. He knows the drill :)

img_3860