Flip Flopper

Politicians get a bad reputation for changing their stories. Here we told you the boat work moved to the interior, but now a post about more exterior fabrication. Seems to work out best if we have multiple projects going at once so things can progress while other parts let the epoxy cure (lots of timing dance lately!)

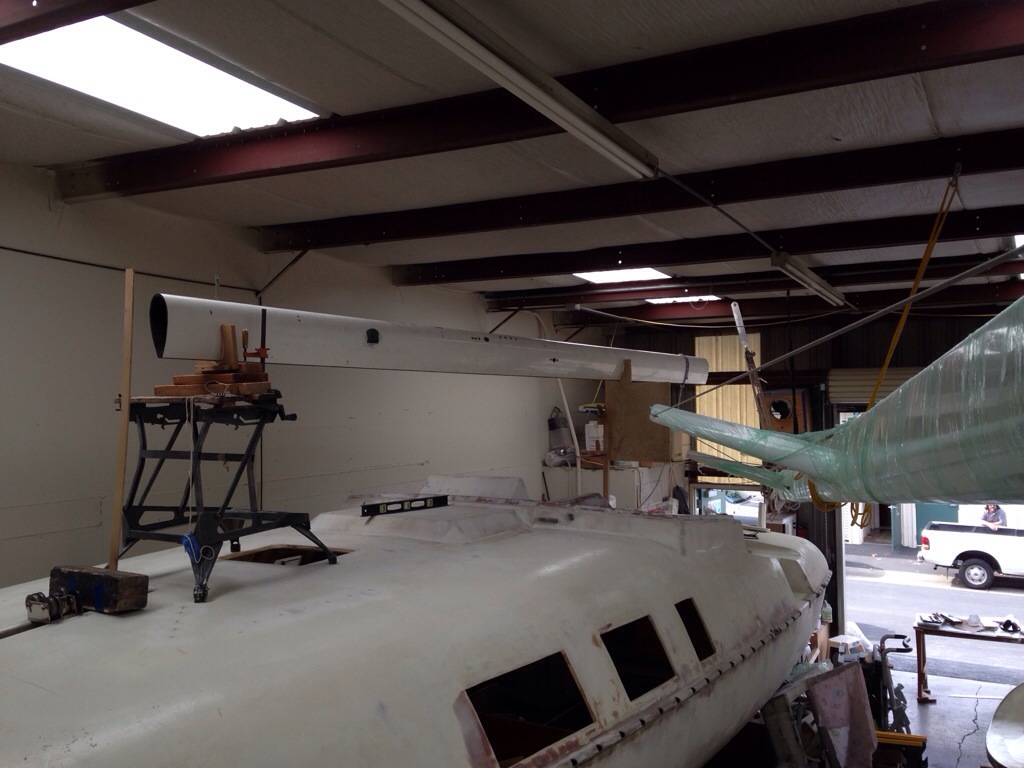
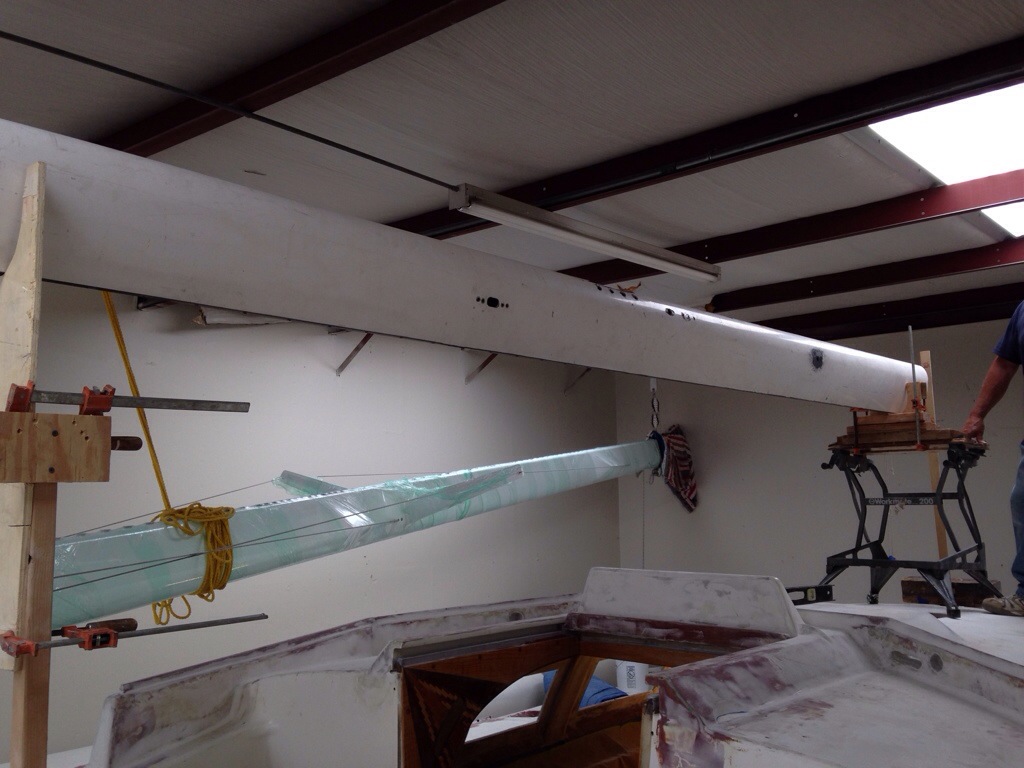
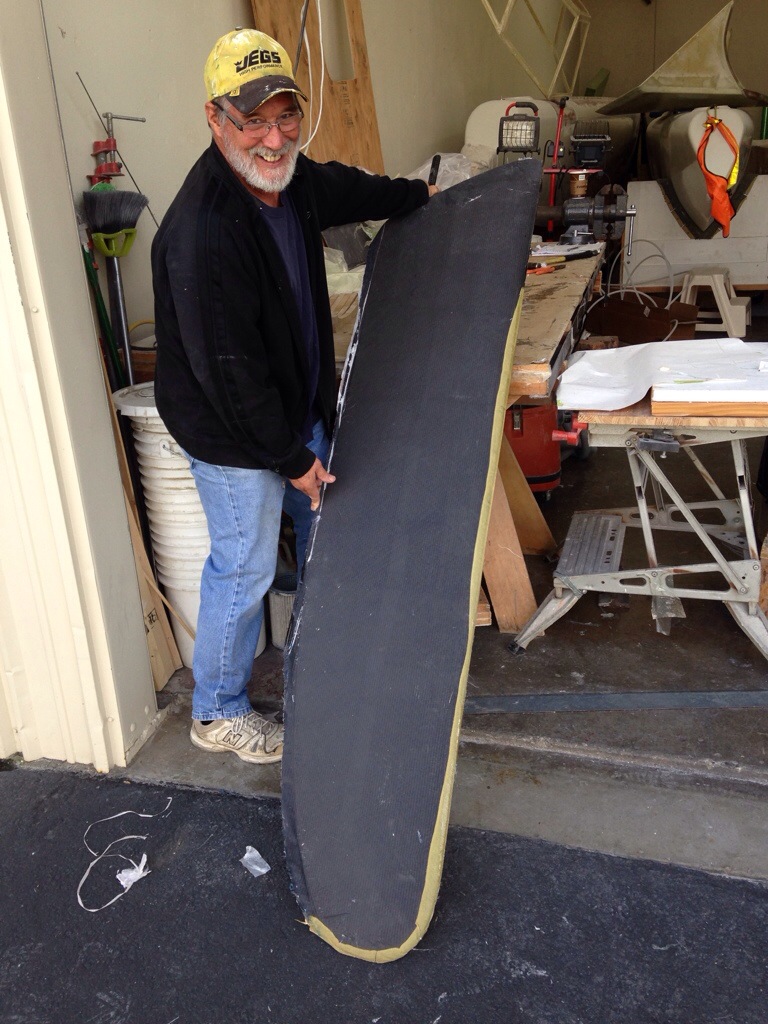
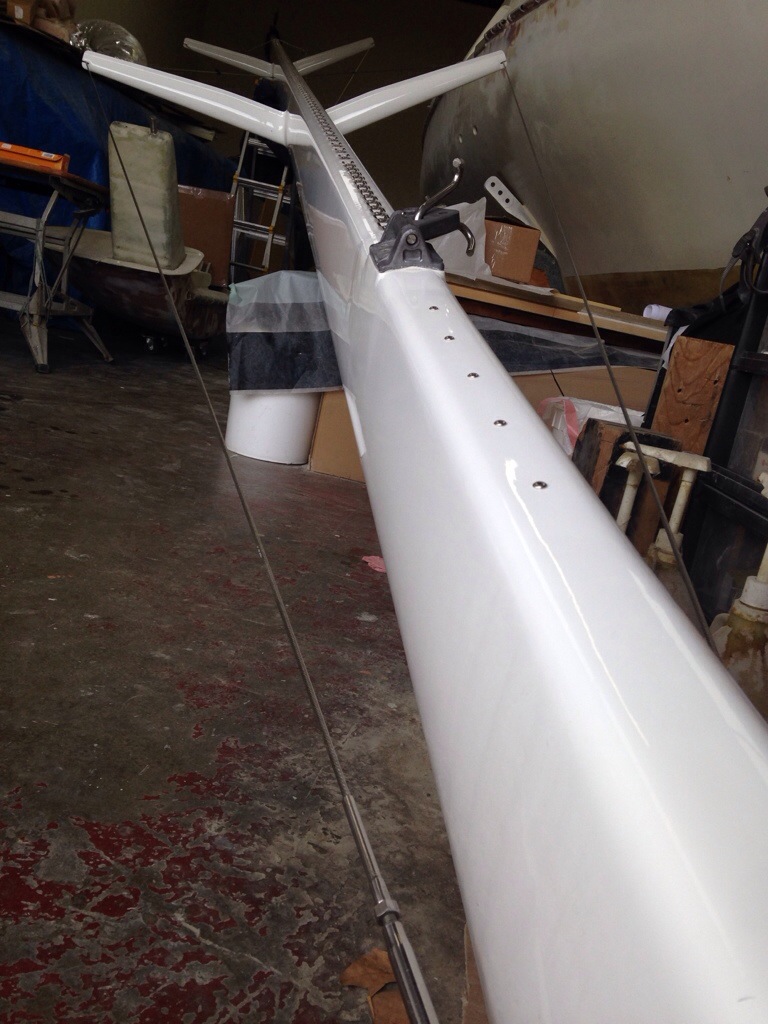
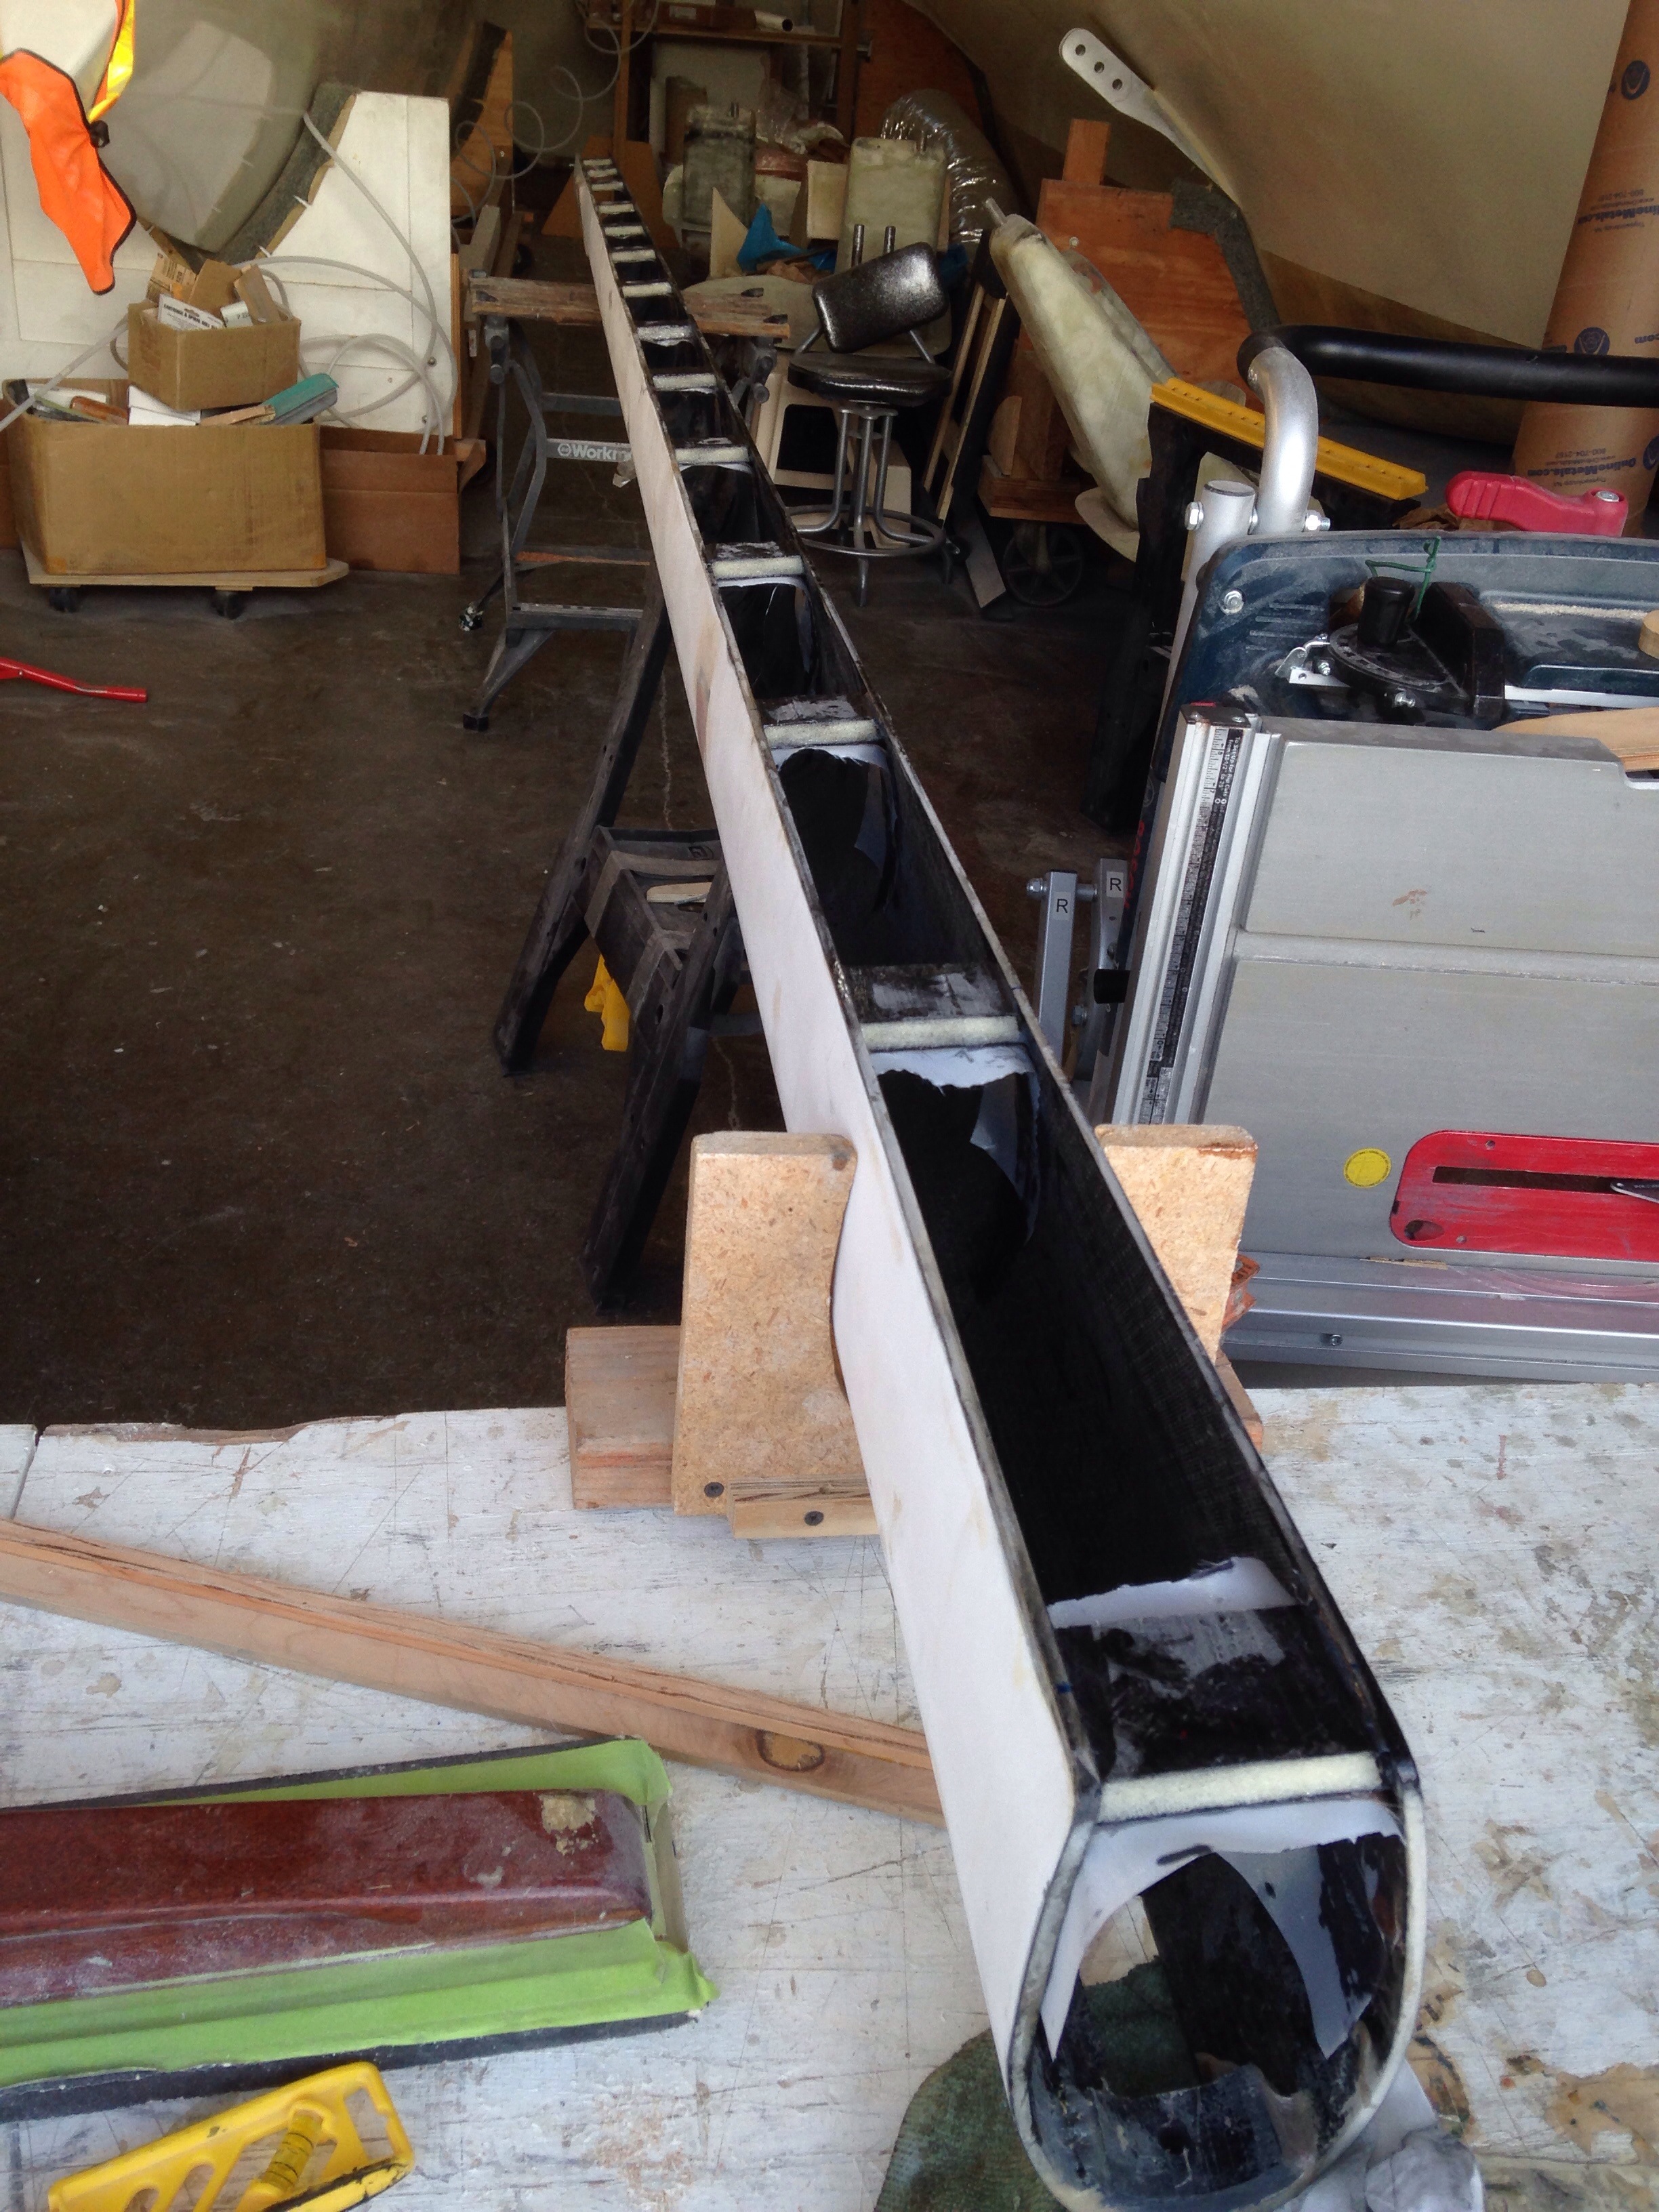
First up is the boom – got the last structural thing done, adding carbon-wrap spacers to the bottom side. Less than a pound of material has now replaced the 20lbs of heavy laminate we sliced off this old mast last year.

20150219-231814.jpg

20150219-231839.jpg
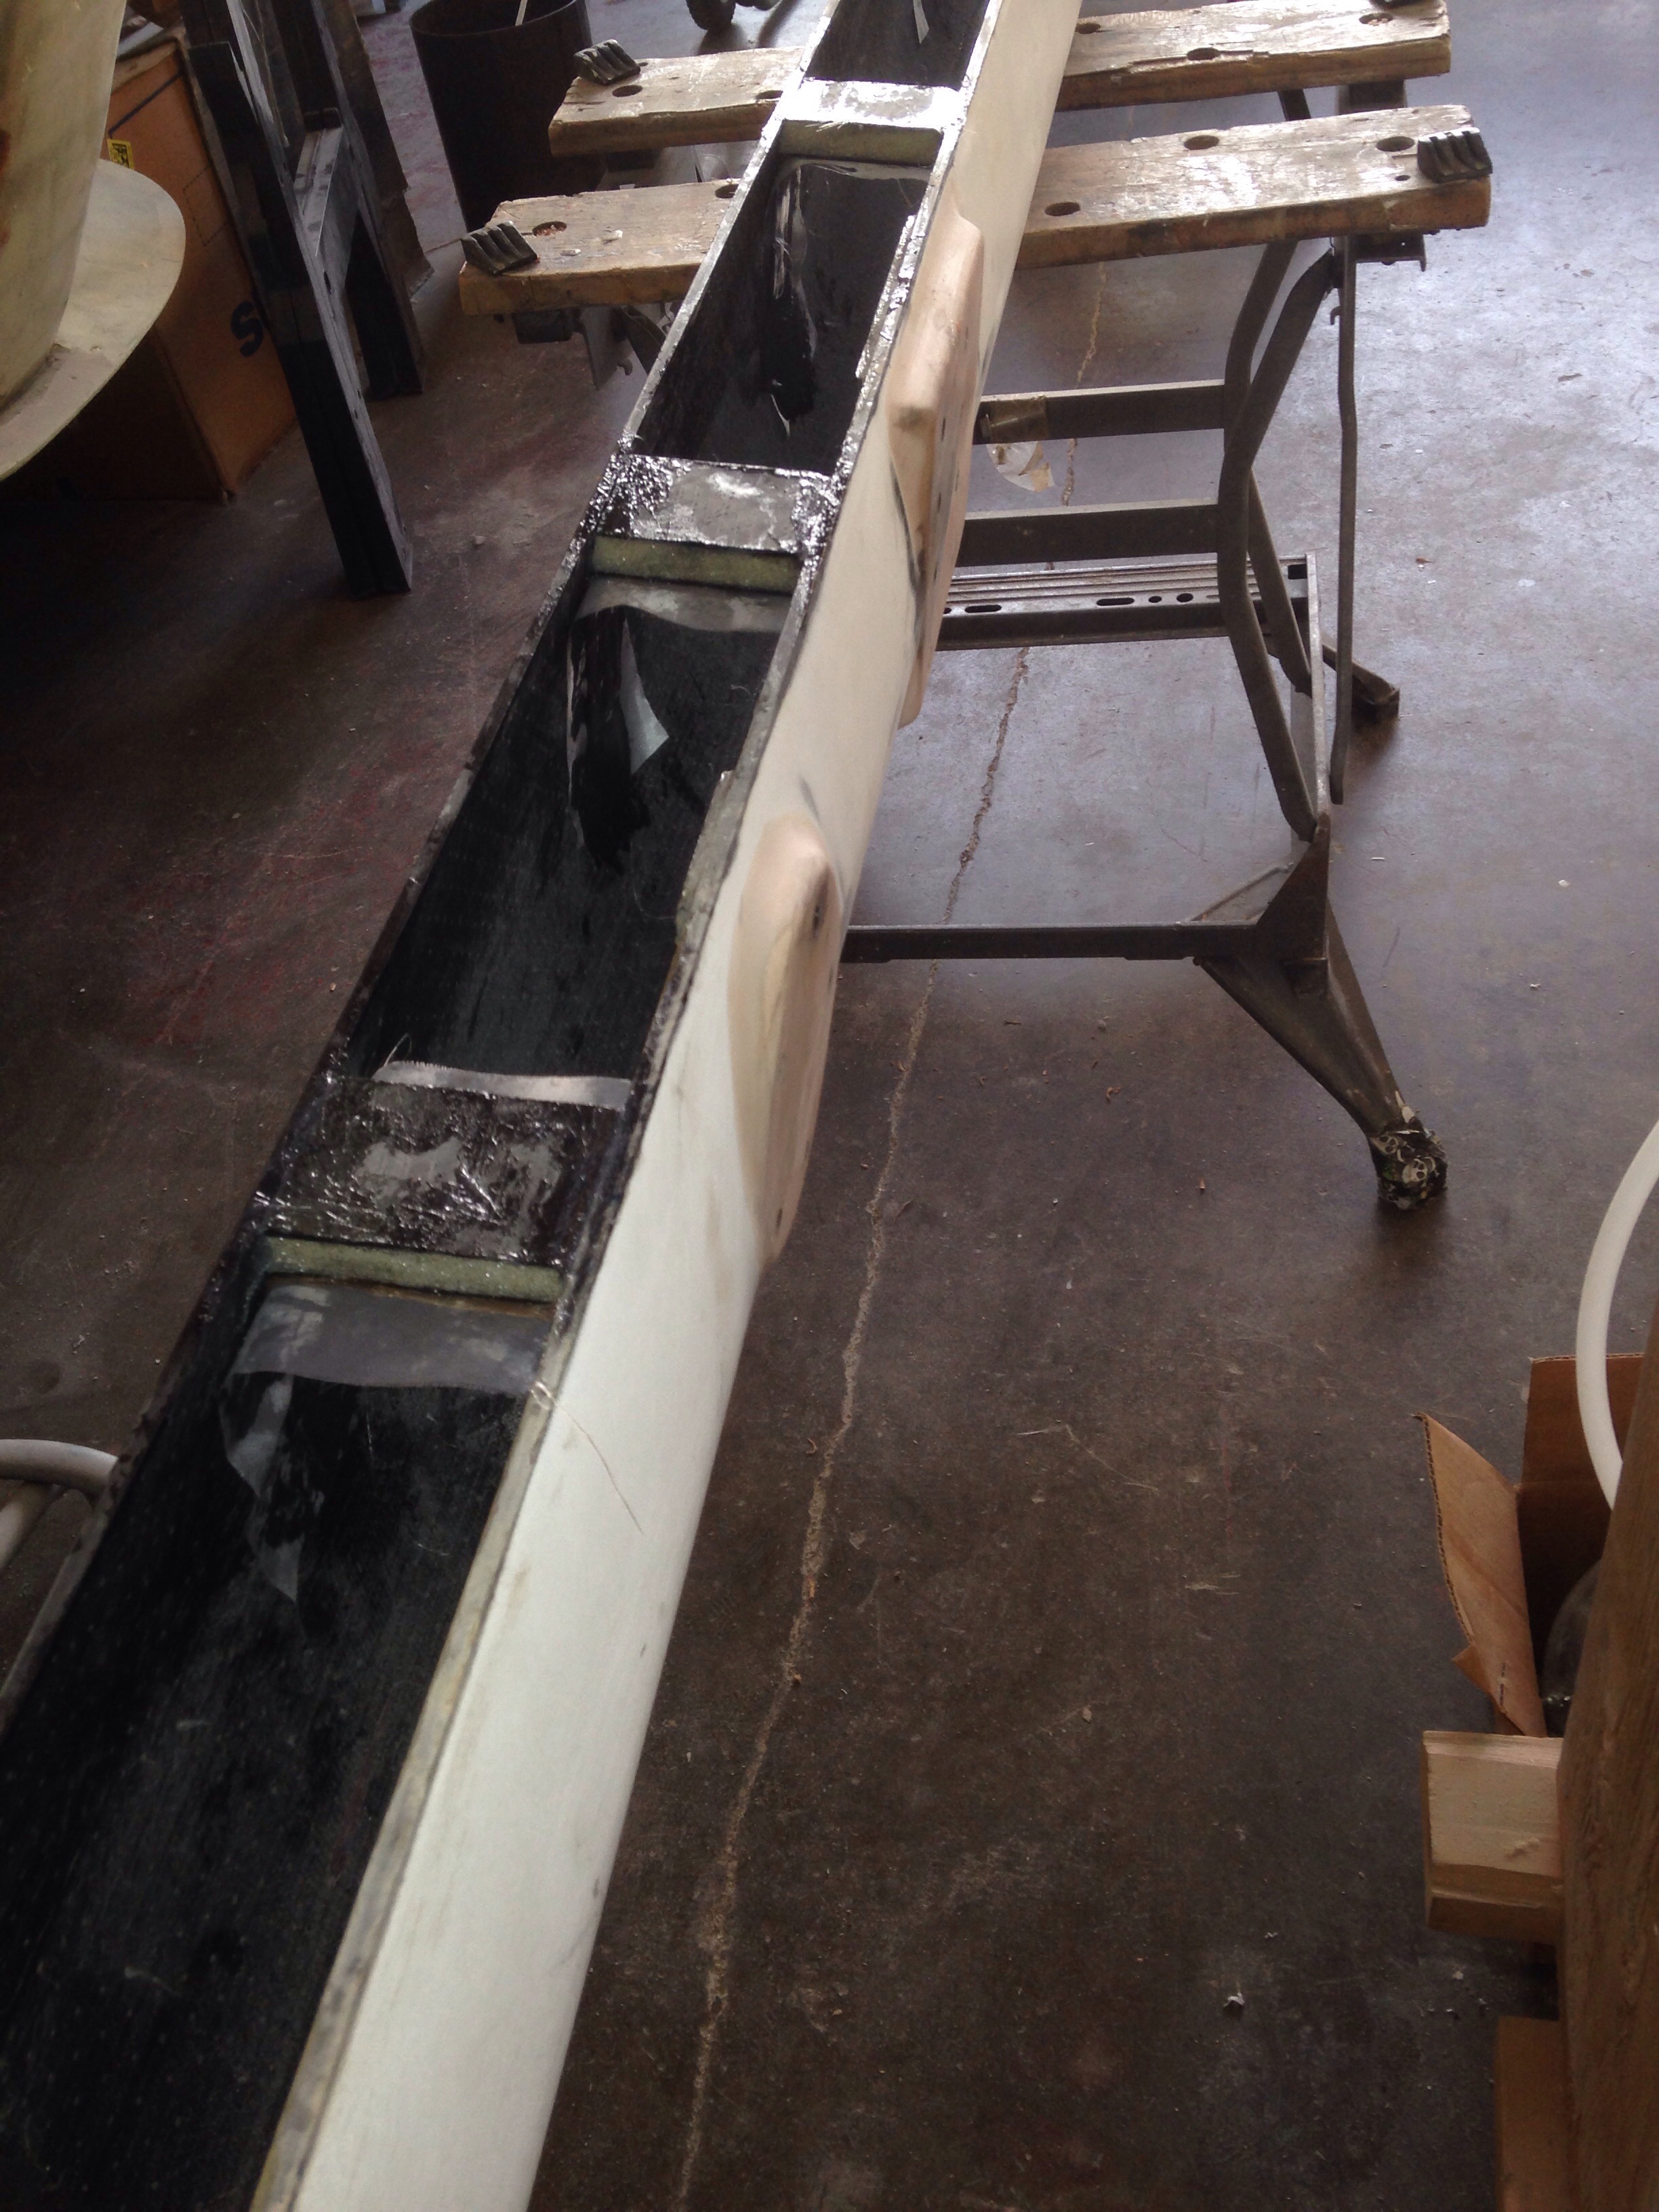
Rick WS brought Matt and pro rigger Guy Stevens to the shop today for a tour, and Guy managed to rattle off about 20 great ideas for the boat, including solving the reefing and main sheet attachments for the boom. I was deservedly chided for putting an out haul track – those holes will now be filled in and we’ll do nice spectra grommets (continuous line hoops) around the boom for reef and main sheet block anchors. This also made me see how to nicely hide the reefing lines inside the easy-access boom. Nice.

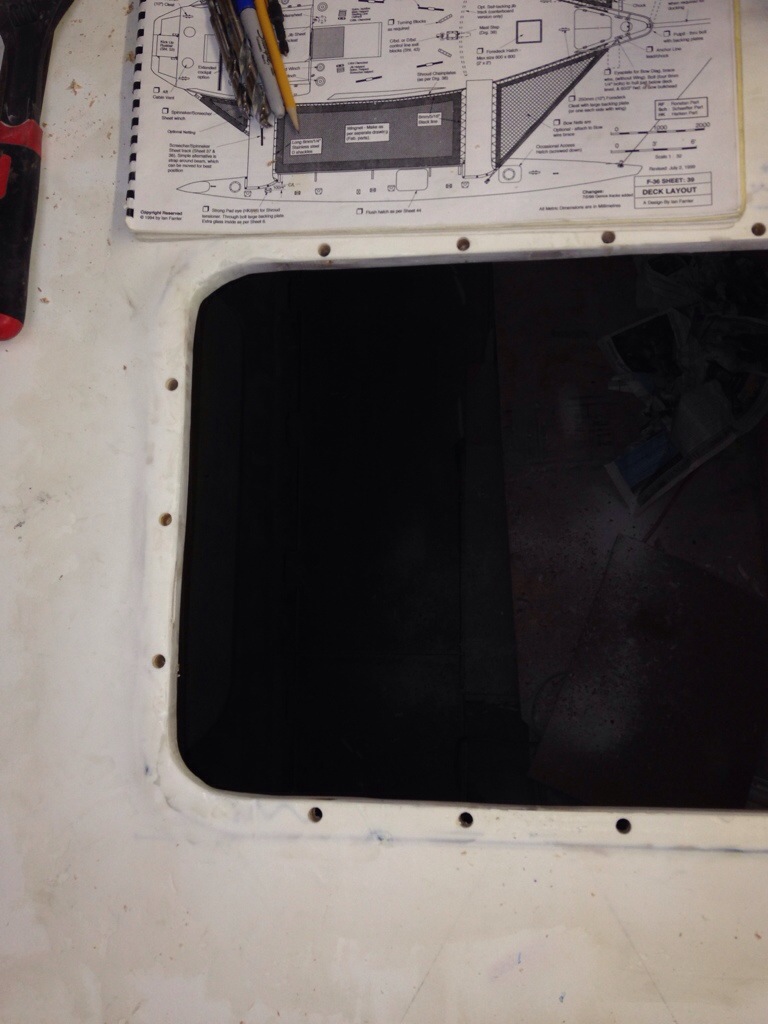
The final cabin top opening hatch went in, this one over the shower.

20150219-232428.jpg

20150219-232451.jpg
In this close up of the hatch cut out area, notice how the cedar core strips are tongue and grove fitted during the primary hull construction. This wasn’t called for in the plans, but the extra labor should be giving us more structural rigidity for zero added weight.
All three of the hinged deck hatches got 3/4″ ply spacers added above the deck as mounting flanges (seen as the tan square over the hole in last photo). It’s against the trend of the new flush mount hatches, but I like raising this lip up to help keep splashes out when sailing in spray or perhaps rain and the hatch cracked open.

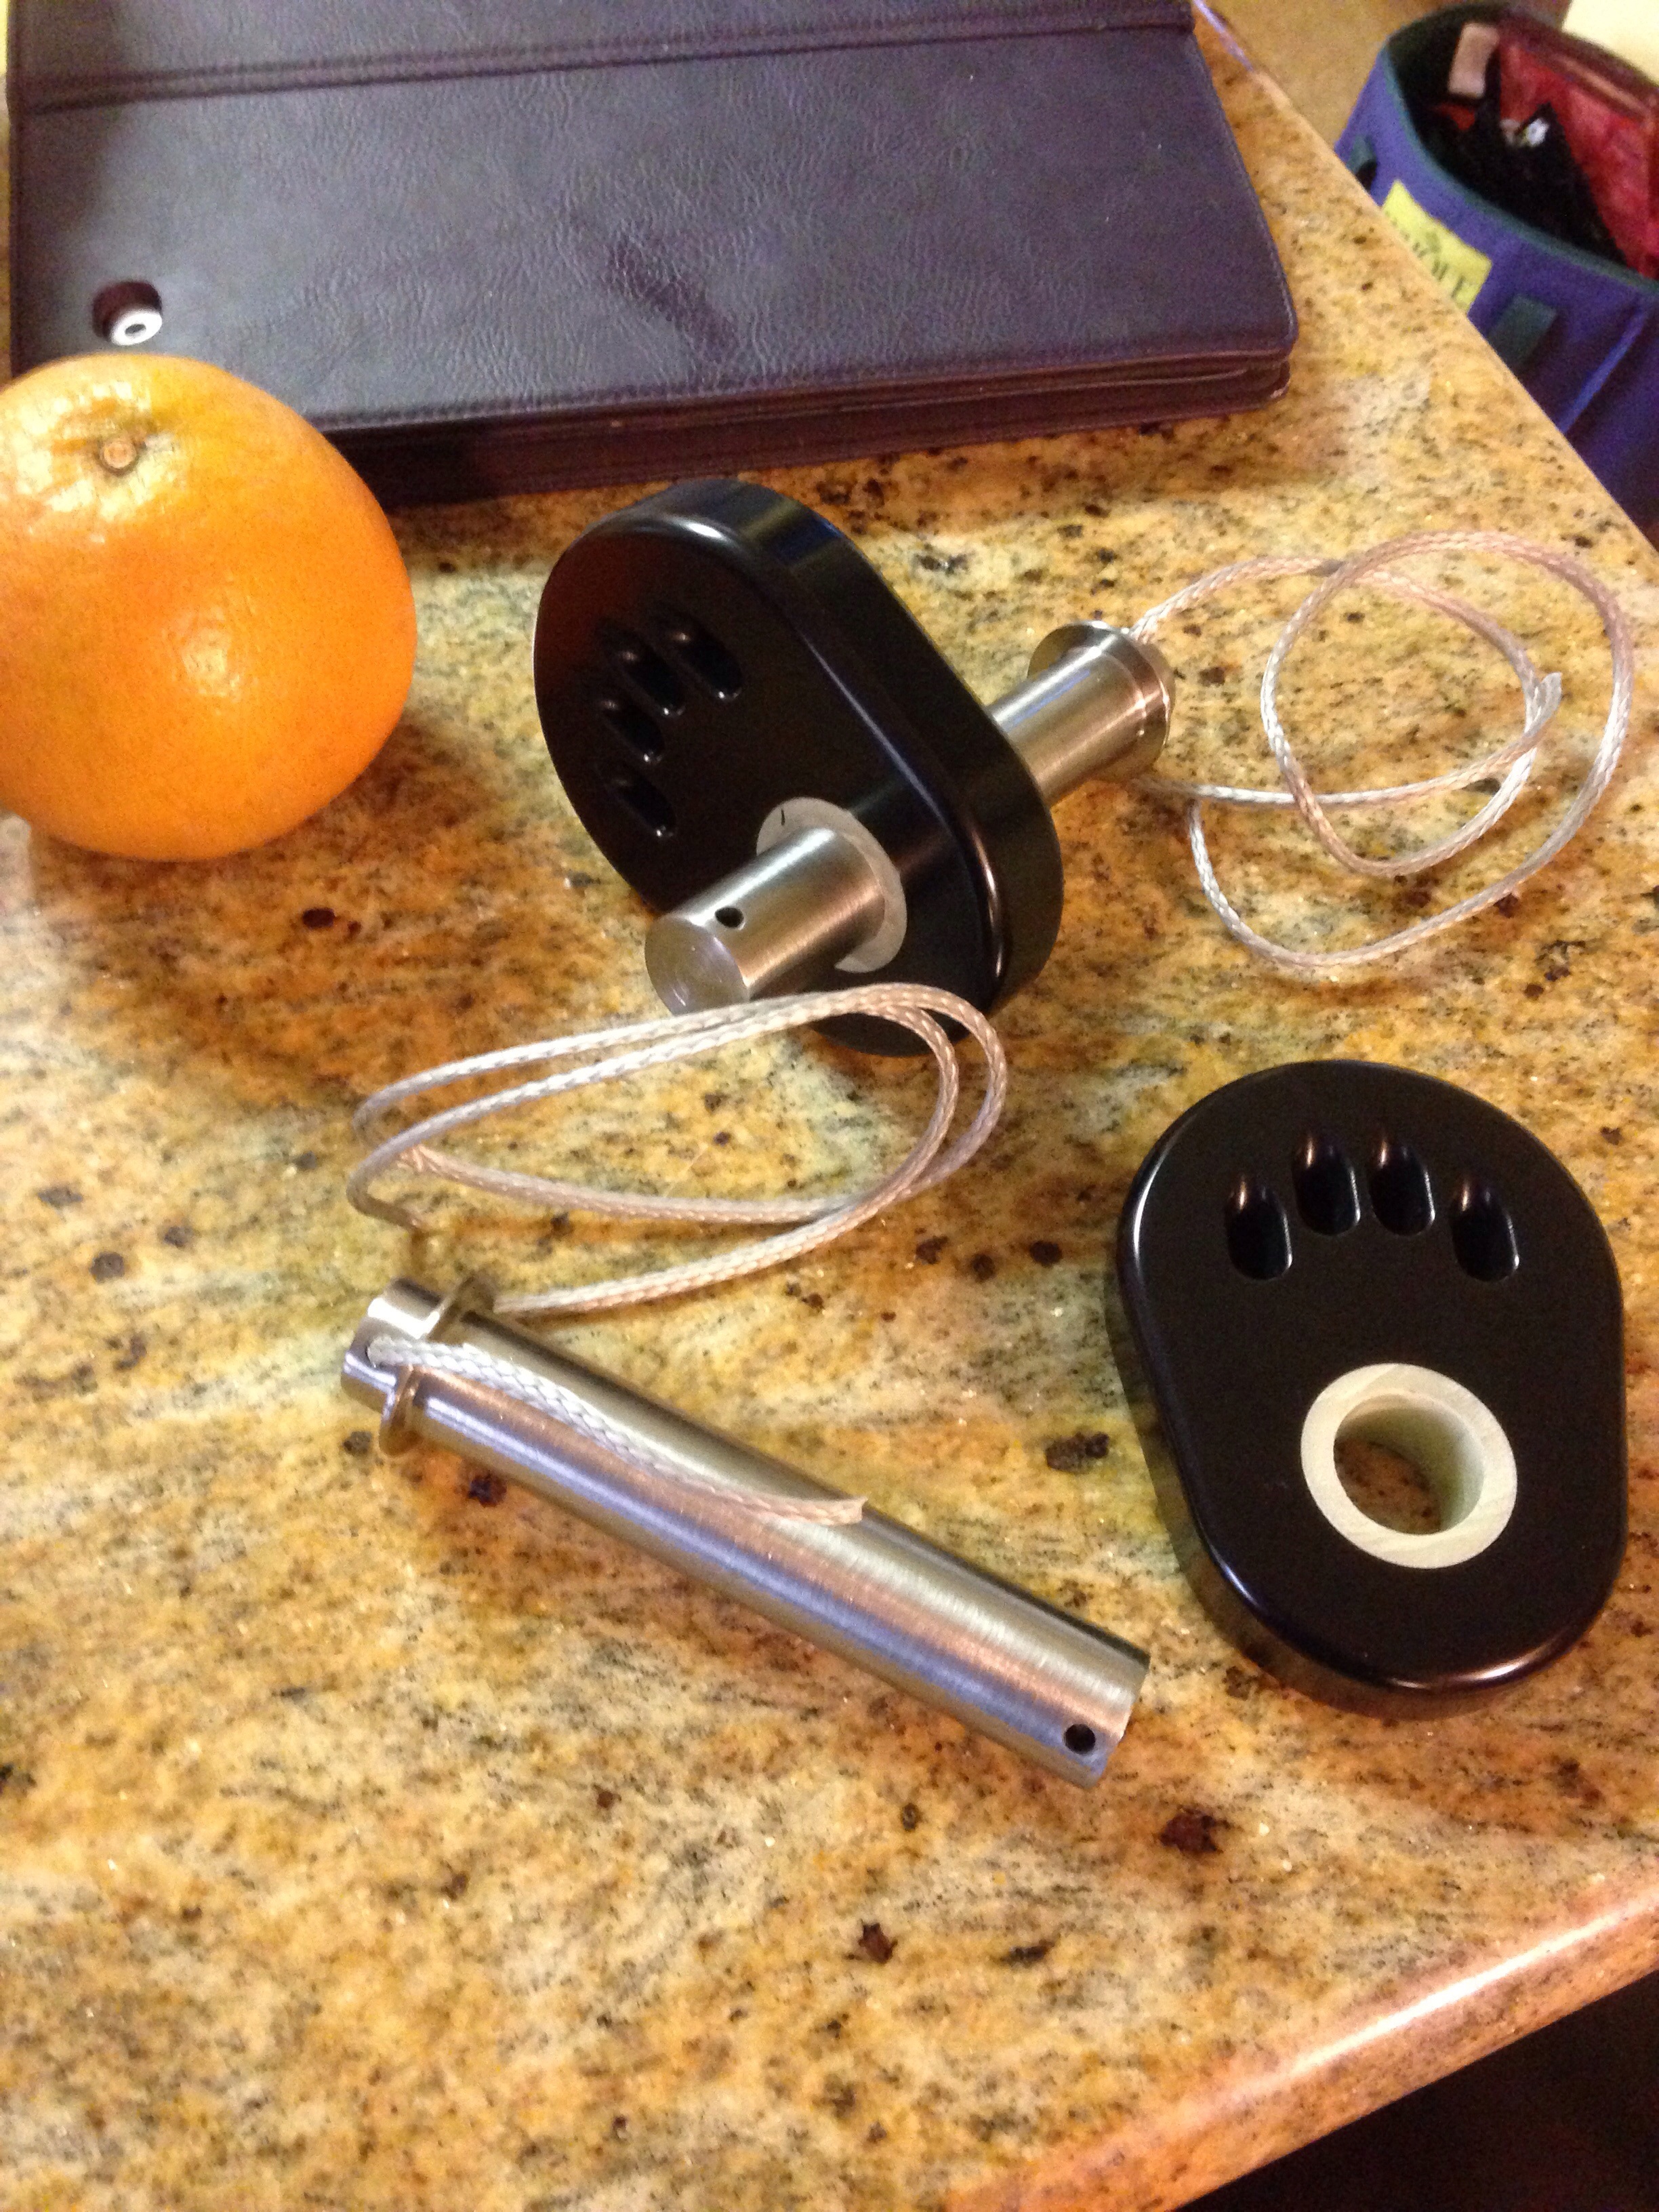
Today’s work was a task that’s been a worry for three years; finally time to make those big cap shroud chainplates. (For Mom: these are the very important bases sticking out of the decks of the 2 outer hulls, to which the mast rigging is affixed. Old ships had metal plates bolted to wood timbers and the chains going up joined at the plates). Making them now in composites and permanently bonding them deep inside the floats means they should never need replacing. Two weeks back I showed the steel pins and lashing ‘bear paws’; those get joined to:

20150219-233524.jpg

20150219-233546.jpg
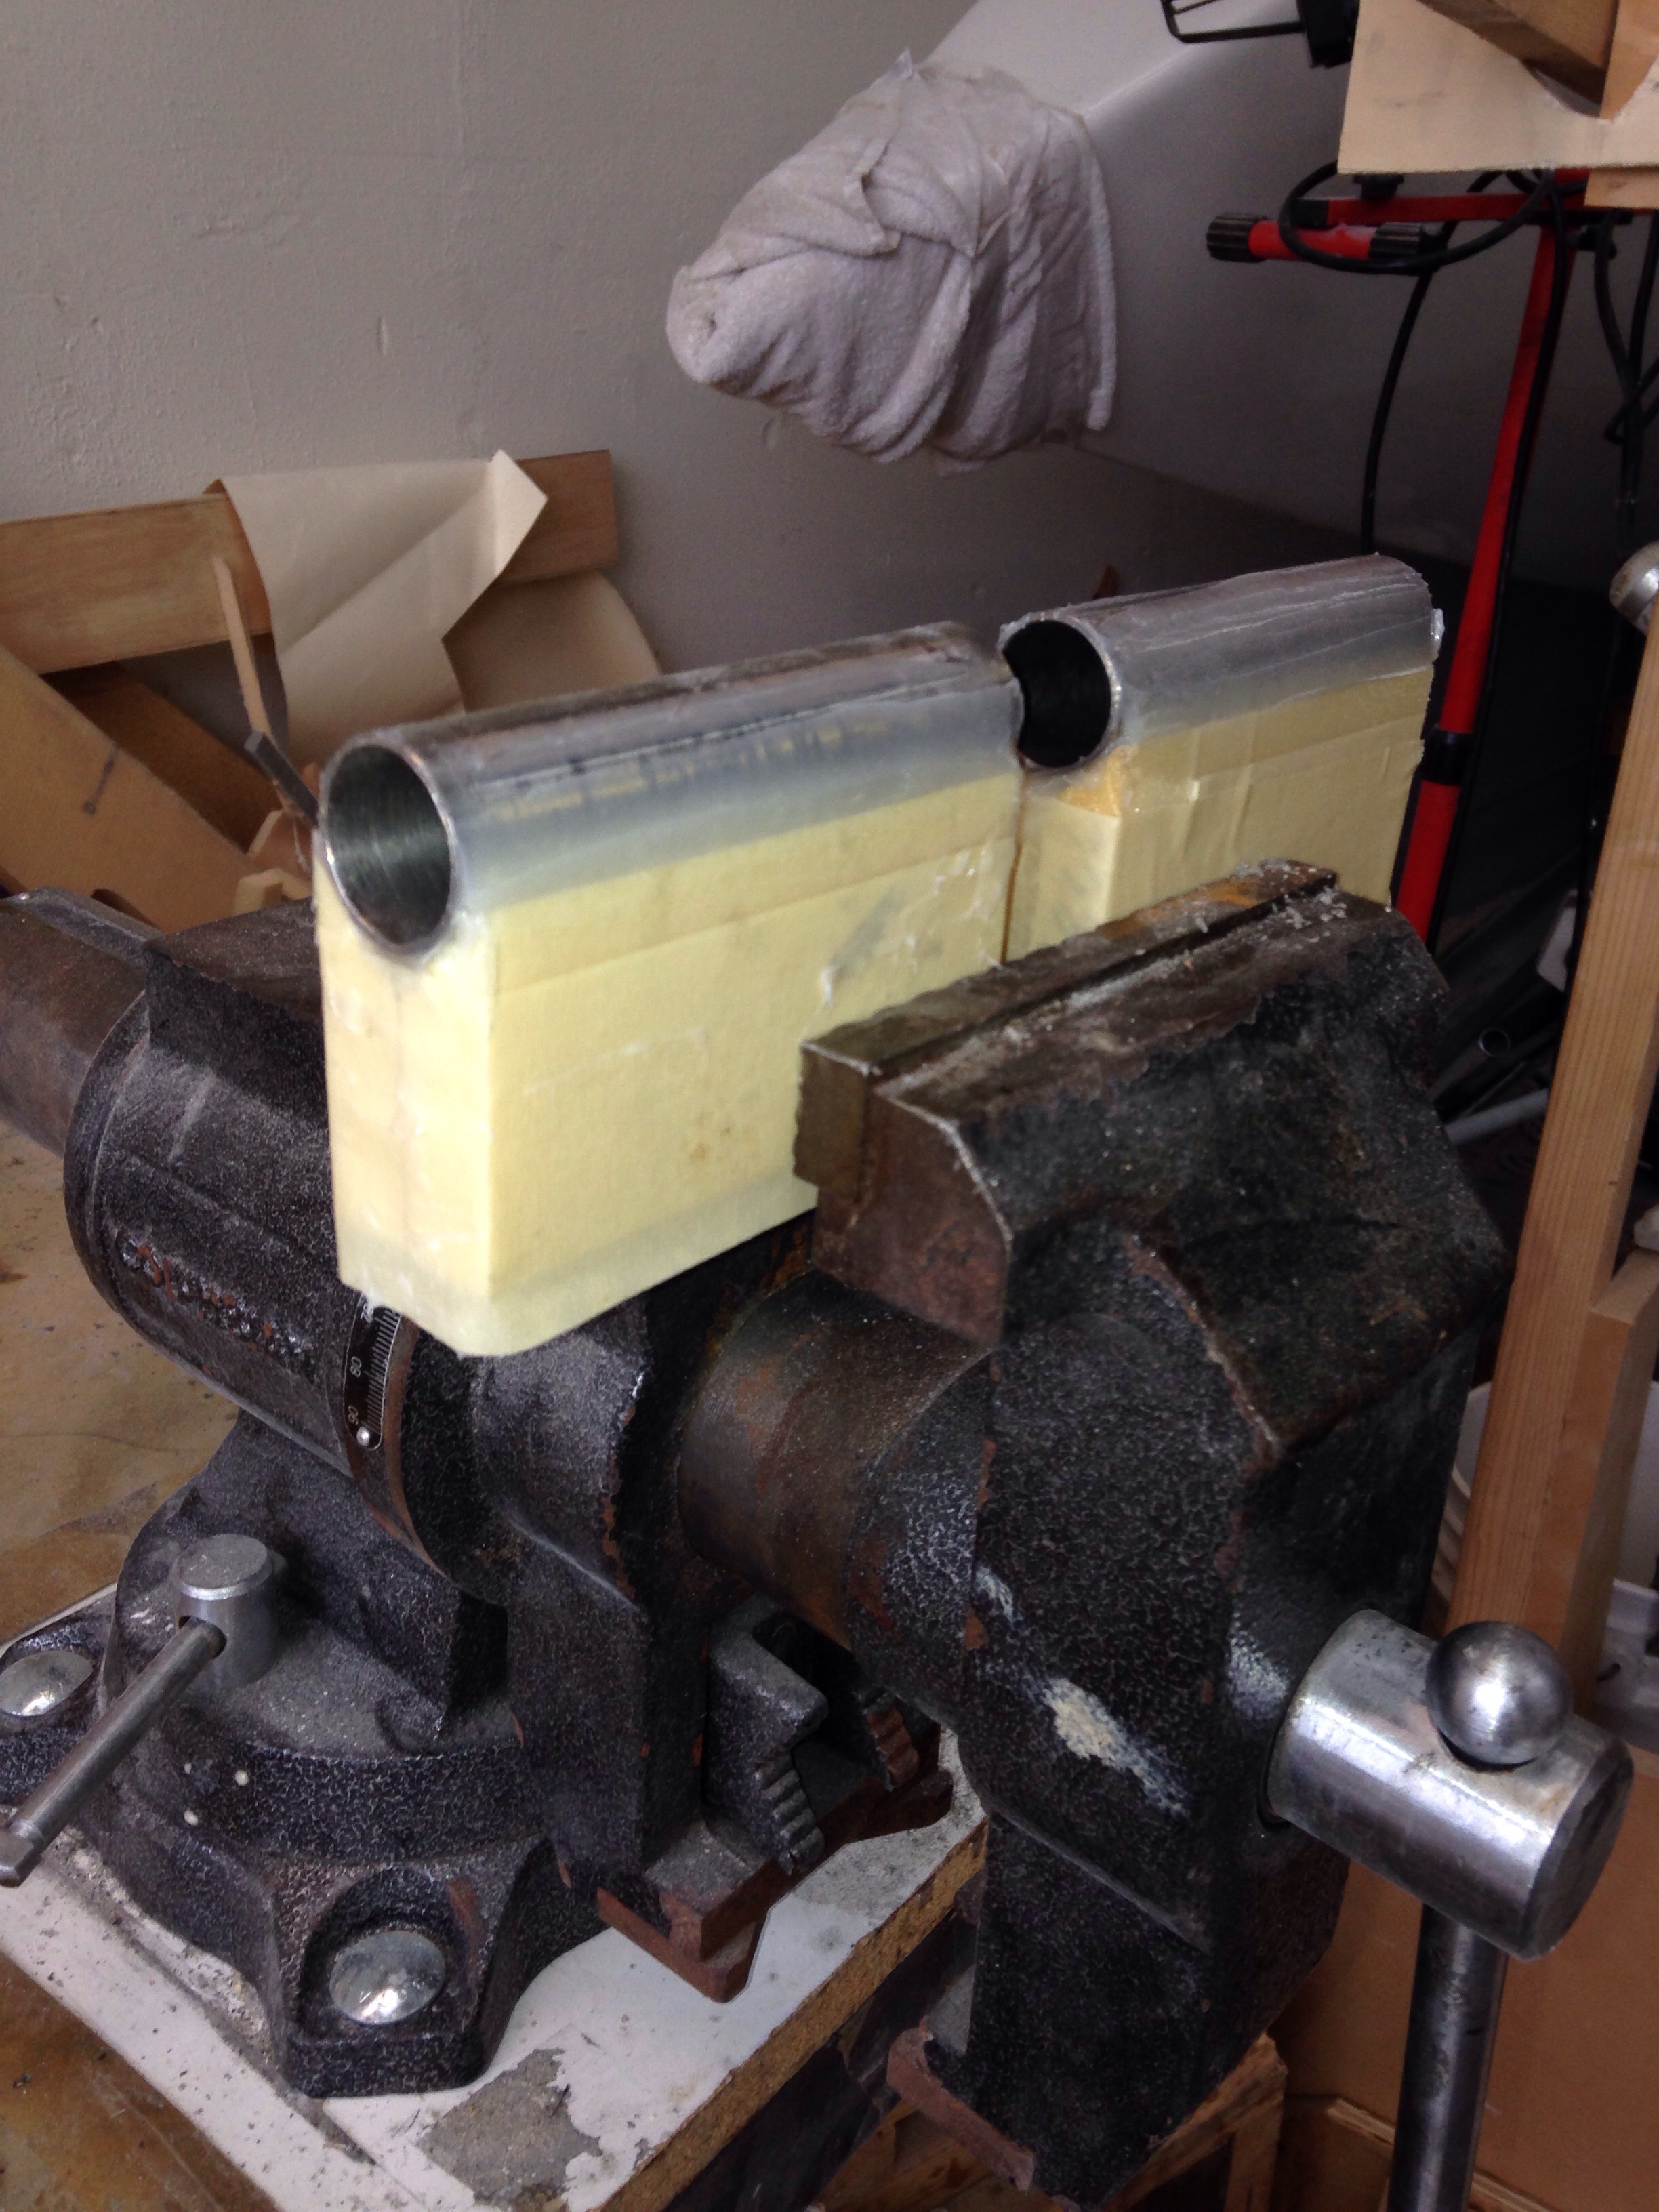
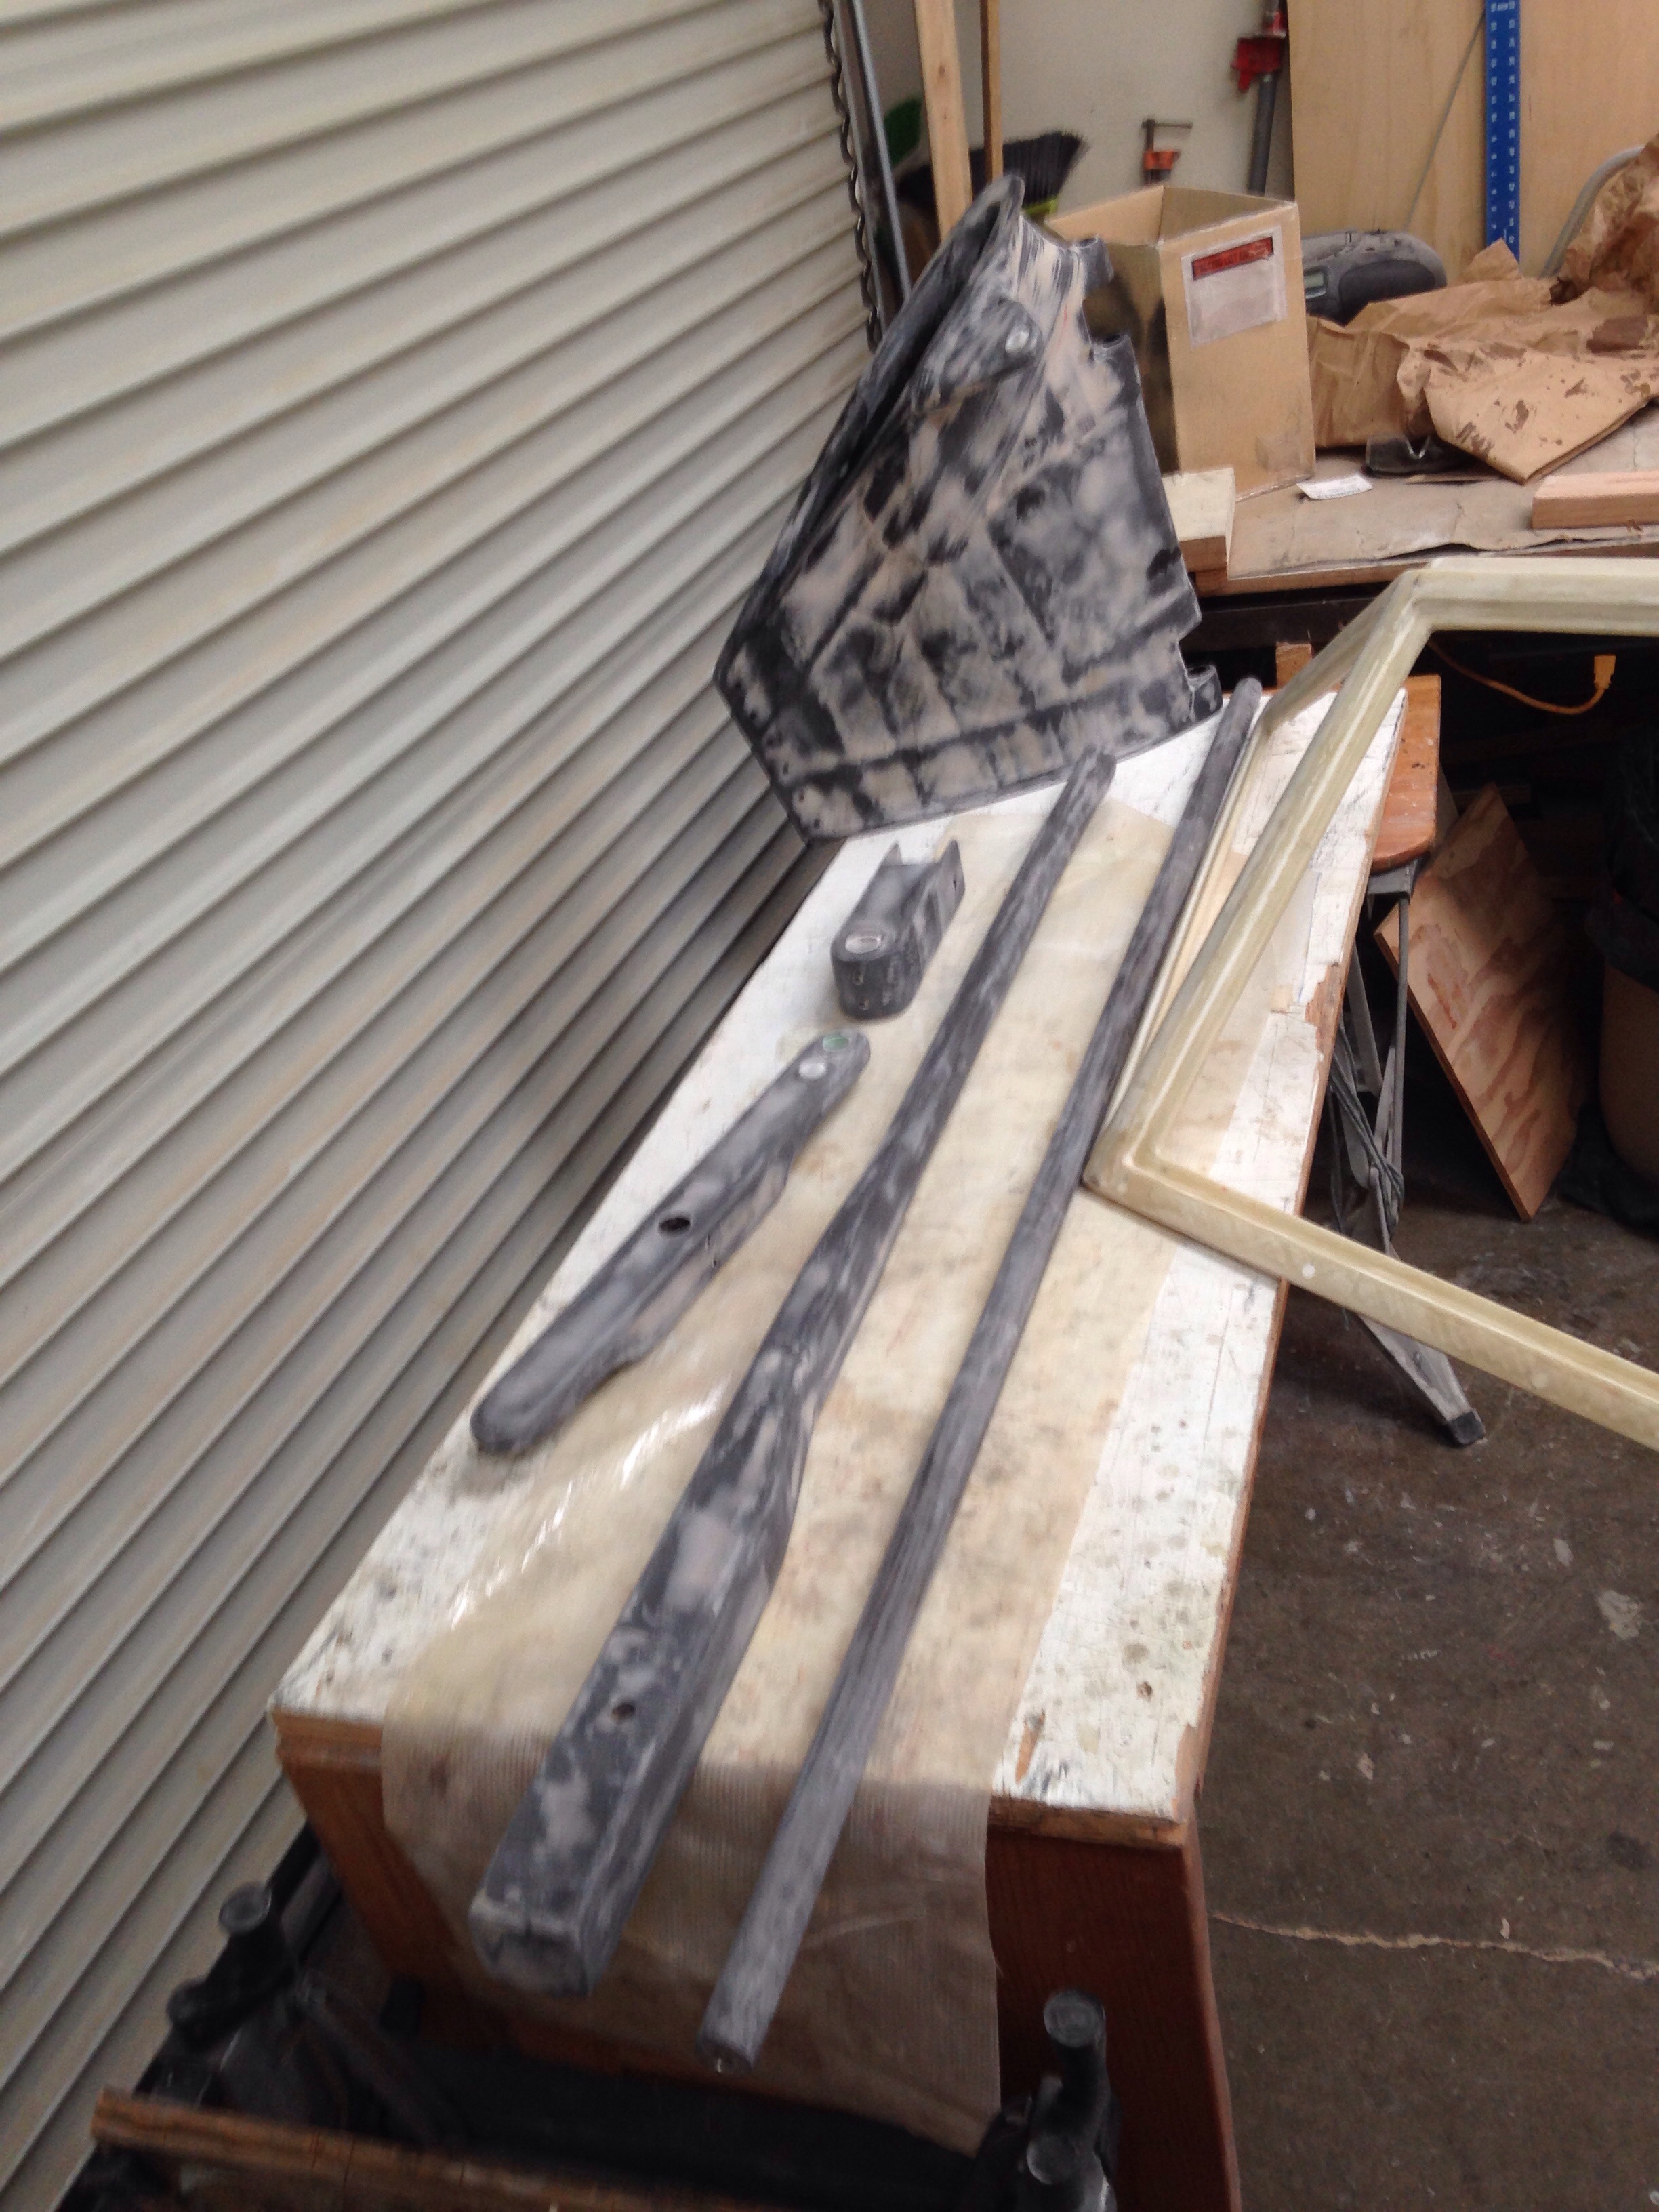
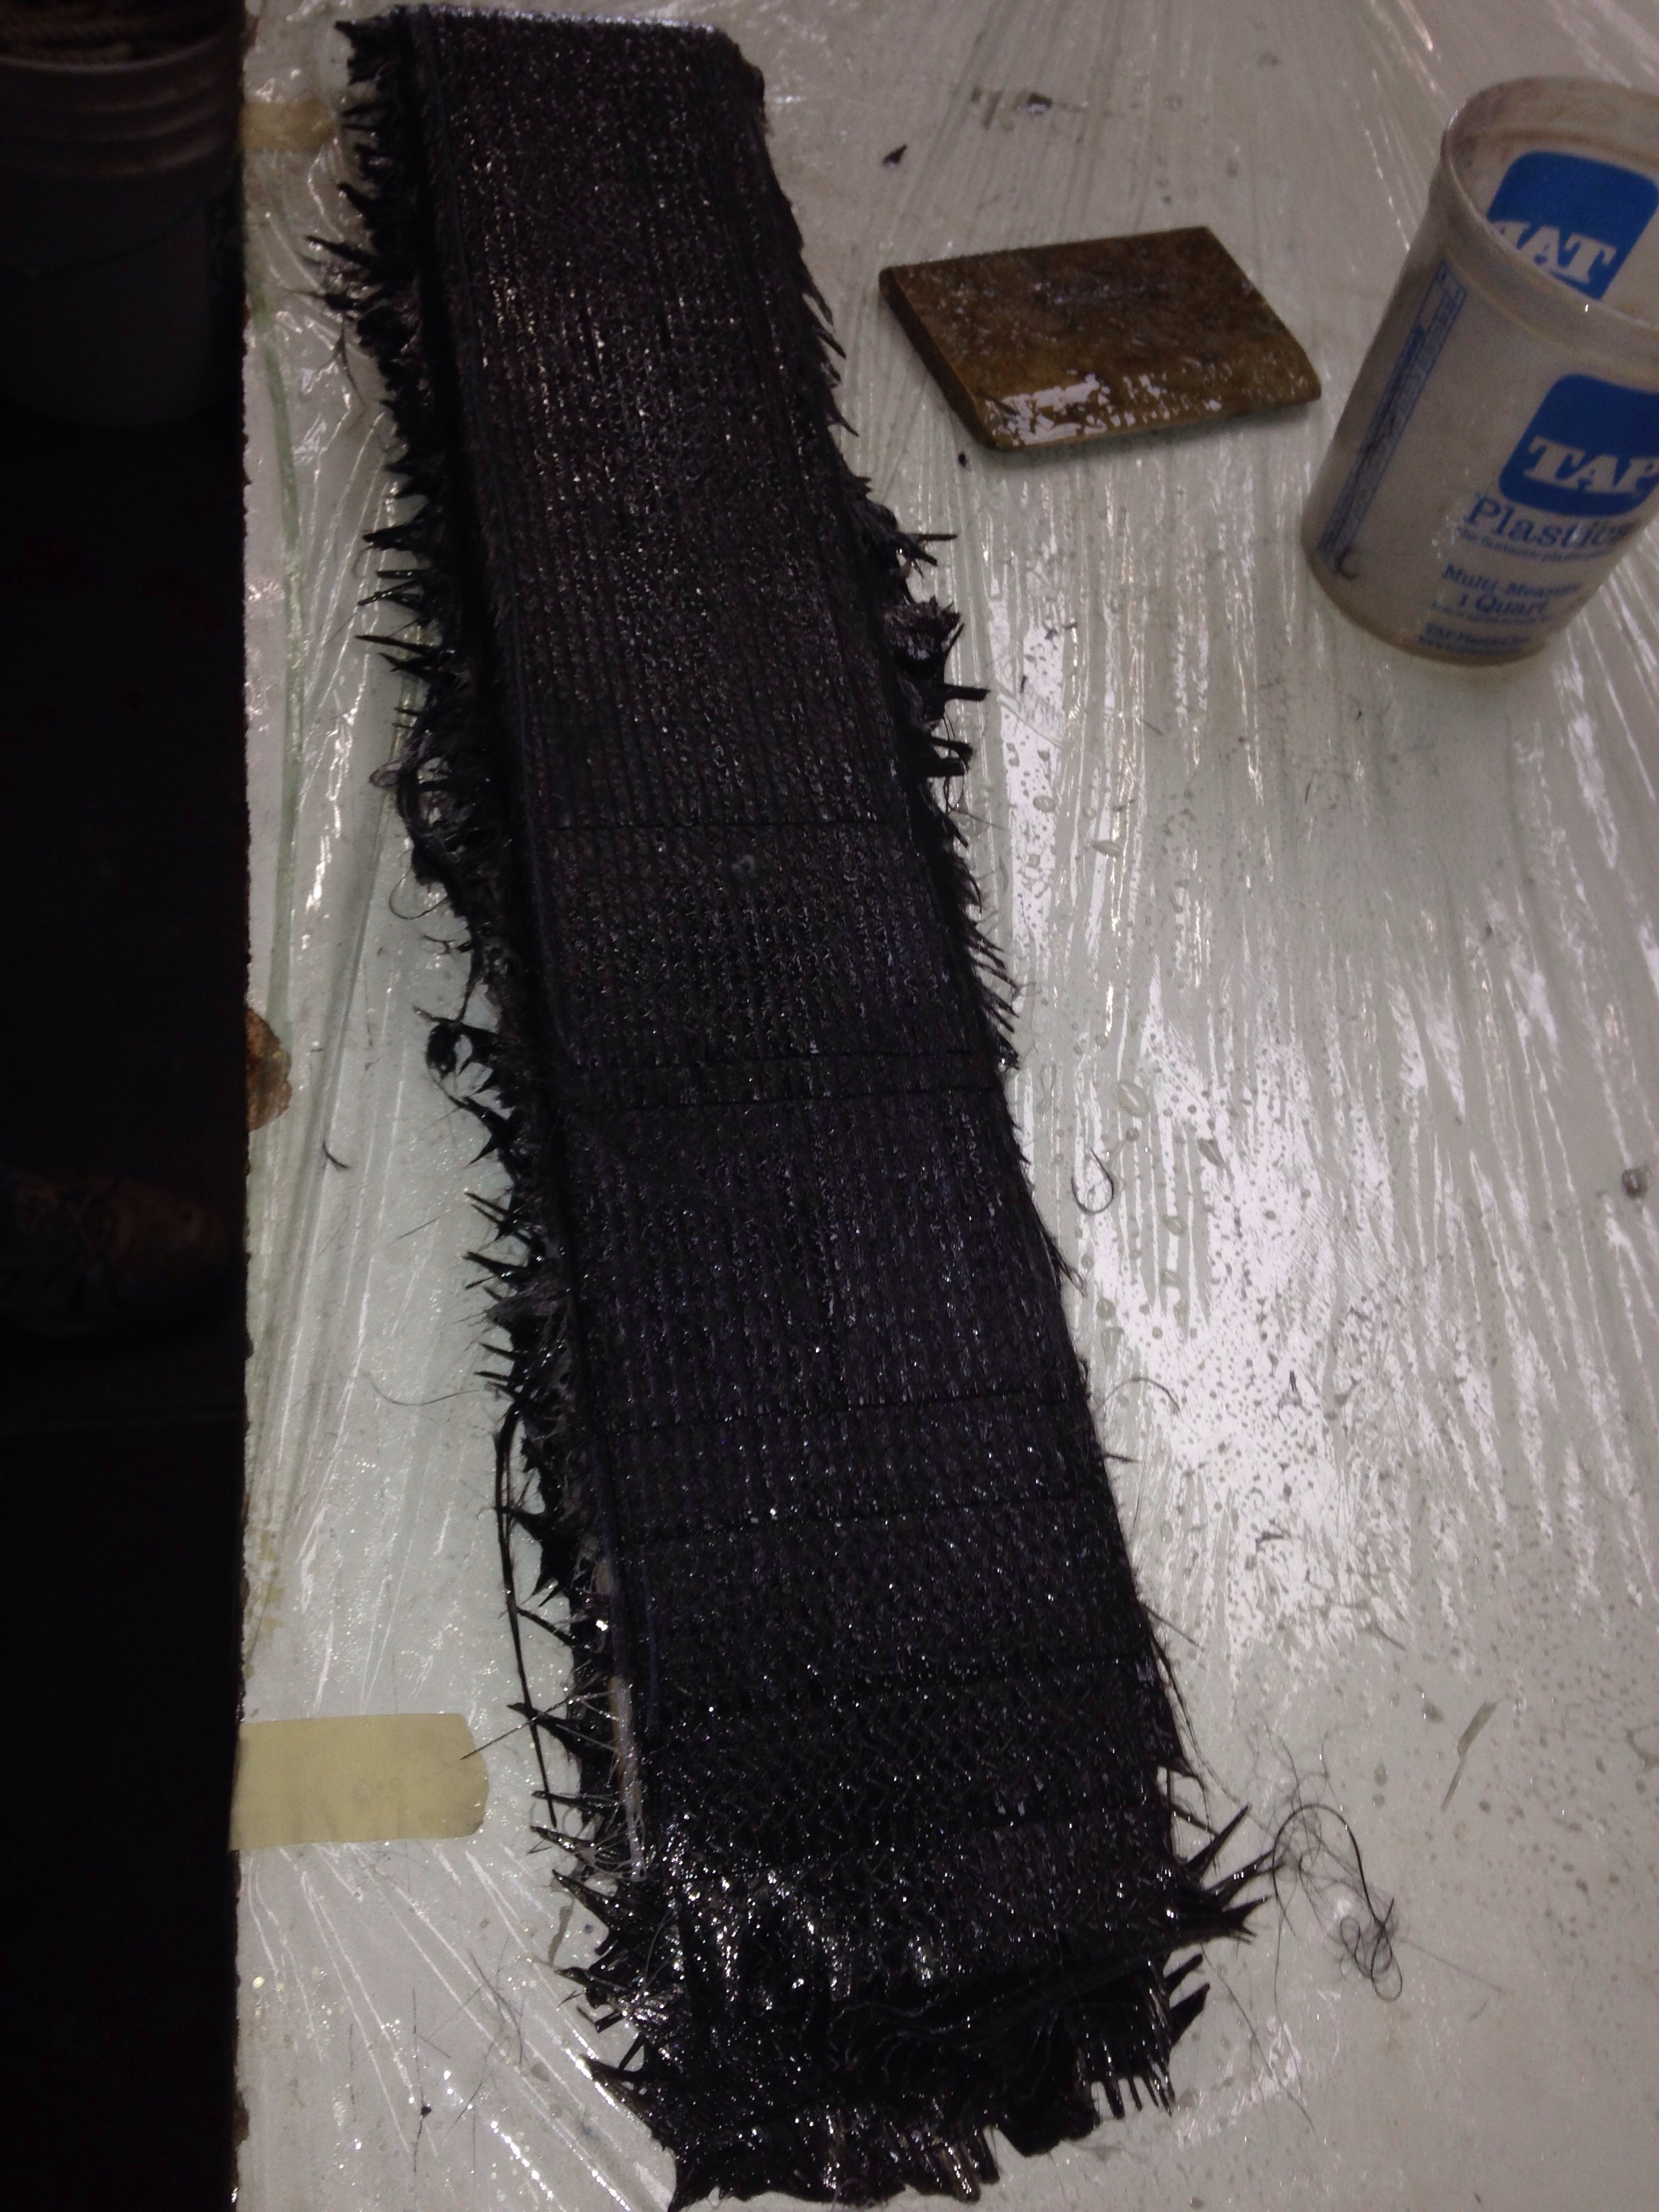
Only the light yellow section will be visible above the deck – the long tan part is what is glued and glassed inside the float hull. Here goes two layers of heavy 45-45 bias carbon with ten layers of 9oz uni carbon sandwiched between the double bias layers.

20150219-233827.jpg you can just make out the staggered uni layers in that photo.
Here’s what’s curing overnight:

20150219-233931.jpg
This weekend we’ll make the slices in the boat to accept these 24″ long carbon chainplates.

Concurrent with the fabrication work we have two pros tackling the stuff that would get the amateurs in trouble. Joe at Digital Marine in Sausalito came to the shop and devised the whole electrical system layout – now he’s translating the ideas in to schematics and parts lists. There are hundreds (it seems anyway) of choices to make in this realm. While he figures out the ‘what’, I’m doing the ‘where’, busy building hidden but accessible wiring chases around the boat. Every wire will be nicely labeled and available along its entire length.

And up in the sky, Keith Burrage of Skateaway Designs has thoroughly modernized the sailplan from our dozen year old plans. We’ll get a better main shape, an exciting full batten reefable jib and a lightweight furling reacher set on a shortened bow sprit. For my F27 brothers, I’ve decided this is not a screecher, ie we’re going to cut it fuller to make it a better 90-120 degree sail, and rely on a better jib and main setup to head upwind. I’m excited about the main and jib sail cloth – just about to commit to radial cut HydraNet, which is Dacron with Spectra weaved in. This means very light weight, easy stacking, excellent durability and rather racy performance with all that spectra/dyneema structural rigidity weaved in. Further helping the shape-holding is the computer aided design personalized to our rig and boat performance. Keith thinks the main will have over 100 panels so that’s a hell of a lot of sewing to do this spring.
We will also do true running back stays to the main hull, unlike the “baby caps” out on the floats of other FBoats. This should further stabilize our light mast and give more performance shaping options.

Things are moving in high gear now and the credit cards are being pounded. As Dad says about growing old, “this ain’t for sissys”!

Big like a bear paw

The first shipment of standing rigging parts came in from Colligo Marine. These are the lower anchors for the cap shrouds – 2 of the 3 big lines that hold the mast up.

20150130-080321.jpg
We needed to have these parts in hand to properly size the “chainplates” to build in to the outer float hulls, receiving these anchors. These things used to be big steel plates bolted through the hull with huge chains attached to them. Instead, we’ll make them in carbon fiber, light and strong.
Grapefruit in photo gives some scale; these parts are at least 3x the size of similar parts on the F27. Colligo’s work here is beautiful.

The head compartment cabinets are all faired in, ready for paint. Need to make a couple of doors, and the L shaped part in the right of the photo is a removable section for easy access to the toilet plumbing.

20150130-081010.jpg

Now we’re repeating the process of cardboard mockups for the dressing / clothing cabinets outside the head area, and the galley cabs. Jeanne came down to the boat and we mapped it all out yesterday.

Down on the workbench all of the new steering components got completed and faired out for paint. Just need to get a couple of bushings in then we can mount it all up and show you.

20150130-081301.jpg
And that’s the edge of the windshield in that photo, also FINALLY ready for paint. So much fussy detail sanding and fairing on that intricate big part, and it was frustrating me so badly that I set it aside for months until Charlie came along with a fresh attitude and tamed the tiger. Thanks man!

Boom shakalaka-boom

Ok, you got a better song with Boom in the lyrics?

Today it was time to pull out the old mast segment we’ve had squirreled away and start creating the main boom. This stick is 18′ of a salvaged carbon mast. The section may be overkill but if we leave it as is, it should be a hell of a strong boom. One option is to cut away the last three inches off the skinny side and form a new, much lighter lower edge the whole length. Or we take Mike Leneman’s simple suggestion of making Swiss cheese holes all along the boom. That would also save weight and make it easy to run reefing rigging internally. And we also need to think through making sail catchers that stick out about a foot on both sides of the boom.

20141030-225421.jpg

20141030-225442.jpg

20141030-225453.jpg
We started making a forward end bracket to bolt inside this boom, which will provide a strong pivot pin attachment to the gooseneck on the mast. One big bummer is that goose is already bedded and bolted to the mast at 54″ up (for the Shuttleworth it was commissioned to) but we need it a foot lower (that would get it to the level resting position seen in these sawhorse holding photos). Can’t really do that mast work until the boat is out of the workshop. Hmmm. The next update should have that boom end bracket to show you. And yes, the boom in this position shown is 6’3″ above the cockpit floor so fewer whacked heads expected. It’ll be about a foot above the hard top, leaving room for some solar panels up there.

The rudder came out of its final carbon layer vacuum bag this morning, looking good (and big next to a grown up!)

20141030-230112.jpg
The yellow strip is a Kevlar piece to help make the leading edge tougher against hitting small stuff in the water. I’ll do a bit more final fairing on this board over the next couple of days and then it will be time to make the scary cut into it to creat the trailing edge trim tab. Cover your eyes, Mertyl, this one’s not for the faint of heart.

The boat has suffered some October down time due to excessive viewership of the SF Giants run. The prudent move would have been to purchase 10 gallons of epoxy, but instead the $ went to tix for Bumgarner’s shutout on Sunday.
Great time with Griffin!

20141030-230722.jpg
But World Series parades also mean it’s time for the weather to turn. Cold epoxy does not flow well, and I finally thought it through – make a winter warming hut! This simple box (old Sheetrock and leftover styrofoam) is now keeping the fluids at just right viscosity, with an air temp in the upper 70s. Venting the box more or less lets us modify the temperature and therefore adjust the go-off timing of the epoxy hardener. REALLY wish I had spent the two hours on this box two winters ago :(

20141030-231211.jpg
It’s warmed by a simple incandescent 60 watt bulb under an aluminum plate holding up the bottles.

Good things are happening building out the aft cabin furniture. Photos to come once the bunks are bonded in. Yes, doing some work on the inside even though I said no cabin work until all exterior parts are complete. Thankfully it means we’re getting to the end of the outside stuff and can see the light towards the winter interior build. We’ll skip the Giants parade and work on the rudder!

45 feet of ugly

20140926-202305.jpg
Rumor has it a nasty old single-wide mobile home has come back to life as a multihull boat support vehicle. So while you wouldn’t trust this thing for any human activity, Stephen’s old trailer did a great job hauling our mast the last 200 miles west from Toronto. The mast had piggybacked on a Formula 30 cat (which looks great and is for sale in Reno) and made it to the Marcoe’s side yard. It was a HUGE relief to finally get this thing tucked away in the workshop. Jeanne and Griffin were heroic in figuring out wedging the 50′ into the 48′ shop.

20140926-202911.jpg

20140926-202926.jpg

20140926-202942.jpg
Although I had seen the mast last fall in Canada, today is a fresh reminder of how nice it looks and the quality of workmanship used. Because it was designed for a different boat, and was built 6-7 years ago but never used, the delivery trip took a detour to naval architect Jim Antrim’s office on Tuesday for a professional opinion on the suitability for our boat. Eagerly awaiting his report.
Wednesday morning was consumed with cleaning the mast from years in storage and the transcontinental drive. The last photo today is for Jimbo – as if you were standing there directing me, after the bath the whole thing got wrapped in movers’ stretch plastic so it’ll be all fresh for the launching day!

This afternoon was a special treat while glass work on the hard top and stern tower cured. It’s time to install SAILING STUFF!

20140926-203735.jpg
Everything is based off the hull centerline and the center pin of the mast. Basically a big geometry exercise to plot out the halyards exiting the mast base and running back through the windshield holes. The jib car track placement comes from the plans.
All bolts are getting oversized drilling; next up is backfilling those holes with solid epoxy putty, then re drilling holes using the bolt diameters. This process prevents the soft cedar core from compressing when the bolts are tightened. See the too-big holes all around the ceiling hatch.

20140926-204214.jpg
We’ll figure out how to do this same process but with recesses on the bottom of the boat where the plumbing through-hulls can be made flush for streamlining. Saw that done on a custom boat and it is great.

Ok, small detour tomorrow, having to make the 450 mile round tripper to take the big blue meanie trailer back to Reno. Really hoping it doesn’t rain or spit snow on those bald tires!

20140926-204748.jpg

Foreign treasure!

Not all of the boat build takes place in the shop. This Sunday’s project involved an overnight flight to Chicago and early morning to Toronto, plus 40 miles of rental car in the snow to track down the 50′ carbon fiber mast acquired (but not delivered) 15 months ago.

20131211-202313.jpg

Down a long driveway outside of Caledon, Ontario is a boat wright’s workshop that is temporarily storing our mast. This was the first time seeing it, and it’s way better than the pictures! U-Spar’s craftsmanship looks fantastic.

20131211-202959.jpg

It’s a full pre-preg carbon build, with proper resin slow-heat-rise baking and well executed reinforcements. I like that they did not do material tapering on the ends to try and shave weight. It’s a uniform layup, stronger than the F39 minimum design specs, and totals about 160lbs including the double diamond stays.

Perhaps the best part for me is how complete it is, down to the windex and antenna fittings, rotation control arm, spreaders, Tides Marine track, etc.

20131211-203916.jpg

The mast crane is a separate carbon composite built to slide in to the mast. It’s set up for two main halyards, including one doubler, and two mast-head spinnakers. Mike L will happily note one of those is perfect for the big SoCal reacher, and I’ve added a set of upper cap shrouds to compensate for that extra load. We have one regular jib halyard, and a storm jib halyard exit is being added at the main’s third reef. I decided to skip a cutter stay and will sew a wire luff in to the storm sail – it’ll be it’s own stay between the deck and the halyard.

Here are a few more shots of details. We didn’t want to unwrap the plastic any further.

20131211-204825.jpg

20131211-204852.jpg

20131211-204908.jpg

The spreaders are fixed onto the mast. It makes transport more difficult but once stepped, that’s another simplicity element (no connectors to catch, erode, etc) I think we’ll appreciate.

20131211-205356.jpg

Because it’s a rotating mast, the bottom is open and the halyards will simply exit and be routed to the turning blocks in the stainless steel base. I took the base, the rotator control arm, and the shroud-to-mast shackles home as luggage. The TSA wasn’t too happy with me.

20131211-210221.jpg

The eyeglasses are there for scale of just how big the primary shackle is, taking the combined pull from forestay and windward cap shroud under load.

We’ll see more photos when the mast comes west. For now, send good thoughts for the fine furniture trucker who is supposed to carry our mast inside his 52′ trailer atop a load headed this direction. We’re not out of the woods yet…