Changing the sight lines

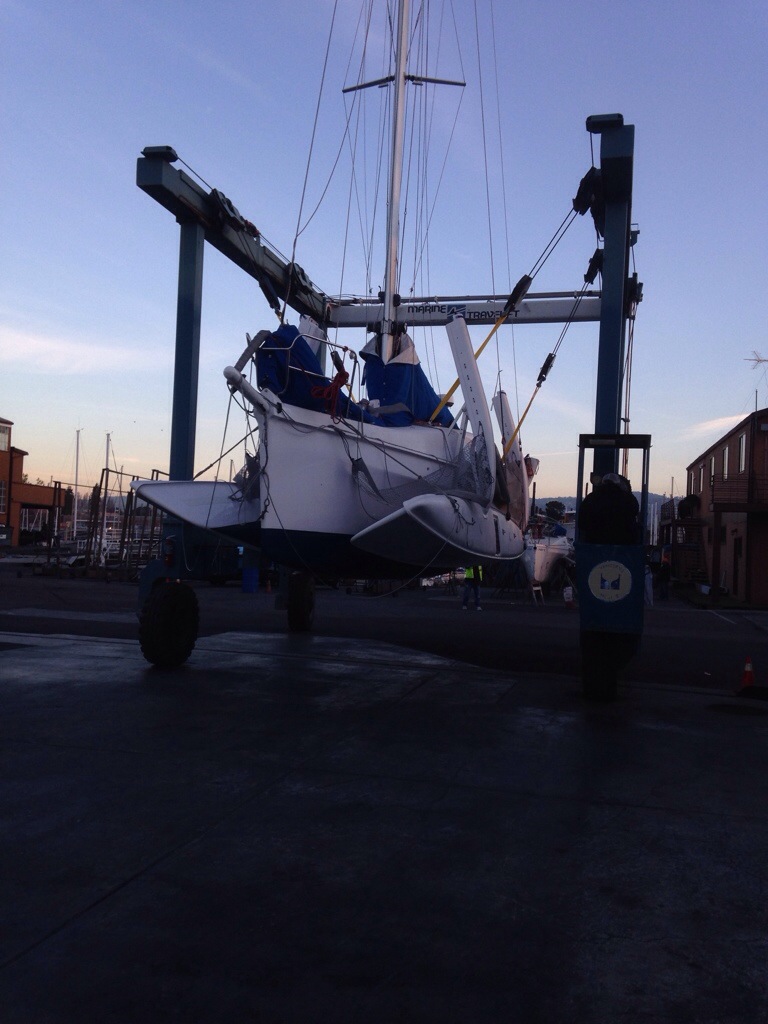
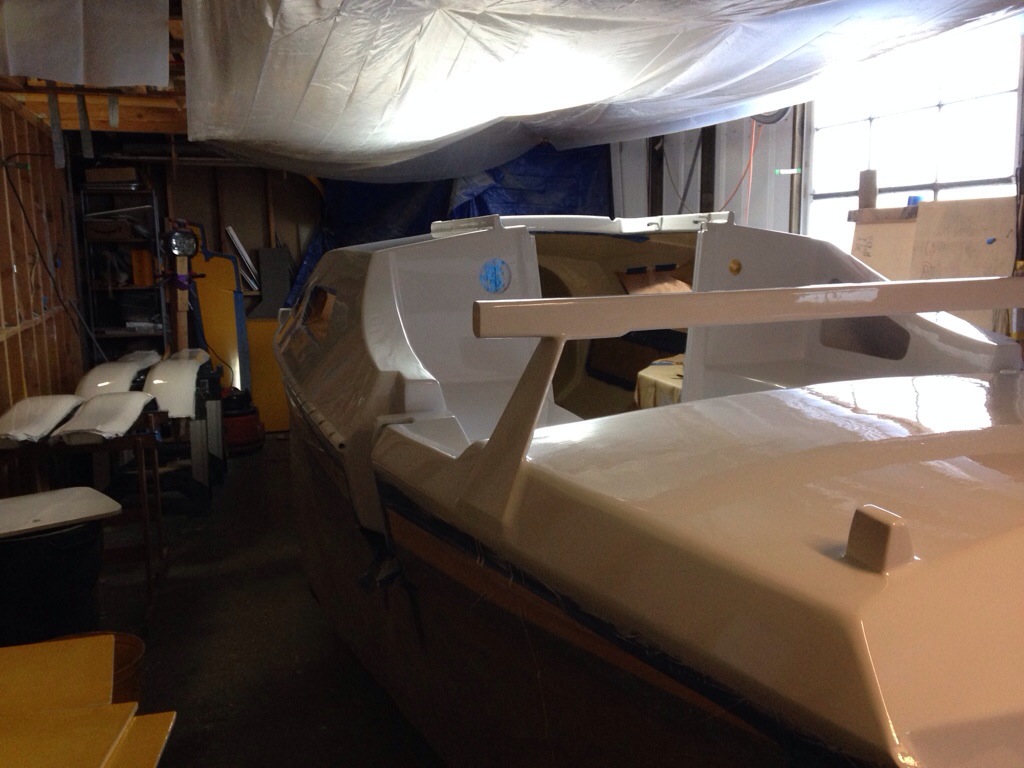
The windshield base is now complete, and it’s a little scary to be changing the look of the boat this much. We REALLY want a nice protective wind and wave screen, and it seems to make a lot of sense to have this with a removable top. Kind of like a little roadster car, where the winter hard top can be left home in the garage during the sunny weather.

IMG_0699

IMG_0700

But how do you design the side windows for a windshield that stays put and hard top that can be removed? I’d rather not have soft plastic side curtains, so maybe part of the windows will attach to the top?  As Drew quickly figured out, the Hallberg-Rassy boats got me thinking; one with windshield style…

HR43MkIIIpano2

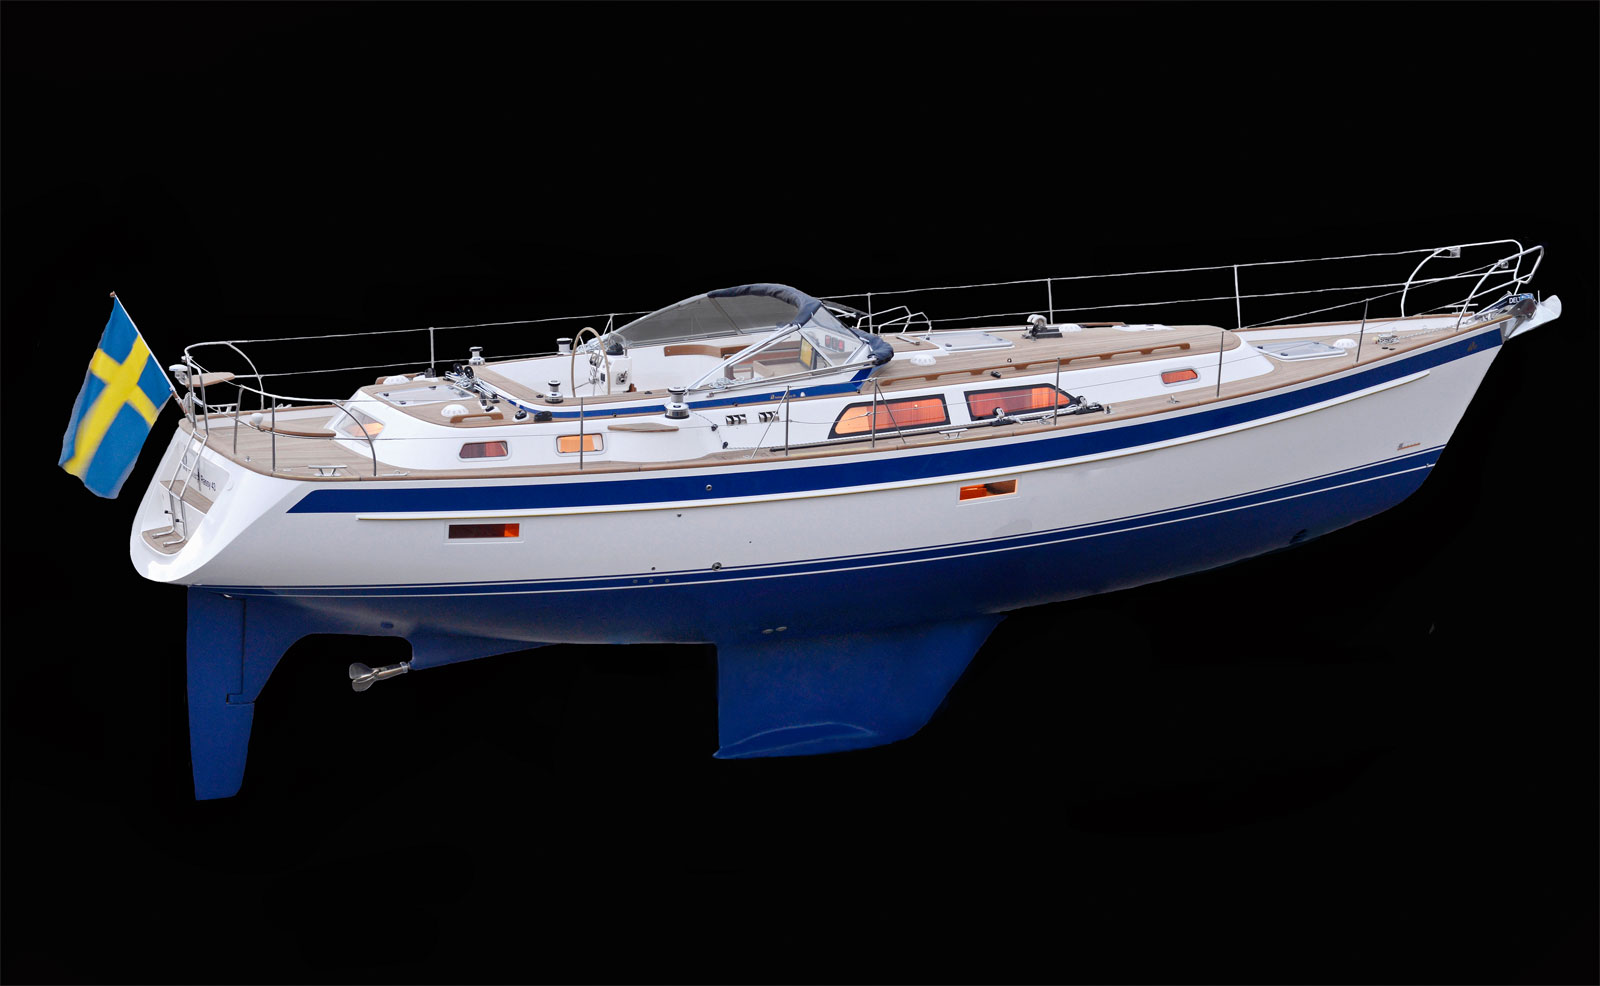
and theirs with the permanent hardtop…

HR48MkIIsailing887RickTomlinson

If anyone has ideas on how to combine these two, let’s hear them!  (maybe split the side windows in to stacked triangles, the lower being part of the windshield, and the upper a part of the hardtop. And a hand-hold running along the joining seam?)

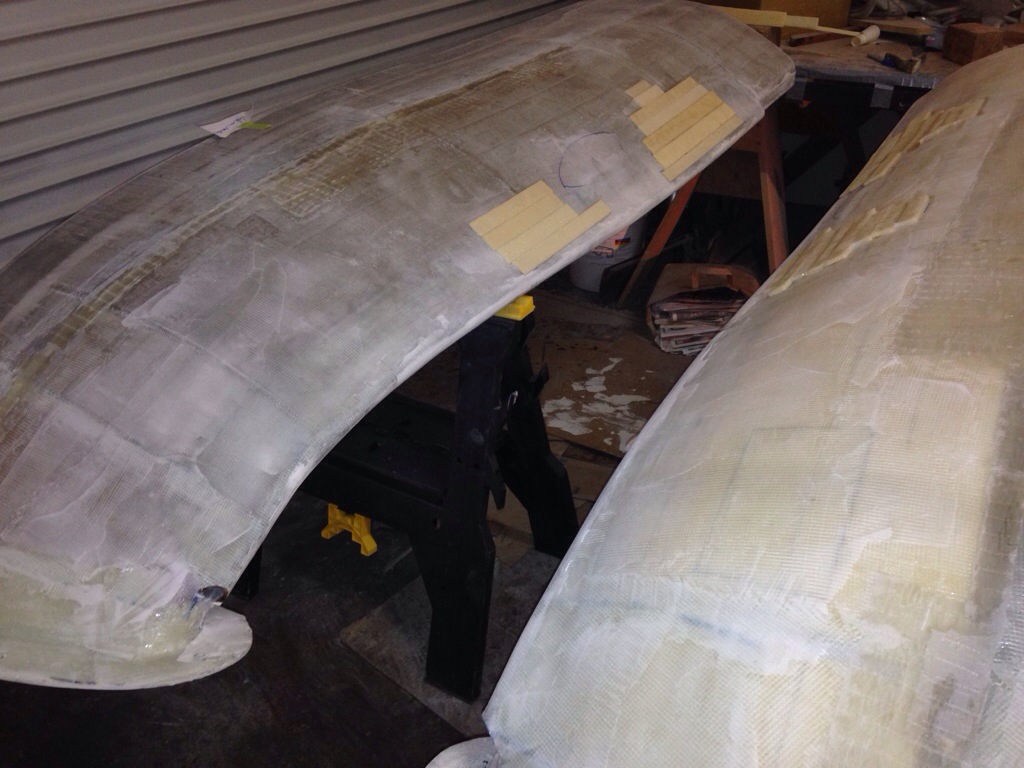
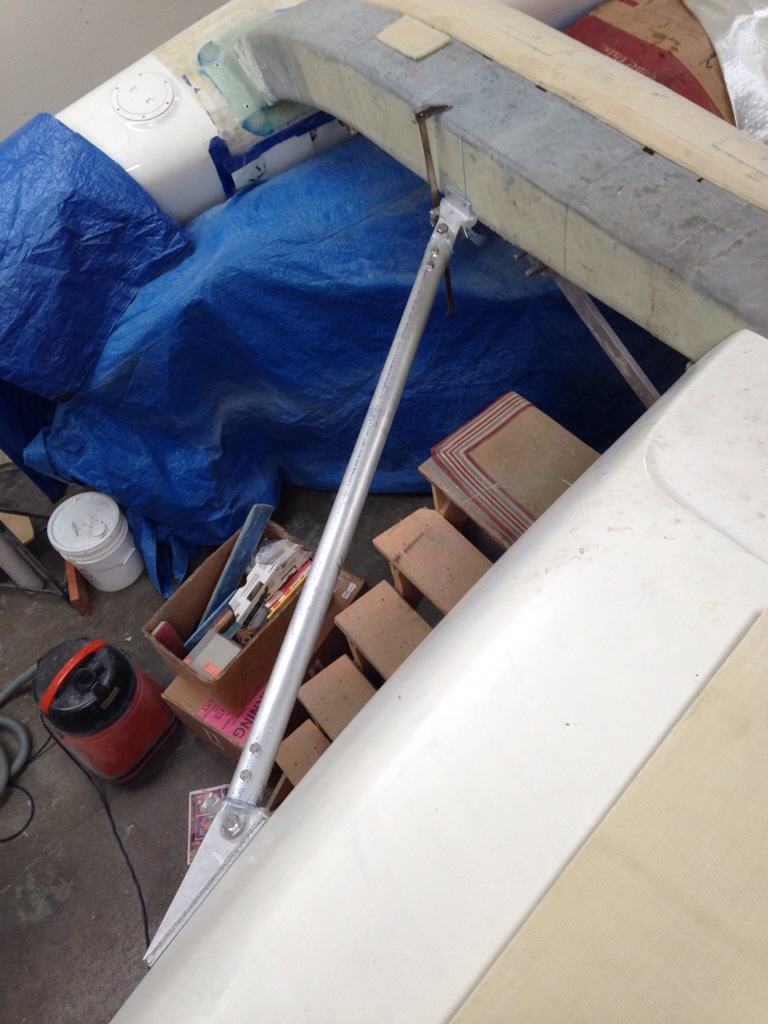
Back in fairing land, the first two beams are getting close. This thing actually looks like the right overall shape now. A skim-coat went on last night, so tomorrow’s sanding should be all about ‘finding final level’.

IMG_0697

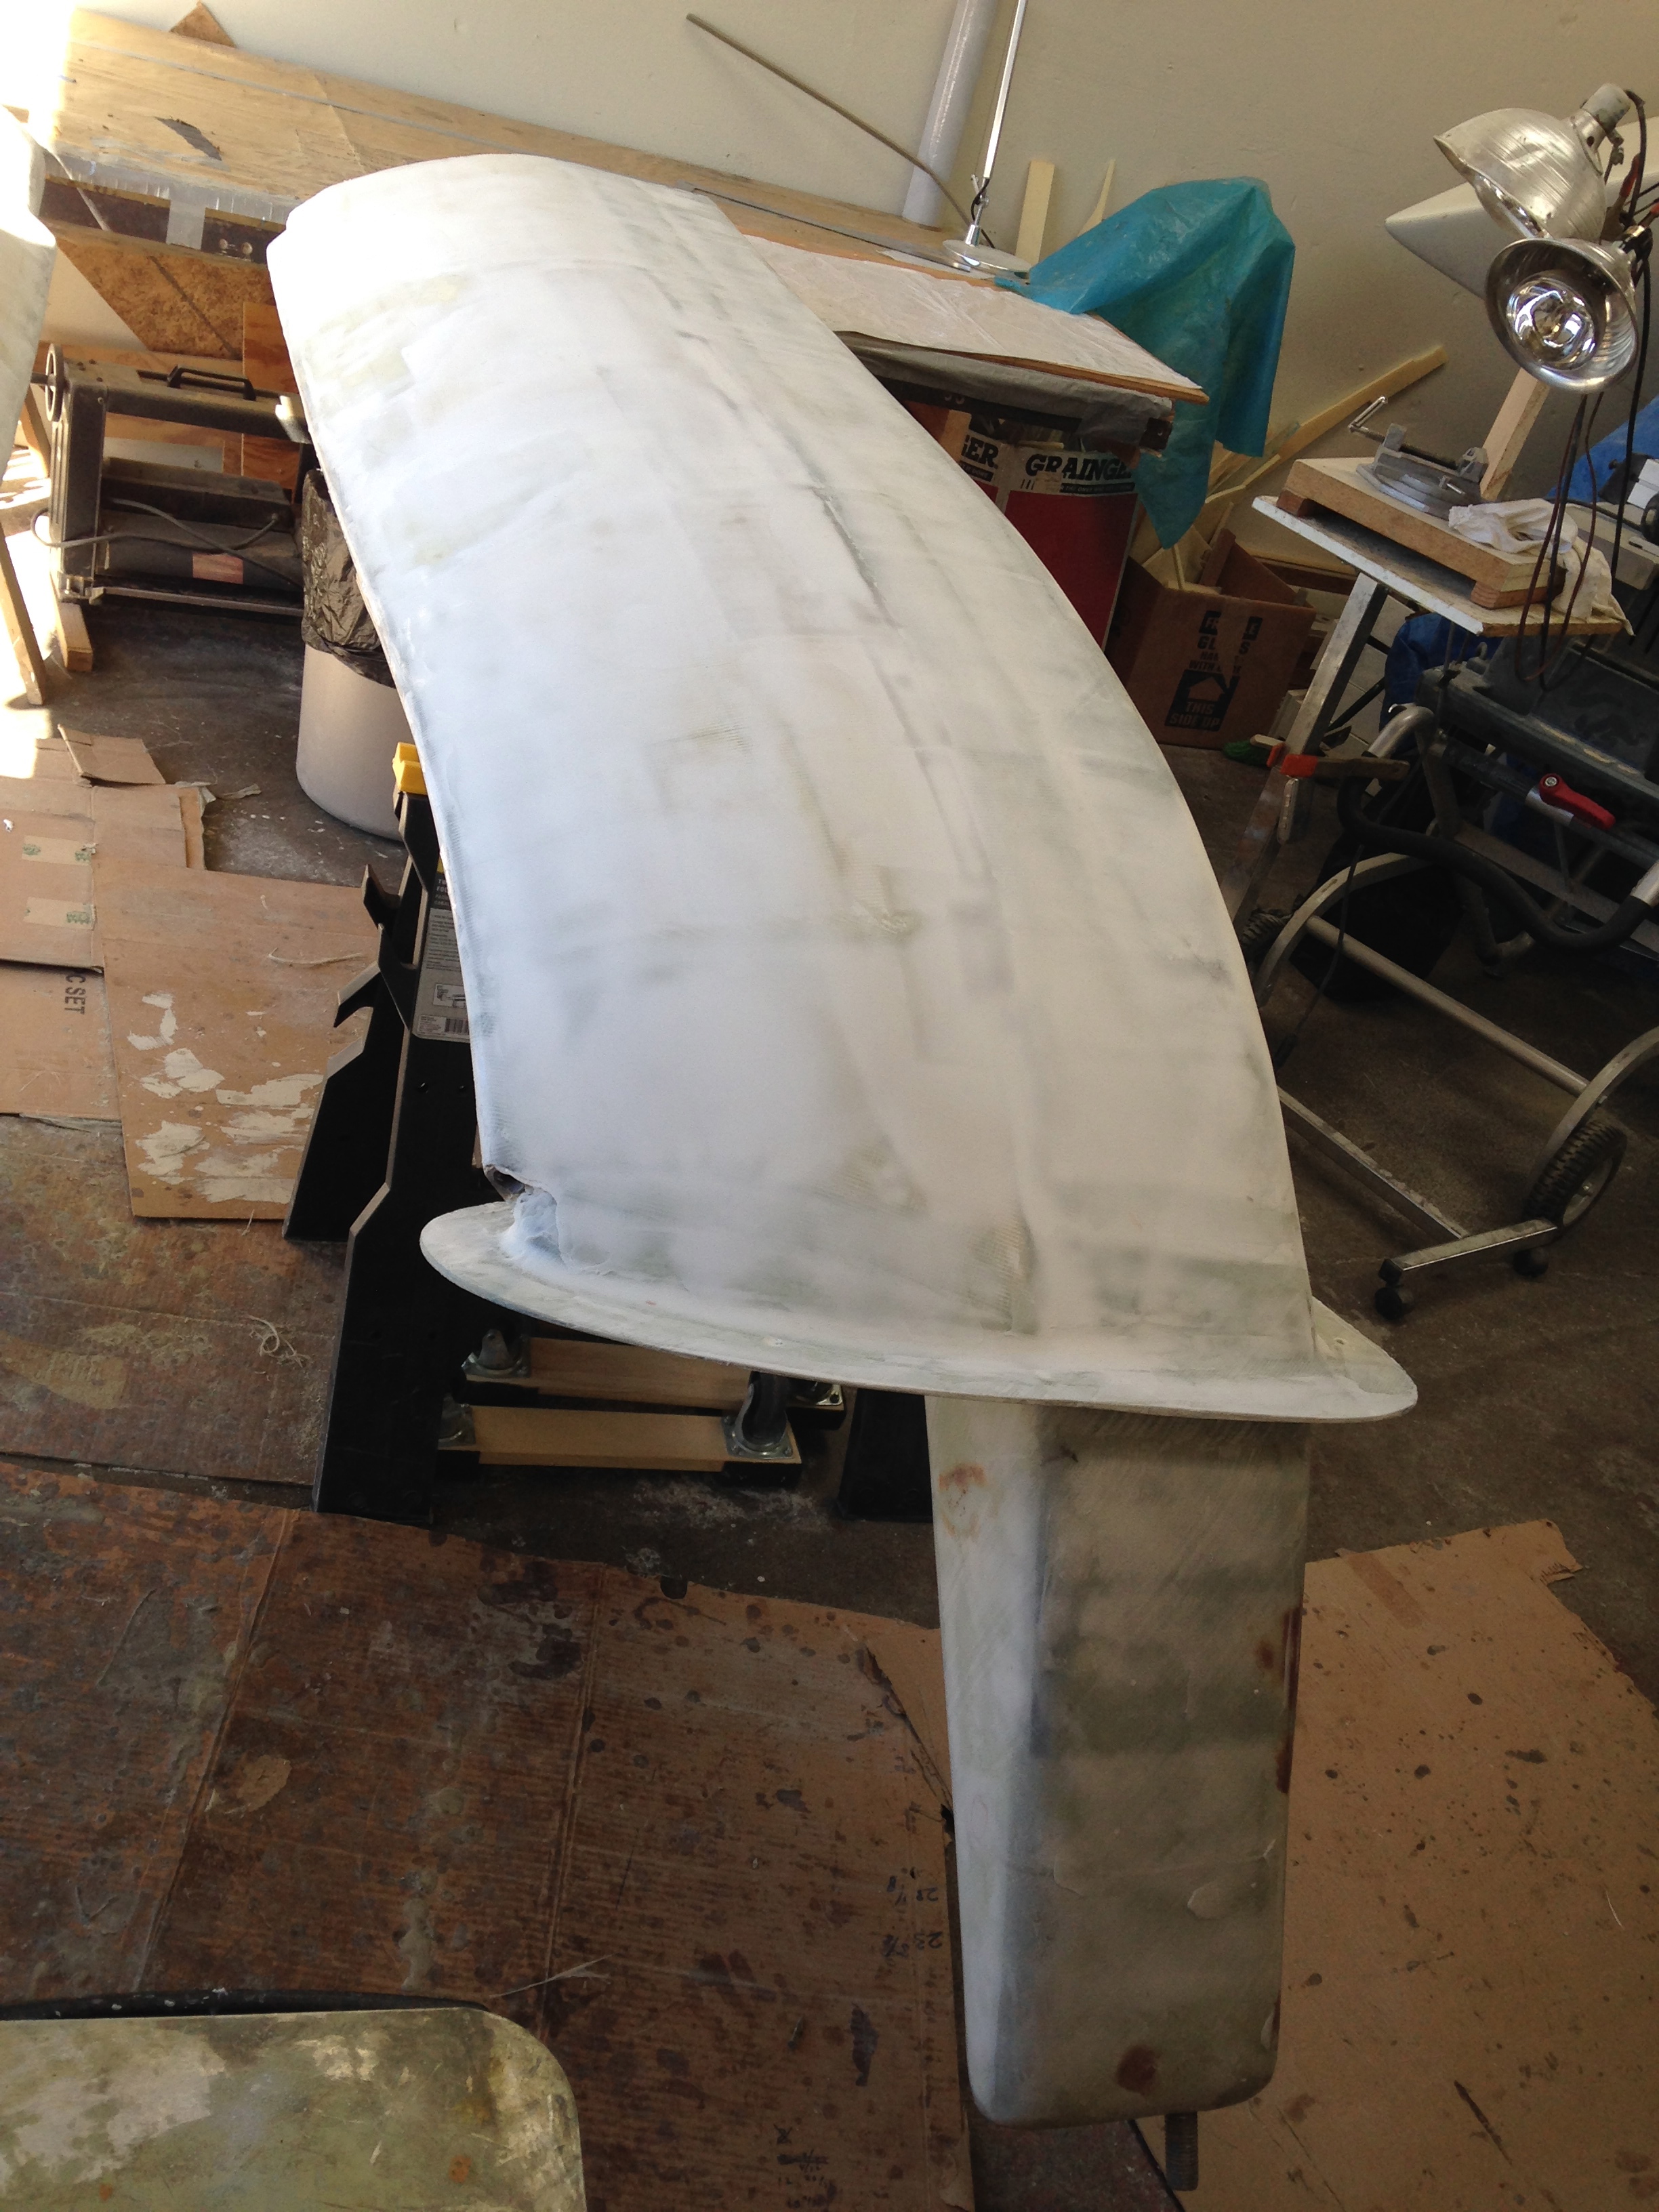
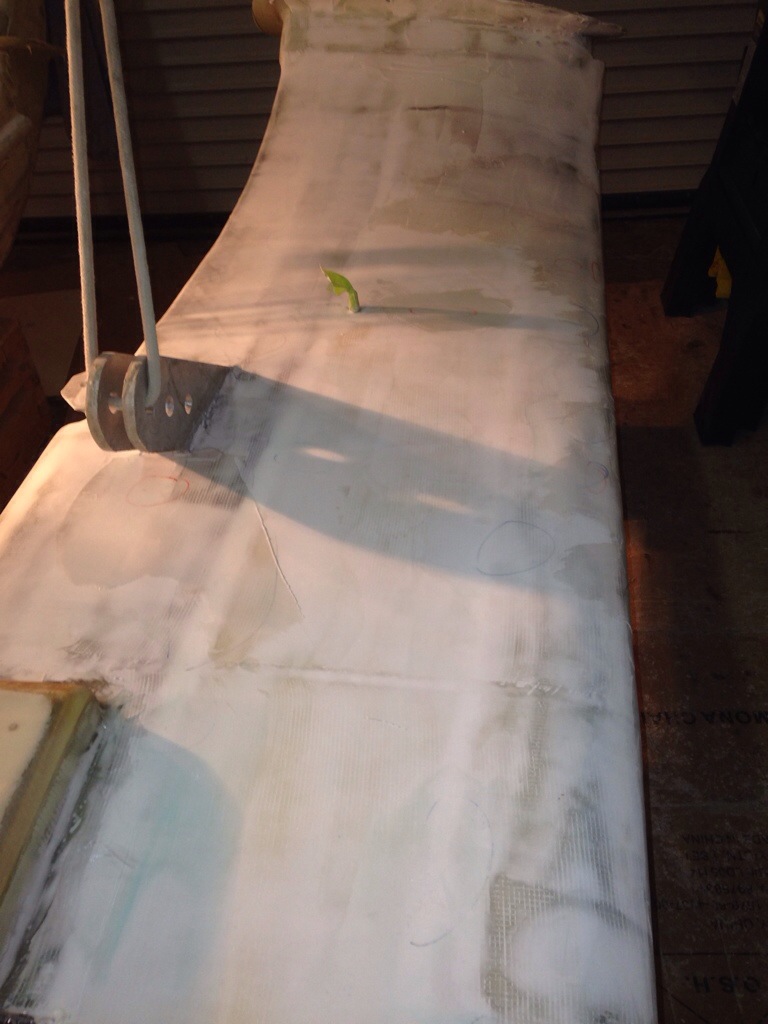
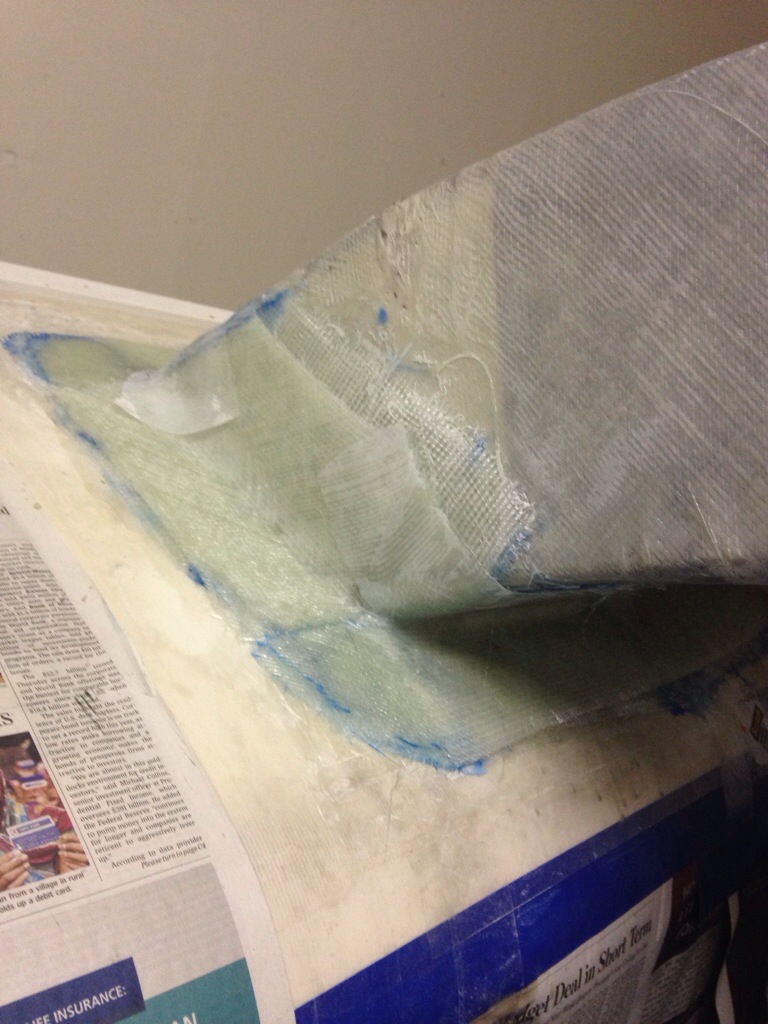
With the other two beams down at floor level, I figured it was a good time to add the final two glass layers that tie the fairings to the inner end piece. After having just read Henny’s account of a very frustrating vacuum bag leak chasing on his major hull infusion job, I was feeling happy and smug about our ‘bagging’ success so far. Pride can be a nasty thing, as I was treated to a horrid Saturday evening of leak chasing! This little bag isn’t pretty, but the ridiculous part is all the blue tape… that’s operator error thinking he was hearing leaks along the yellow sticky tape line, and then the vacuum plug joint.

IMG_0701

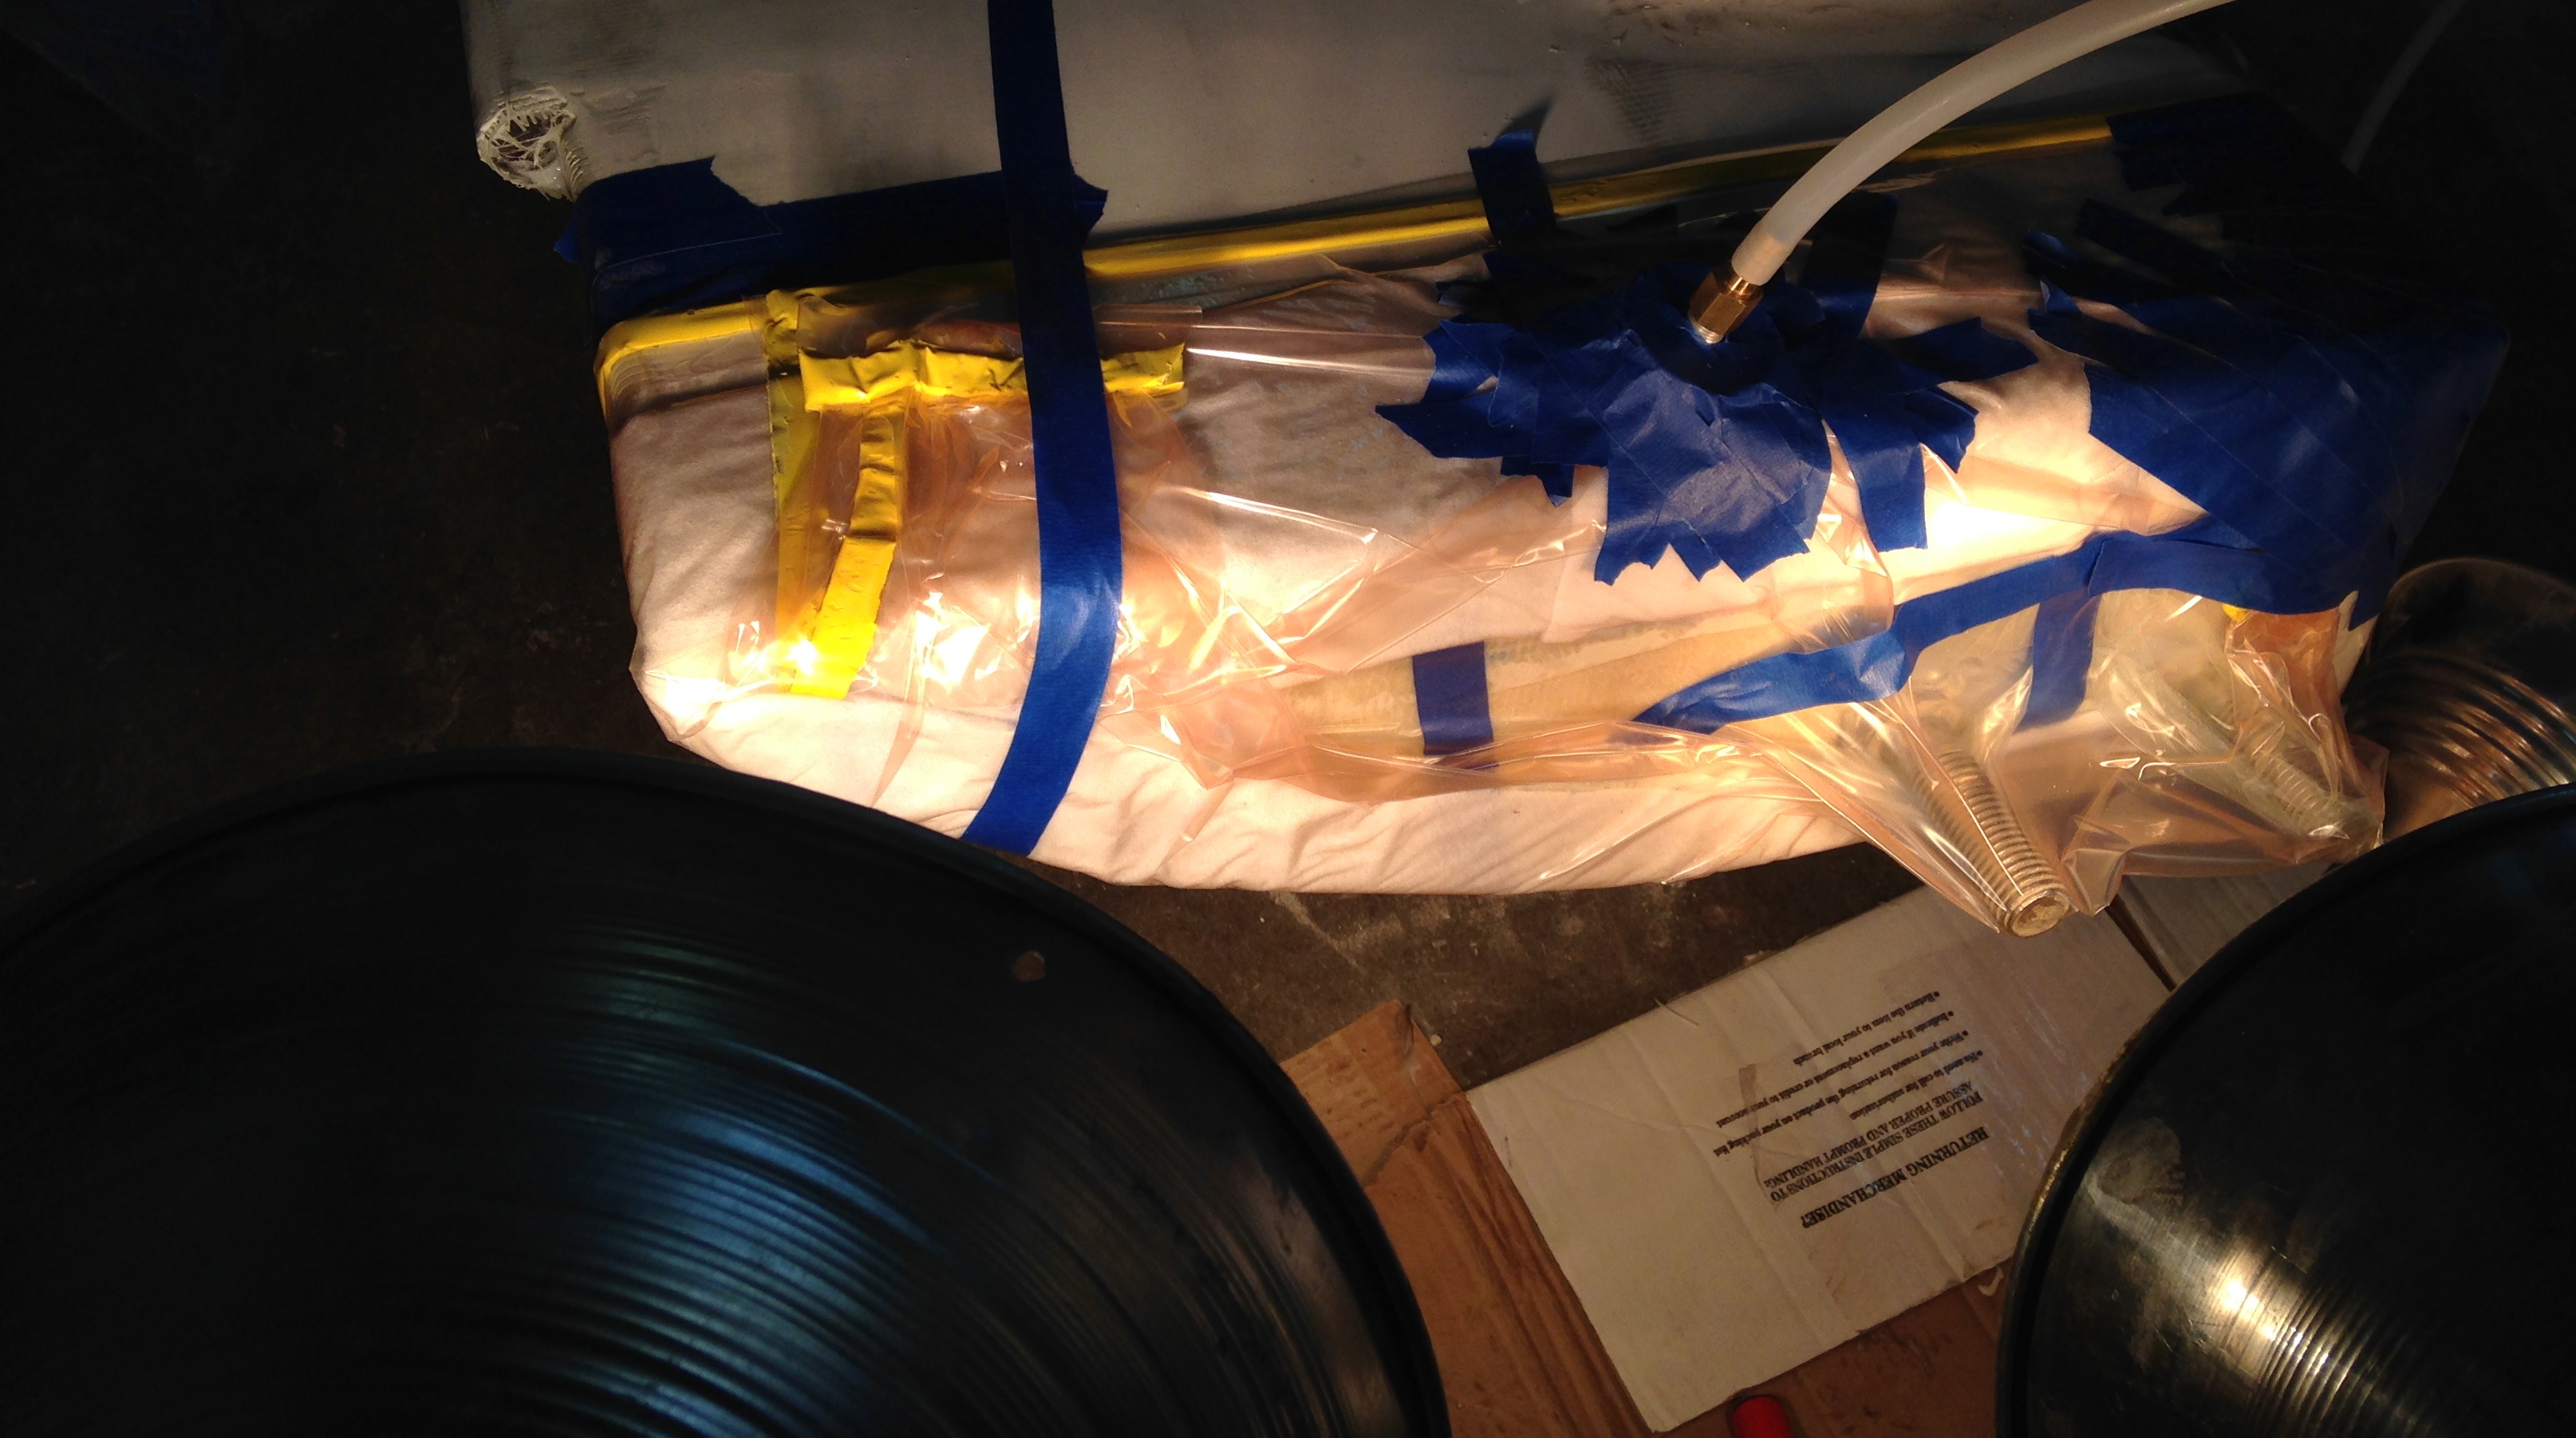
There were actually two of these bags, set up with a t-fitting over to the pump. The pictured one would not get past -8 mercury inches, and the other one only -4 (-20 to -25 is my preference). After about an hour and a half of cursing and messing with tape, I came to the realization that air was probably being sucked thru the unfaired portion of the glass weave where the wave deflecting fairing joins the main square beam – if I had waited to do this operation until all the weave had been filled in, this would have likely been a 10 minute, ‘just fine’ operation. Argh. And of course after rolling around on the floor all that time, it was time to check the vacuum pump. Big problem there as many ounces of pump oil had blown out the exhaust hole. This new $400 pump has blown some oil on each of its first five runs, but it gets worse each time. Really hoping Fiberglass Supply will come thru with warranty support tomorrow. Time to take a Sunday break and go watch the Super Bowl commercials (and lick wounds over no 49ers).

Don’t want the fire-hosing!

When you see the videos from the Volvo Ocean Race boats bashing through big waves at 25kts, the alarming thing to me is the blasting of water that often hits the exposed driver, not to mention anyone else who happens to be on deck. Not that we expect to be that extreme, but this should be a relatively fast boat and there will be days of choppy water and cold temps. Simply put, we need a good windshield.

This project is a custom job (not in the designer’s plans). I’m making it in removable sections so we keep the trucking height down, and have options for a more open air cockpit here in SF bay. Here’s the first step, laying out three big forward windows via base framing.

20140127-215456.jpg

20140127-215512.jpg

Tomorrow we’ll fill in the big gap from these new frames down to the sloping-away coaming, and start on the forward edge of the frame. Building it right on the boat seemed faster then mocking it all up on the workbench with repeated up and downs.

Meanwhile, the beam bottom sides were finished and Sunday afternoon Griffin helped me get two of them up in position for fairing the tops. Unfortunately it looks like the wave-deflector framing mold had about a quarter inch miss in two of the nine forms. That showed up today as shallow depressions on the front slopes of the finished beams. So we’ll have a few ounces of wasted weight added with some extra foam and another light glass layer over the fill-in areas. And of course chalk up another couple of hours in the re-do column. (Keep the saw exactly on line next time).

20140127-222020.jpg

Fair thee well

Lots of boat builders complain about the “fairing” work. This is the part where all the imperfections of roughing-in construction have to be smoothed out to get a perfect finish. In a factory setting, great care is taken to “fair” the finish inside a mold where new parts like a boat deck will be made repeatedly. In a one-off custom build, I have to do the same work, but it’s done on each part as we go. The 4 big beams looked pretty ugly before fairing began – the courseness of overlapping heavy 17oz fiberglass fabric, and some struggles with smoothly seaming the compound curves of the front splash diverters, etc all add up to lots of fairing work. Everyone advises to put time in to smoothing out the core surfaces before laying final glass layers; there were a few places I didn’t do that enough, and I’m paying for it now with extra fairing work.

20140122-230812.jpg

Figured it made sense to start on the BOTTOMS where no one but the fish and curious kayaker will see – a good place to learn this skill. Of course the shop is now a big mess with little room to move. Time wise it’s good to have them all going because there are long intervals where the fairing compound has to harden before the next sanding.

Here’s one at the beginning; white compound is spread on with a notched trowel, then sanded back with a longboard to find level/even planes. The dark red sander is our first air compressor driven tool – an 18″ long sander for auto body shops; works well for this too.

20140122-231219.jpg

And here’s one farther along, pretty close to final sanding…

20140122-231341.jpg

The bottom sides should be all done by Friday night, and this weekend we’ll reconfigure the shop to work the top sides hopefully all at once and get this dreaded task completed. During drying/curing times I’ve been climbing up on the main boat, designing the windshield and hard dodger setup. It all has to be remove able for transport, so this is pretty fun freehand fabrication. Photos to come once we get past the cardboard practice stage :)

And a quick congrats to Rick Waltonsmith on recent upgrades to Corsair 37 Transit of Venus as he gets her ready for the Pacific Cup race to Hawaii this summer. Yesterday we watched as Swensunds yard put her back in the water after a nice bottom job. Just to be clear, our boat won’t fold up like that – we’d have to take the beams completely off to make things trailer ready. Anyway, it was a great afternoon sailing TOV on the Estuary, testing out her big Code Zero and carbon main. She’s all rigged up to GO FAST!

20140122-232217.jpg

20140122-232249.jpg

(Ted, Rick and Jim, note the yellow lifting straps – exactly the same thing as we did on Origami in Sausalito, only with much bigger shackles!)

Goodbye Golden Gate (transit, that is)

20140113-081412.jpg

That my friends is the 72 pulling up the last time for the 65 mile ride SF to Santa Rosa. All those commuting hours sure cut in to the boat work time :). But now it’s Monday morning, day 1 of full time building – very exciting indeed!

Met up with Cal in the Strawberry Village parking lot to exchange a wad of 100’s for the military surplus diesel furnace kit. This was supposed to be installed in a large Abrams troop transport vehicle, but supply was greater than demand. “Craigslist Cal” speculated on a pallet of 4 kits, and had enough proof that I’m convinced it is not nefariously obtained.

20140113-082234.jpg

This is hydronic heating, meaning that the small diesel fed furnace will tap in to the main engine fuel tank to heat the same radiator fluid system as the engine. Pipes will run this hot fluid through a water heater tank (for sink and shower) and through hot air radiators with fans on them. That hot air will be ducted through large tubes just like a household furnace.

20140113-082713.jpg

This is the Espar D10 model, intended for buses and boats up to about 49′. Since this unit was kitted out for a truck, I have to order some different exhaust parts and other marine tidbits. But overall well worth the effort as I saw these at the boat show with installed prices of about $5k. We’ll get this all done at about a third that much. And having a heater a little too big sounds just fine for the Gulf of the Farralones or a few weeks on the Irish coast, right?

Time for the shop now, back to beam fairing. And if I get mad at the boss today, I’ll have to look in the mirror – it’s a whole new ball game.

That’s a wrap!

Literally and figuratively.
The beam fairings are getting their final fiberglass skins to tie in to the beam boxes. This is the last big step of the overall beam builds work – straightforward and repetitive including lots of ‘filling and fairing’ rounds to smooth out the surfaces for painting. The beams are each well over 100lbs now, so turning them and moving around the shop is a pain (especially when one got away and rolled over on my foot – that bruising ended an evenings work!)

20140108-055603.jpg

But the big “wrap” is saying goodbye this Friday to my dear colleagues at Ryan/Epsilon. I’ve hit the 30 year mark in corporate marketing, and realized this boat needs a full time builder to get her launched in 2014. So, welcome to the new blog followers who are kinda pissed at me for leaving the San Fran office but are happy to have reserved themselves crew positions aboard 005 :). Let’s just say things are really going to heat up in the boat shop now and we’ll all start seeing more interesting progress reports.

Found a source of military surplus diesel-fired hydronic furnaces. With a wad of cash tonight I’ll inspect and hopefully purchase a ‘new old stock’ Espar unit that was intended for a US troop transport in Arctic service. Supposedly someone made up a dozen or so too many kits… Stay tuned

Follow the leader

All four big crossbeams are back down on the ground, clogging up the workshop with a big push to get them faired and finished (then protective wrapped and stored away in back). The last building step is to form the net lashing rails. Earlier we saw some photos of the PVC pipe being affixed to the starboard hulls/beams. Now the fiberglass is going on – these layers will sit under the final wrap layer that ties the fairing to the beam. See the grey pipe under two layers of glass…

20131222-224543.jpg

I got to visit Andy Miller’s F22 for a progress report. He’s nearly done painting; a fancy two tone job with hot yellow below the gunwale and white on deck. Here is the finished product of the net lashing rails. What’s not seen is a 1/4″ rod slid inside the tube. The slots give access points where you run a small line around the exposed rod and back to the net lacing.

20131222-225000.jpg

Can’t quite see his yellow hull as it was masked off during my visit, but the yellow rudder, tiller, etc. look great.

20131222-225149.jpg

Having a floor full of huge beams and yet another suggestion of using a bandsaw for finish work, it became time for a weekend of evening housekeeping. We moved a big pile of various parts into better storage corners, and finally tackled the problem of no dedicated vacuum bagging space. Repurposing scraps (beam mold box sides, etc) yielded a really nice dedicated bagging table, separate from my big table at the shop front.

20131222-225731.jpg

And around the other side of the boat bow we found a little corner for what’s soon to be a dusty, productive mess of shavings as the new little bandsaw and table sander get set up by the drill press, router and chopsaw. The big Bosch table saw is on wheels and has proven a fantastic purchase – that stays up front to handle large sheets and rips.

20131222-230142.jpg

I expect to get a lot of work done thru the holidays as business travel stops. And A LOT done in early 2014 – more on that development to be reported soon :)

Happy Christmas, everybody. If we can’t be out sailing in warm breezes, at least lets have some fun with families and maybe some afternoons getting the boat(s) ready for spring!

Foreign treasure!

Not all of the boat build takes place in the shop. This Sunday’s project involved an overnight flight to Chicago and early morning to Toronto, plus 40 miles of rental car in the snow to track down the 50′ carbon fiber mast acquired (but not delivered) 15 months ago.

20131211-202313.jpg

Down a long driveway outside of Caledon, Ontario is a boat wright’s workshop that is temporarily storing our mast. This was the first time seeing it, and it’s way better than the pictures! U-Spar’s craftsmanship looks fantastic.

20131211-202959.jpg

It’s a full pre-preg carbon build, with proper resin slow-heat-rise baking and well executed reinforcements. I like that they did not do material tapering on the ends to try and shave weight. It’s a uniform layup, stronger than the F39 minimum design specs, and totals about 160lbs including the double diamond stays.

Perhaps the best part for me is how complete it is, down to the windex and antenna fittings, rotation control arm, spreaders, Tides Marine track, etc.

20131211-203916.jpg

The mast crane is a separate carbon composite built to slide in to the mast. It’s set up for two main halyards, including one doubler, and two mast-head spinnakers. Mike L will happily note one of those is perfect for the big SoCal reacher, and I’ve added a set of upper cap shrouds to compensate for that extra load. We have one regular jib halyard, and a storm jib halyard exit is being added at the main’s third reef. I decided to skip a cutter stay and will sew a wire luff in to the storm sail – it’ll be it’s own stay between the deck and the halyard.

Here are a few more shots of details. We didn’t want to unwrap the plastic any further.

20131211-204825.jpg

20131211-204852.jpg

20131211-204908.jpg

The spreaders are fixed onto the mast. It makes transport more difficult but once stepped, that’s another simplicity element (no connectors to catch, erode, etc) I think we’ll appreciate.

20131211-205356.jpg

Because it’s a rotating mast, the bottom is open and the halyards will simply exit and be routed to the turning blocks in the stainless steel base. I took the base, the rotator control arm, and the shroud-to-mast shackles home as luggage. The TSA wasn’t too happy with me.

20131211-210221.jpg

The eyeglasses are there for scale of just how big the primary shackle is, taking the combined pull from forestay and windward cap shroud under load.

We’ll see more photos when the mast comes west. For now, send good thoughts for the fine furniture trucker who is supposed to carry our mast inside his 52′ trailer atop a load headed this direction. We’re not out of the woods yet…

No Monkey Business

We got to thinking about keeping the boat secure at anchor and in port. The main companionway door-boards should be both light and strong. I’m thinking I’ll make them from foam core with some carbon fiber, and add plate aluminum as a security measure. And for warm nights / extra ventilation we’ll fabricate open pattern boards, perhaps with vertical rods that spin so they are difficult to saw. Today we roughed in the door tracks; these are much beefier than what I see commonly. Half inch metal, and the screw heads will disappear under the final finish work.

20131130-235547.jpg

In that photo you can also see the companionway grab-handle detail. I built the frame today for the aft cabin hatch, and as a side project made up some decorative wood inserts to make a ‘similar but different’ look for the aft entryway. All of this was after deciding to build a traditional sliding hatch and boards, rather than buying a big hinged glass hatch. Those run over $500, and would open up right in the path of the tiller arm. The slider should prove safer and more versatile for ventilation and privacy options. And hopefully everyone will enjoy the looks of the woodworking :)

20131201-000324.jpg

The Leneman Steps

Yes, that sounds like a special passageway in old Europe. But back here in California our boat’s boarding ladder gives it’s credit to good friend Mike Leneman and his lovely Minette catamaran. After a brisk Wednesday night sail out of Marina Del Rey, Mike simply stated, “yea Greg, you’ll be making one of these”.

20131128-000747.jpg

These steps will swing up and tie off to the beam brace when not in use, and the whole unit will quickly unpin for storage in the float when at sea. The bottom step is one inch above the waterline when the steps are set at level. They can raise or lower to suit conditions.

Sailing aboard Minette last year was a real inspiration for this project. Mike built her with the same cold molding strip plank and glass method, making a strong, light boat out of trailer able large hulls, beams and bridge. Her simple systems and big powerful rotating rig scared Jim and I at first, but the speed and sea keeping abilities really grow on you quickly. It’ll be a thrill to join Mike down south next year.

20131128-001155.jpg

Here’s a clearer shot of the rear diagonal brace behind the aft beam. Very sturdy and designed to keep the whole boat square (prevent wracking that can occur in weaker trimaran designs). Thanks again Dad for cutting all the thick metal tangs that I cemented in to this pole. The epoxy goes in 4 inches, stopped by foam plugs at each end. There will be netting placed in this triangle later on.

No shop work yesterday as the decks (and minds) were cleared for Jeanne and Greg to enjoy our 25th wedding anniversary day. Sunset on the Pacific was perfect.

20131128-002504.jpg

Port beam fairings

While the actual crossbeams are complex, 100+ pound structures, they make up only 10 inches (looking down on them) across what will be finished 2 ft wide beams. The rest of the width comes a 5 pound ‘fairing’ made of foam core with one layer of glass inside and out. I showed them being built in their frames early this year. Here’s one of them with the access holes cut – that’s how we reach inside to glass them to the solid structure. Now that they’re installed, those holes will get filled back in this weekend.

20131114-232703.jpg

The silver and white panel in the background is the final panel of the refrigerator cabinet, the side where the cold plate mounts.

20131114-232846.jpg

After the fairings go on, the completed beams get flanges formed. This is where bolts will go to hold the beam to the float. In the photo you might be able to see the plastic non-stick that’s on the float deck. The Fiberglas flanges are formed in place, adhered to the beam but will pop right off the deck when we lower the float back to the floor.

20131114-233343.jpg

Today’s steps were the final primary construction of the four beams. That build spanned almost two years, so it’s a very satisfying milestone. There are plenty of hours left to skin and fair them, and add the net lashing points, but it’s a huge relief knowing the ‘danger parts’ work is done and the whole boat fits together as intended :)